HMS Superb - the largest model I have built thus far and with the largest set of masts and spars. For this model the spars were fashioned from 2mm dowel rod rather than cocktail sticks and yes, I need to get some more of this!
Now that all of the pieces are in place we can look to the final stage of the assembly - the glueing.
If the second part of the construction needed a tidy approach then the final stage needs something else - patience! This is where a good quality adhesive is essential - my preferred choice is super glue - and the aforementioned patience.
This stage is actually pretty straightforward but you cannot rush it - I learned this the hard way - and I always make sure that I have one of my 'top deck' hull templates to hand to use as a jig whilst the glue is hardening off.
The first step is to, well, step the masts and for this you need to mark off what will be the overlaps.
The starting point - the overlaps (marked in pencil below) are 1/2”
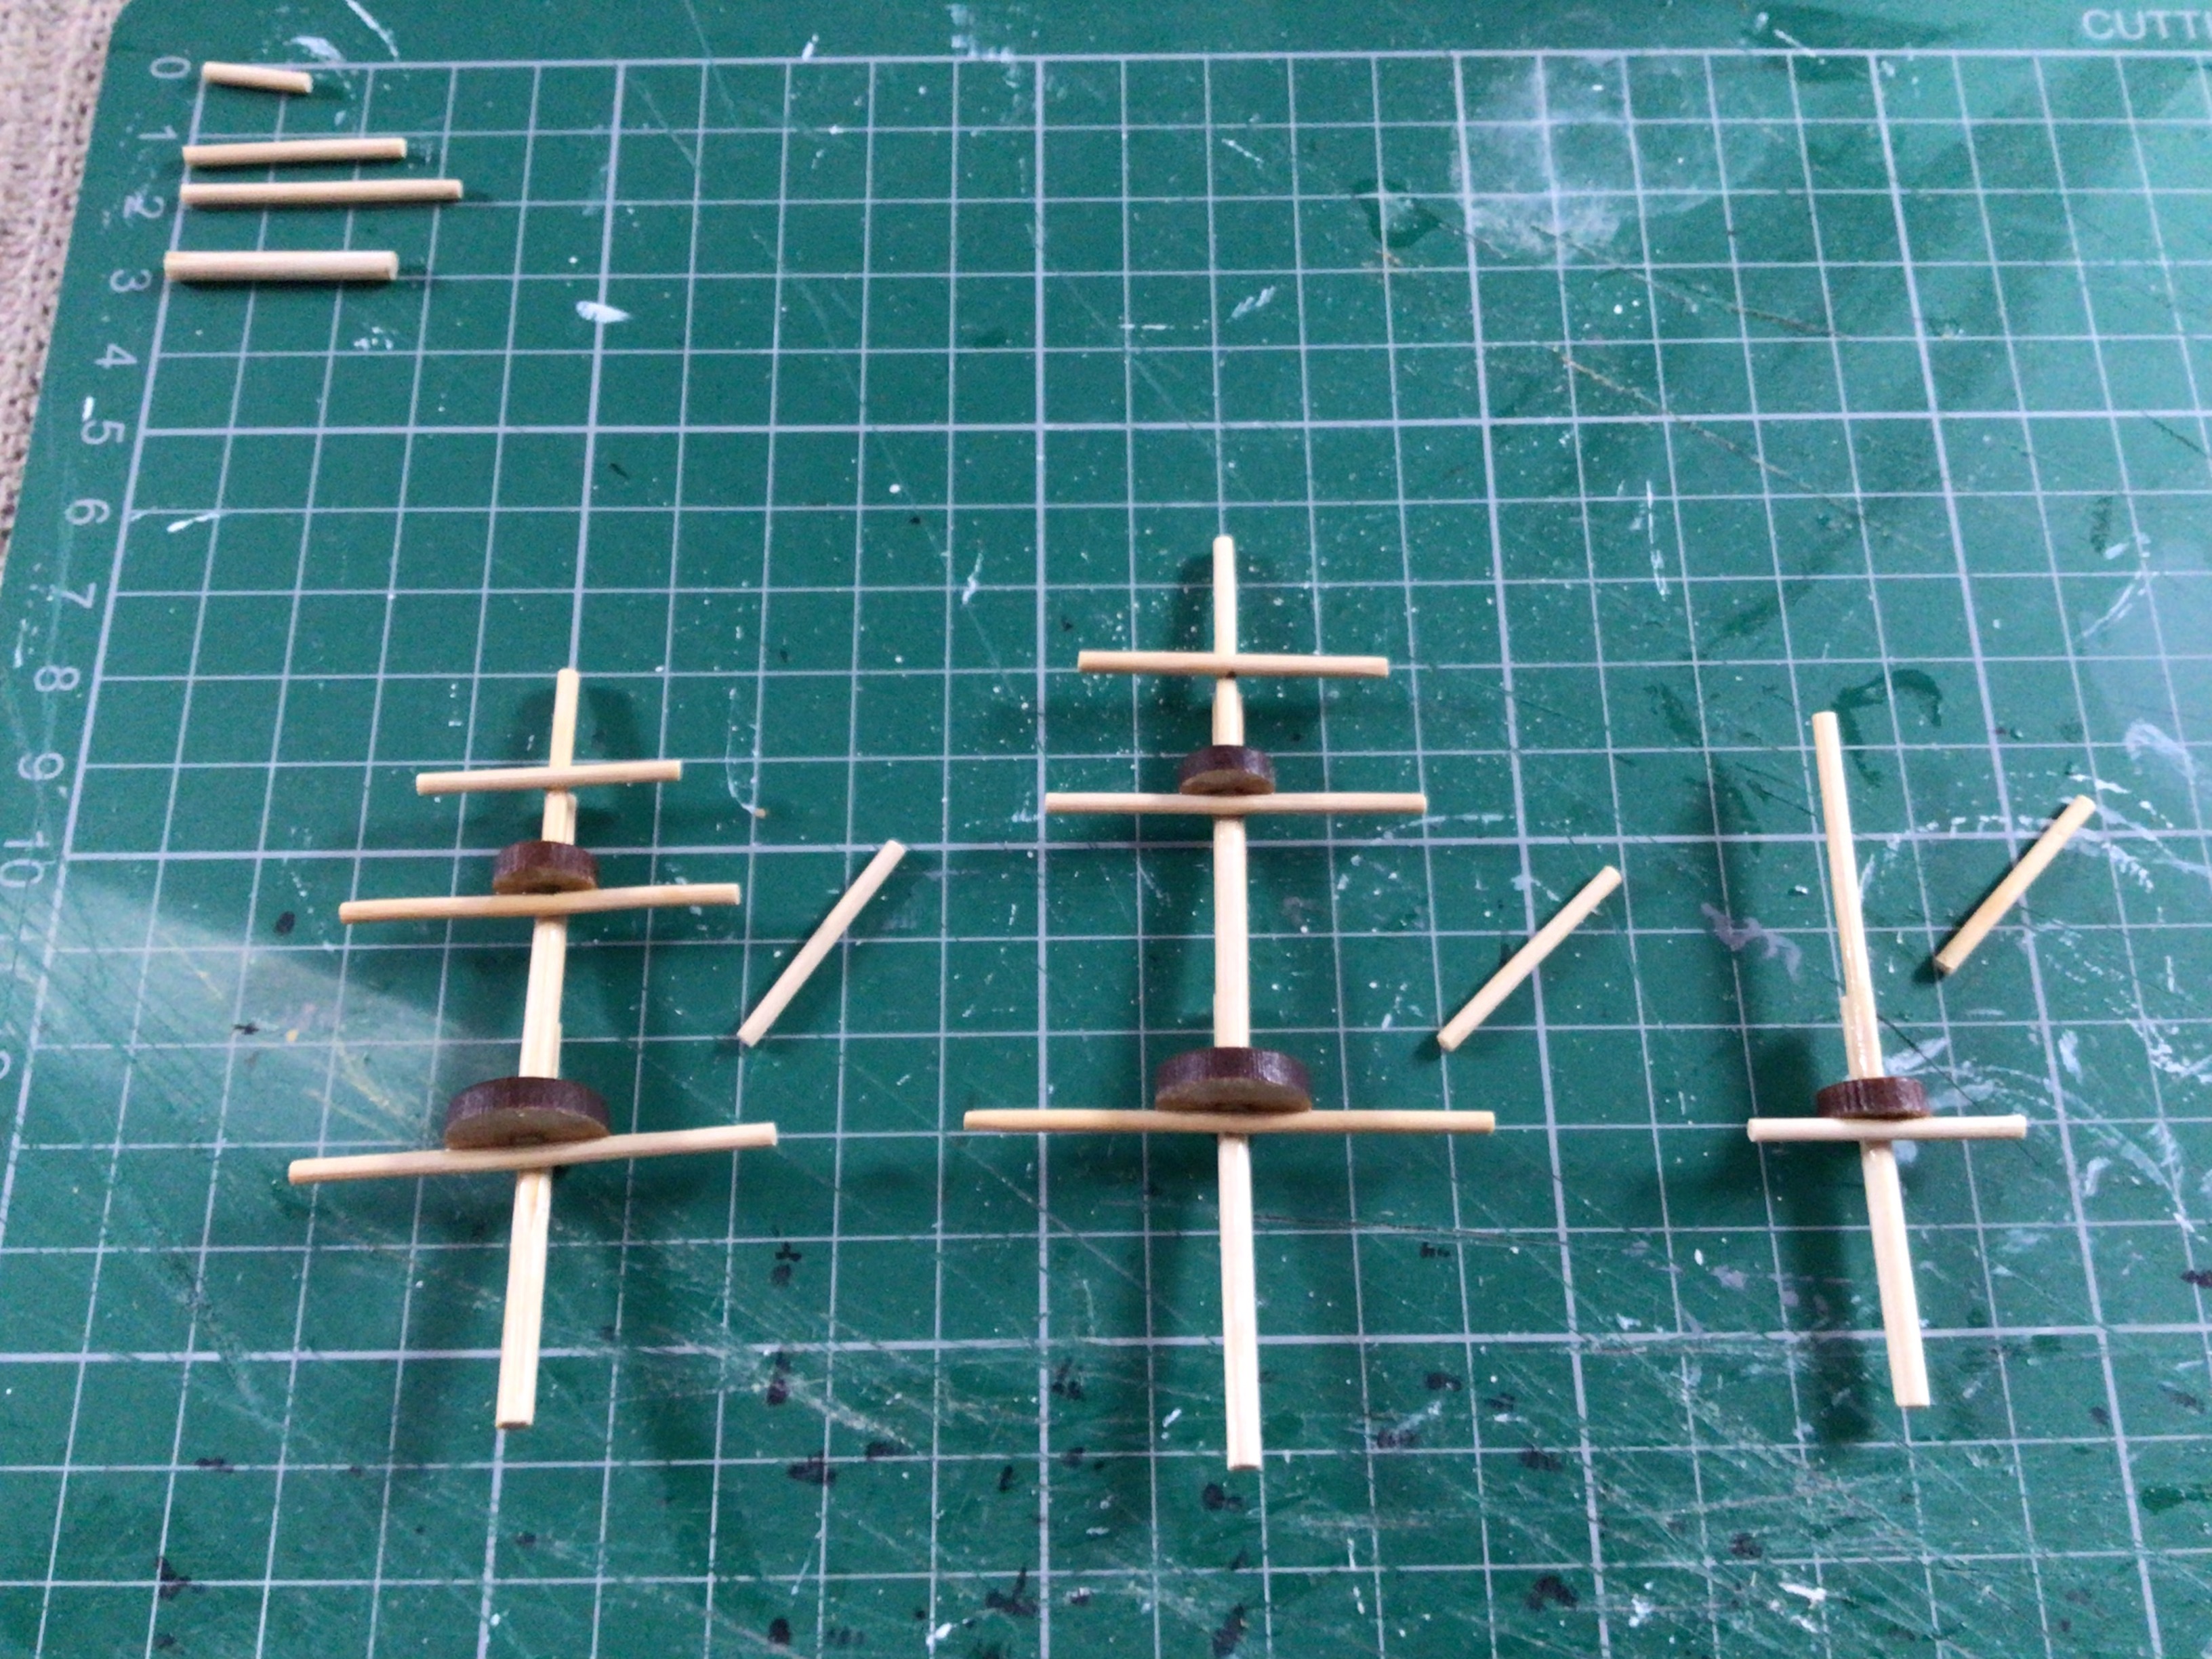
Initial assembly. The fore and main mast are in three steps consisting of two lengths of bamboo skewer and one of cocktail stick whilst the mizzen has only two - one of each type, skewer and cocktail stick.
Adding the top step. You can see where the fighting tops will be placed on the fore and main mast whilst the mizzen already has it in place
It is a good idea to lightly sand the surfaces that will be glued for two reasons. Firstly, it provides a flat surface for the glue to adhere to for a stronger join and secondly, it helps to keep the mast steps aligned.
The addition of the fighting tops to both the fore and the main mast.
Care should be taken at this stage to ensure that not only are the masts aligned but that the fighting tops are square with them and that the underside is fully flush. This is important for when the spars are added.
The underside of the fighting tops - note that they are more or less in line and are flush. A good tip is to lightly sand the underside to ensure that it is square and that the mast is not set too low and is poking out!
You can be fairly generous with the glue here as it will help to seal any gaps as well as providing a stronger join.
The spars are, for the most part, glued directly to the underside of the fighting top and are hard against the mast. This provides a really strong join as plenty of the spar is in contact with some adhesive!
When fixing spars that are not glued to a fighting top I use a rat tailed file to file a curved ‘dip’ in the mast so that the round cocktail stick will ‘sit’ in it. If you look at the foremast above, just above where the number 9 is, you can see the filed recess. Not only does it help the spar to sit nicely it also provides a better surface for glue.
It is also a good idea to mark the centre point of a spar with a pencil to help line it up when fixing into place.
A view from the underside so you can see that everything is more or less lined up as it should be.
All three masts completed with the exception of the gaff spars.
The small sized fighting tops are only able to take one thickness of mast in the slot so any mast above it is glued directly to the ‘stump’ of the mast and directly on the top of the fighting top.
Looking at the mizzenmast from above showing how the top mast is fixed directly to the top of the fighting top.
Gaff spars ready to be fixed in place. All that needs to be done to these is that one end should be filed to roughly forty five degrees
The gaff spars are fixed against the mast in the slot provided in the fighting top. They should be glued in such a way so that the filed surface and either side of it are glued within the fighting top. In effect they are glued from three sides.
Viewed from the underside - you can see how the gaff spar is mounted using three surfaces - the mast and the two inner sides of the fighting top. You get a better idea of this by zooming in on the picture.
The assembled masts placed temporarily in a hull template for the glue to properly harden off
The first part of the bowsprit. Once again I use 1/2” for the overlap and again, a light sanding to square off the surfaces that will be in contact provides a much stronger join
This is what I refer to as the MP40 stage!
The final step
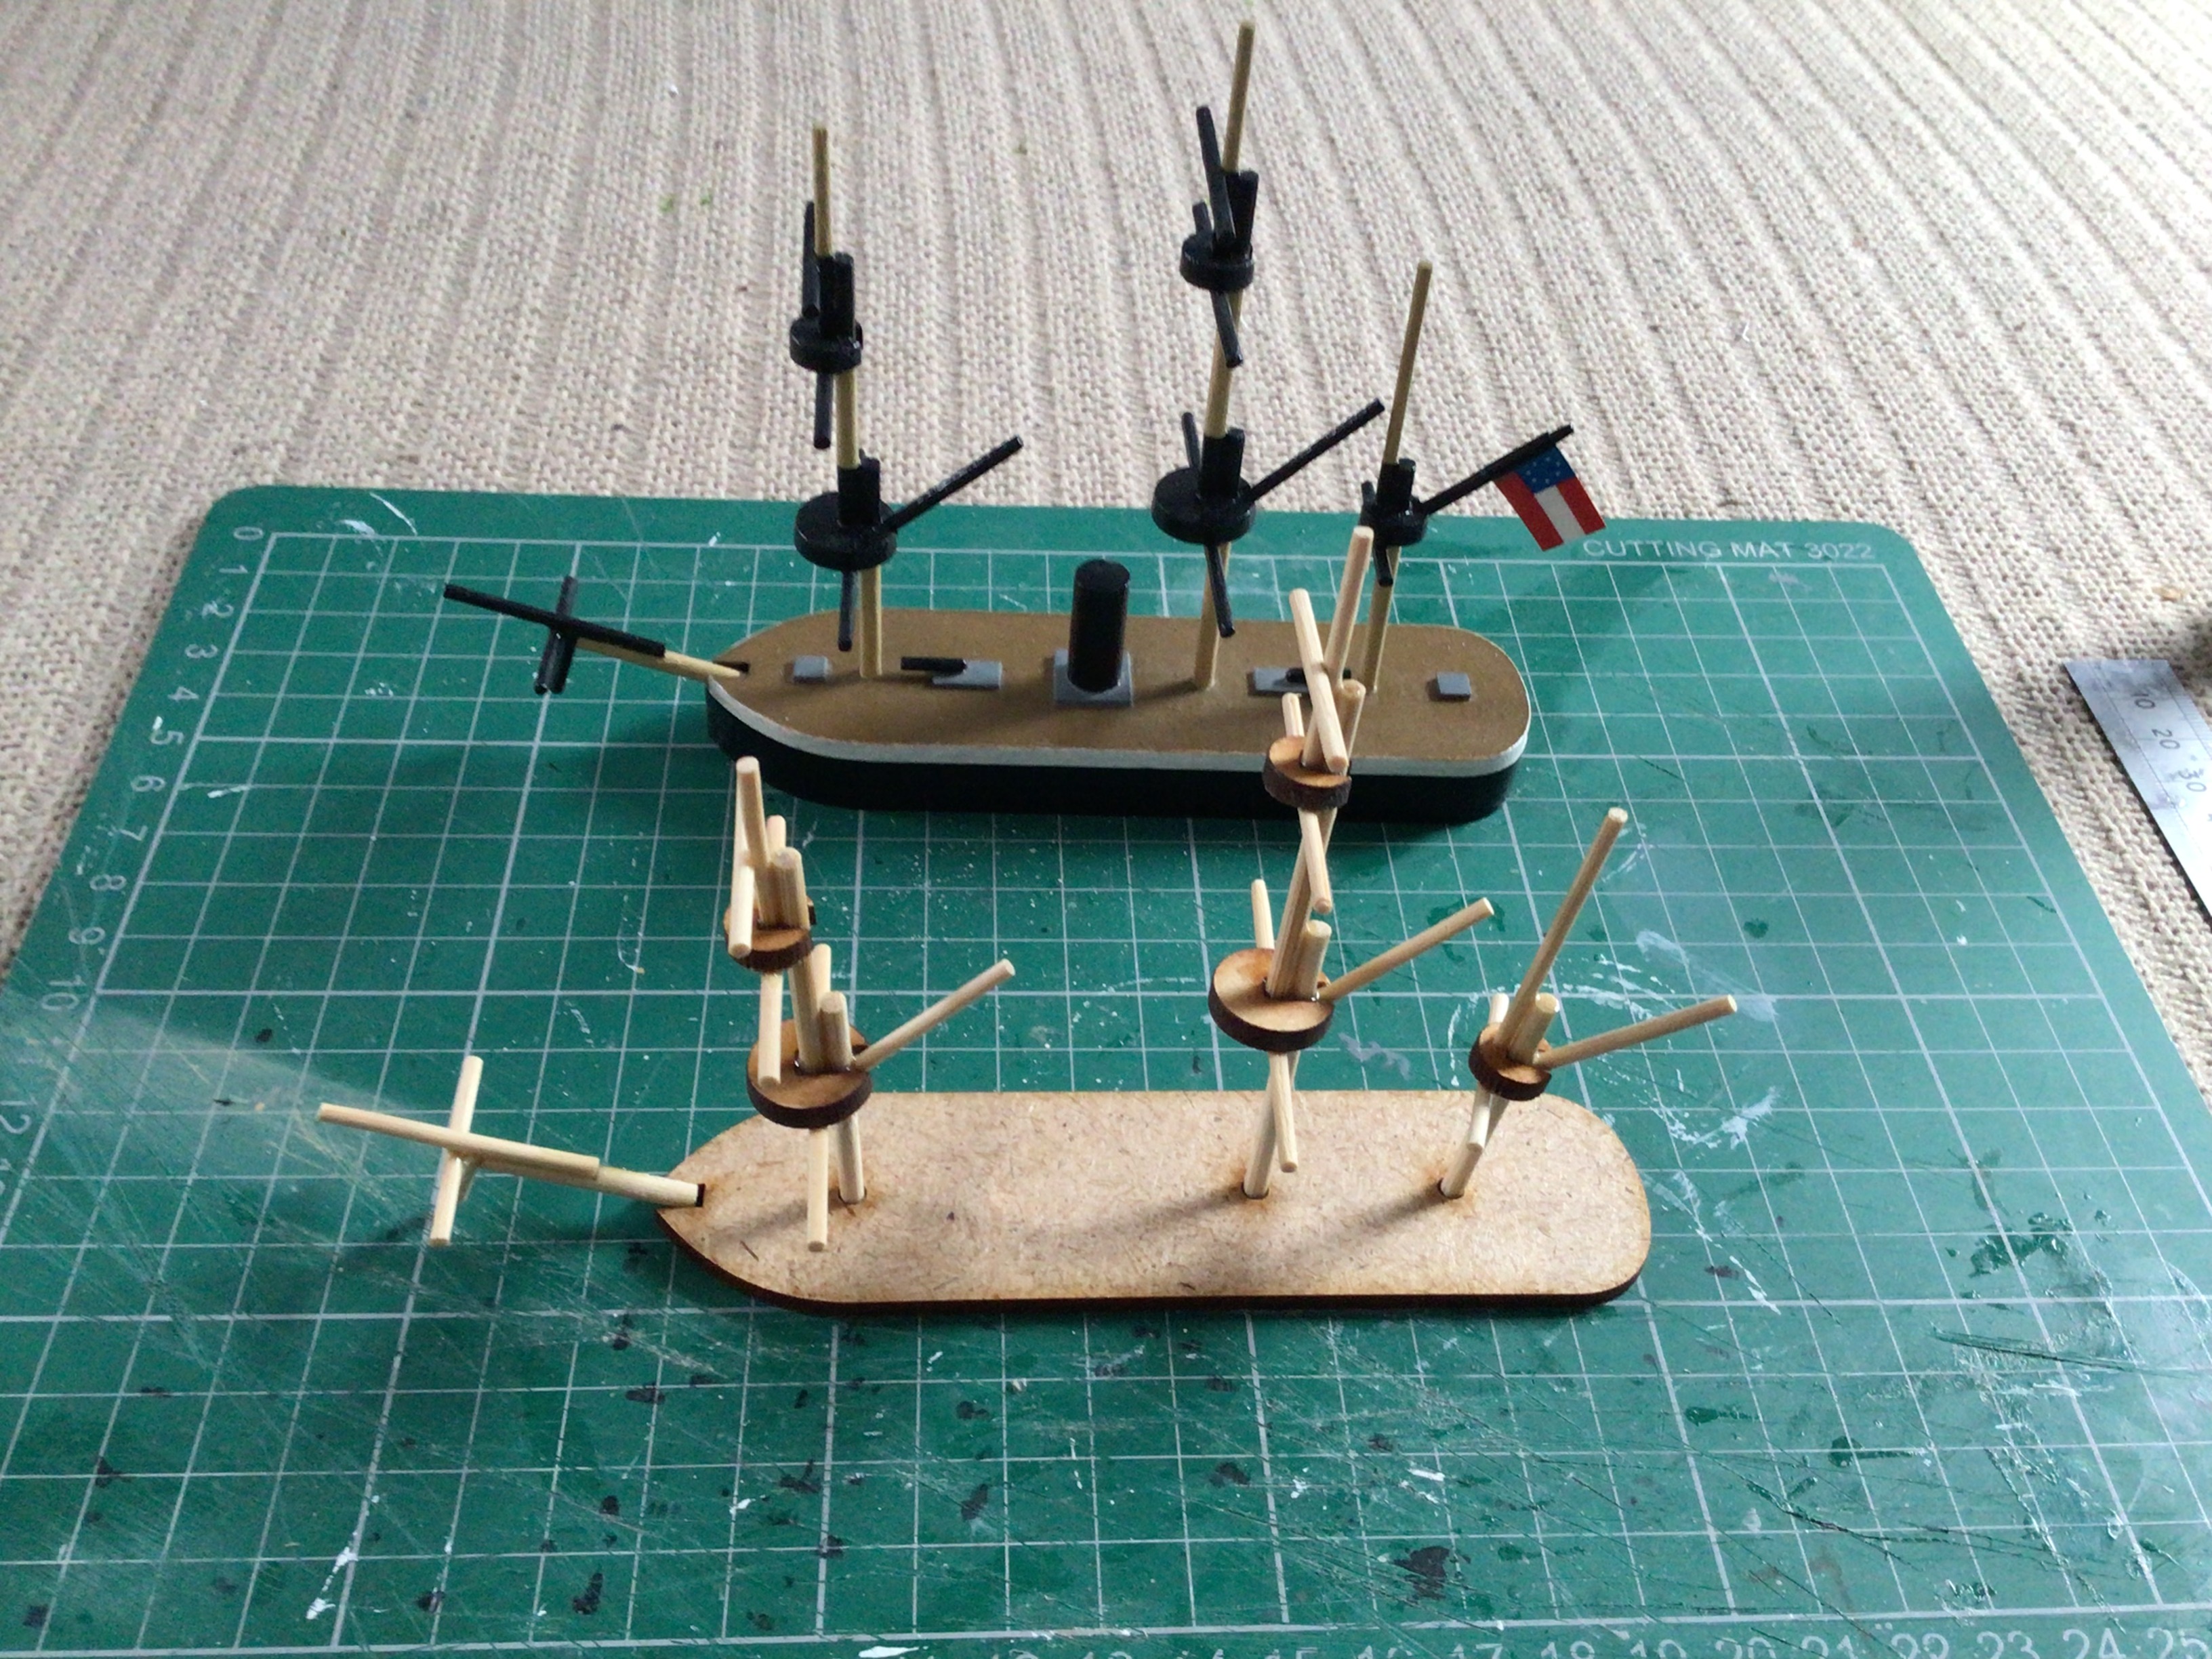
There you have it, a full set of masts for use with, in this case, another Confederate commerce raider. All I need to do now is to finish the rest of the build and get her painted.
I would love to say that this particular build went smoothly but I did experience a few issues - mainly because it has been a while since I last made any masts and I was a little out of practice - although nothing catastrophic! In truth it has been a good workout for my modelling ‘eye’ so to speak. As every ship in the new ironclad build have masts it was as well I ironed out the wrinkles beforehand!
The paint scheme for the masts will follow that of the completed model above and luckily history helps us out here - black for spars and ironwork was common although how extensive and for how long I am not sure about. Anyway, it looks good and the black covers a multitude of excessive glue-induced traumas!
I hope these three posts have been useful - it was not a subject that could be rushed - and once again I would like to thank John Armatys for giving me the nudge to do this!


10 comments:
Like it.
Cheers Rob! It was good to be doing it again if only as a one off at present - good practice for the veritable forest of masts to come!
All the best,
DC
Superb tutorial and a very nice finished model, looks cracking.
Looks like the masts are the hardest part of these models - but you’ve made a lovely job of them.
Thanks, David - a very useful tutorial. At some point I will revisit my own ACW vessels and see what can be made of them.
Cheers,
Ion
Thank you for writing it up! All three parts are safely saved on my PC (and I've got to resist the idea of making some of Henry VIII's warships.....).
Best wishes,
John.
Thanks Donnie! The model that is completed was built around a year ago but I am using her as a guide for the new one - the masts for which formed the basis for the tutorial.
I will do something similar for the hull as well methinks.
All the best,
DC
Cheers JBM! By comparison the hulls are a doddle - as the next tutorial will show! Masts are very satisfying to build for sure as they certainly serve to focus the mind and the attention span!
All the best,
DC
Go on Archduke - you know you want to! Glad you enjoyed it.
All the best,
DC
Hi John,
I rather enjoyed penning the tutorial so your encouragement was definitely worthwhile! The same system could easily be used for anything that had sails and stepped masts and I certainly plan to tackle some age of sail stuff in due course.
Henry VIII? Go for it!
All the best and thanks once again,
DC
Post a Comment