Tuesday, 5 April 2022

3 x 3 Ironclads - The Story So Far


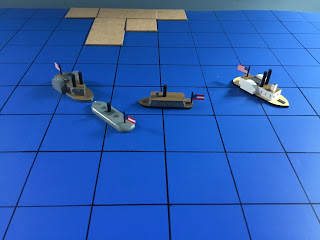
The first game was based upon the Battle of Hampton Roads featuring the U.S.S. Monitor, the grounded U.S.S. Minnesota and the C.S.S. Virginia.

I have now played two throughly enjoyable actions used the 3 x 3 Ironclad variant of my more formal rule set designed for the American Civil War. It has been an interesting experiment for sure and has given me the wherewithal to set up and game fast play naval actions - either as a one off action or, and far more likely, as part of a campaign. It is now a formal part of my naval wargames catalogue so to speak.


The second outing featured the U.S.S. Kearsage and the C.S.S. Alabama

The rules that I adapted to fit the format of 3 x 3 were the set devised from and incorporating elements of Bob Cordery’s Gridded Naval Wargames and David Manley’s Dahlgren and Colombiad. It is testimony to the excellence of both sets that the systems I have used have been able to survive my cumbersome attempts to shoehorn them into something entirely different! 

There are many things that came to light during my first two games - mainly from a perception perspective rather than from the rules although there were a few points that needed fine tuning (and still do) - but my overall impression is hugely positive. As mentioned previously I can see these rules (or similar) working well for a variety of periods and indeed, I have already alluded to a couple - Madasahatta being one, something age of sail related and also my perennial fascination with Lake Tanganyika during the Great War.

The Tweaks and the Reason why

The first change I incorporated was to move from using two squares for a ship model to one. This has proven to be rather more effective and so the two square model I was using (based on the Ship ‘O The Line age of sail rules devised by the late S. Craig Taylor way back in the 1970s that subsequently morphed into the Avalon Hill board game Wooden Ships and Iron Men) has changed in the parent set to using a single square. It will simplify firing arcs although the two square model was more accurate in this respect. Accuracy has been sacrificed for playability and ease of use.

Using a single square has also had implications for movement. Originally under the two square per ship system I was using a notional scale of 1 square equalled 2 knots. Clearly using a single square meant that a  larger scale was needed. Again, this was a compromise dictated by the needs of playability so I settled on a notional scale of 1 square equalled roughly 6 knots. In real terms this means vessels during this period can move from between 1 to 4 squares depending on type. The knock on effect of this is that using a gradual reduction of speed due to damage sustained - as in the original rules - was no longer appropriate as a reduction of 1 to the speed of a ship would be around 6 knots rather than 2 - an important consideration when the top speed of some ships was only 3 to 5 knots!

Similarly, turning ships has been simplified from the original rules. I have adopted a very simple system whereby turns are in 45 degree increments and turning one of these cost a movement point. This means that slow ironclads with but a single movement point can either turn or move. A further restriction is that if a ship turns then it must move before turning again within the same game turn. I may play around with this slightly but it seems to work so far although making some allowance for the ships that are either very manoeuvrable or that sail like a shed would be an idea.

To make the fullest possible use of the playing area I am going to allow each grid area to have more than a single ship therein. I will give each grid area a limit and each ship will have a value based on its size. I am thinking 6 points per grid area with small sized ships rated at 2 points, medium 3 points and large at 4. This will allow between 2 or three ships to occupy a given grid area. A word of caution around this though as I will need to think about the implications in respect of ramming.

By comparison with all the above the whole firing system is a model of relative calm and clarity! The only changes that I have introduced is that I have reverted to the ‘roll to hit then roll to damage’ system as combining the two felt a little overpowering. The system now is based the old standby of close, medium and long ranges (1, 2 and 3 squares respectively with 1 being when occupying the same square as the target) requiring a 4, 5 or 6 at close range, 5 or 6 at medium range and a 6 at long range. I am using Penetration over armour factors to act as a modifier to the damage roll where 4 or 5 are two hits and 6 is 2. For modified scores over 6 then a further d6 is rolled and of the score is equal to or less than the excess then a further damage point is inflicted. A natural damage roll of 6 gains a further roll.

I have yet to adjust the critical hit table as the existing one is not suitable for the simpler system I am now using. Opting to have a random critical hit when the ship reaches its critical point is a lot easier to manage and the rationale is that if a ship had suffered that much damage then there would be good chance that something vital was broken.

The rest of the rules fall very much into the optional extras category to a greater or lesser extent. The rules I have for forts and obstacles etc can be pretty much be used as written so I will not have to worry about them. To summarise the above then, I need to formalise and tidy up the following areas:

  • Critical hit table
  • Turning depending on ship size
  • ‘Stacking Limits’ - the number and type of ships allowed in a square
  • Ram attacks
I am also looking at the possibility of a rolling playing area to a limited extent and mention of the whole playing area thing has reminded me that I need to ‘pimp’ the piece of plywood I have been using into something rather more aesthetically pleasing!

There will be a short lull whilst I address the above before I try out a further game incorporating the changes so the next relevant post will probably not be until the weekend. 

In closing I have to say that despite the challenges the idea of a fast play 3 x 3 naval game is a sound one and is something I hope to use extensively going forwards. It has also served to remind me - not that I needed reminding - that one does not need to have dozens of models, a huge playing area and unlimited time to enjoy a good wargame!


Sunday, 3 April 2022

“A Sweet Roam, Alabama”, 19th June 1864….Game Number 68


C.S.S. Alabama engages the U.S.S. Kearsage

As a quick follow up to my previous action I rather fancied something set on the high seas and so that perennial standby of the naval wargamer - hunt the raider - came up with the famous battle between the U.S.S. Kearsage and the C.S.S. Alabama fought off the coast of Cherbourg in June, 1864.

In many ways this is an ideal engagement to fight on a 3 x 3 basis as the number of ships is minimal, the actual battle itself was very much how many naval wargames turn out - the endless circling of one another in order to gain an advantage - and the two protagonists were fairly evenly matched (on paper at least). I have used the stats for the ships as written (and these are in turn based on elements of David Manley’s Dahlgren and Colombiad rules) but have allowed the U.S.S. Kearsage an armour value of 1 but only against the C.S.S. Alabama’s broadside 32 pounders (1/1 guns). This was because Captain Winslow of the U.S.S. Kearsage took the precaution of wrapping lengths of chain around the ship’s vital areas as a form of protection. 

This is a straight up duel, pure and simple. H.M.S. Shannon versus the U.S.S. Chesapeake from the age of sail also springs to mind as a likely subject and indeed, there are many other two ship fights that the 3 x 3 system would suit quite well. 

Captain Winslow of the U.S.S. Kearsage had been pursuing the hitherto elusive Confederate raider under the command of Captain Raphael Semmes for some two years or so but now finally was his chance to end her career once and for all. As he observed the rebel ship coming into range he muttered under his breath “You had a sweet roam Alabama, but Semmes I’m coming back for you!”


The protagonists - C.S.S. Alabama and the U.S.S. Kearsage. Both will be having a minor refit as there a few further details to be added. Neither pretend to be super detailed scale models - they have been built in my usual ‘based upon and purely representational’ style!

C.S.S. Alabama

Size: Medium, Speed: 2, Hit Points: 9, Critical Point: 3, Armour: 0, Guns: P,S 1/1, PS 2/3

U.S.S. Kearsage

Size: Medium, Speed: 2, Hit Points: 9, Critical Point: 3, Armour: 0 (1 versus Alabama 1/1 guns to represent chain wrapped vitals), Guns: FW 2/3, P,S 3/3

Initial Dispositions


The C.S.S. Alabama in the south western corner approaches the U.S.S. Kearsage. The somewhat patchy appearance of the board is due to it having been sealed prior to painting. I would have liked to have had this completed before the action but time is not my friend at present so fighting a battle took priority!

Turn 1. No firing to begin with (ships may not fire nor be fired upon when in the manoeuvre zones) so straight to initiative. Union 3, Confederate 1. The Union opt to allow the Confederate to move first.


Turn 1. Both captains appear to be exercising caution as they both execute turns to bring their full broadsides to bear.

Captain Semmes of the C.S.S. Alabama ordered the helm over to port as he closely watched the closing Yankee warship executing the same manoeuvre. “The Yankee captain knows his stuff” he said to no one in particular. This would be a close fight with quarter neither asked for nor given. His options were limited - he needed to slow the Yankee to enable his ship to get away but his opponent so far showed no signs of closing the range and appeared content to mirror his every move. “What’s his game?’ Captain Semmes mused.

Captain Winslow watched his adversary warily and for the moment was satisfied to keep the rebel raider under observation. The time for fighting was near and for two years Captain Winslow had prepared for this moment. There was no room for error, no margin to give comfort - it was do or die - but he, his men and his ship were ready.

Turn 2. Still no firing although the U.S.S. Kearsage would soon be in a position to do so with her forward artillery. Initiative - Union 1, Confederate 5. The Confederate opted to allow the Union to move first so as to ascertain their intended course of action.


Both ships reduced speed in order to aid their respective gun crews accuracy. 

Captain Semmes braced himself for the broadside he knew was coming as his ship drew parallel with the Yankee sloop albeit heading in the opposite direction. In his mind he had decided that a good broadside into the enemy ship - hopefully damaging her engines - would suffice and then the C.S.S. Alabama would head off at best speed. That was the plan, crude as it was.

Captain Winslow was not about to let his enemy get away and so resolved to turn into her as hard as he could once his artillery had opened fire. Ideally he wanted to slow the C.S.S. Alabama down so that he finish her at his leisure. Above all though, she must not be allowed to escape.

Turn 3. Both ships opened fire. The range was 2 so 5 and 6s are required to score hits. Firing is simultaneous. The C.S.S. Alabama rolled 3 d6 (for her 1/1 battery and the 2/3 - I used a different coloured d6 for the 1/1) and rolled a 1 and 2 x 4. 5s or 6s were needed for hits so no effect. The U.S.S. Kearsage fired back with her 3d6 and scored 2 x 5 and a 4 so there are two potential hits. Each d6 gains a plus 3 for penetration (penetration of 3 versus armour of 0) and scores 2 x 2. Both of these are adjusted to 5 meaning two points of damage are scored against the C.S.S. Alabama - first blood to the Union ship!

Initiative - Union 3, Confederate 2. The Union moves first.


Both ships attempt to turn to face each other after the initial salvoes. Although drawing first blood the U.S.S. Kearsage now has the Confederate ship threatening to cross his stern, thereby being in an ideal position to inflict a punishing stern rake.


The acrid smell and voluminous clouds of powder wafted across the decks of both ships as each continued to turn as hard as they were able whilst hurriedly reloading their guns. The C.S.S. Alabama had been hit but thankfully nothing vital was damaged and casualties were very slight - they had been lucky. Captain Semmes was torn as to his course of action. He reasoned that he could break off the action but he was mindful of the fact that his ship would would be rigorously pursued. He would have to fight hard to beat off the Yankee ship and hope that his own damage was slight so that a clean getaway would ensue. He made ready to reengage the enemy ship.

Captain Winslow was satisfied thus far with the outcome of the initial round of firing. He had damaged the rebel ship and as long as he could maintain the range and match her course and speed he felt sure of the inevitable outcome. He ordered the helm hard over.

Turn 3. Both ships were able to fire with their broadsides although due to the arc - both ships were heading away from each other - their gunnery factor is halved (rounded down meaning the U.S.S. Kearsage loses out as her factor is 3) meaning that each ship rolls a single d6 to hit. The Union roll a 1 and the Confederate rolls a 3 meaning both ships fail to hit.

Initiative - Union 6, Confederate 2 - the Union allows the Confederate ship to move first.


Both ships continue their turns although the C.S.S. Alabama has intentionally slowed in order to better maintain her station.


Captain Winslow ordered an increase of speed to ensure that the rebel ship would have a harder time trying to cross his stern. “Damned if that rebel ship is going to rake me!” He muttered under his breath. His crew worked feverishly to be ready to fire the instant the rebel ship came to bear.

Meanwhile, aboard the C.S.S. Alabama, Captain Semmes opted instead to decrease speed in order to remain at the ‘hub of the wheel’ whilst the Union ship hurtled around the outside. It would help with the accuracy of his guns whilst at the same time hindering (or so he thought) those of his enemy.

Both ships made ready to reengage.

Turn 4. Both ships fire, again with but a single d6. Again both side miss - the Union rolled a 1 whilst the Confederates rolled a 2.

Initiative - Union 1, Confederate 5 - the Confederate allows the Union to move first.


The turning race continues with the U.S.S. Kearsage turning harder than her opponent. Neither side appears keen to engage with full broadsides and so this jockeying for position will continue until either side makes a mistake. Who will ‘blink first’?

Captain Semmes, his eyes never leaving the rapidly circling enemy ship, further considered his options. He desperately needed to damage his opponent but thus far this was proving to be a difficult proposition. He needed to somehow outwit the enemy - perhaps drawing him in closer to deliver a decisive blow although this option was fraught with peril. Trusting to fortune he made his decision - he would try to engage the enemy more closely.

This was exactly the thought going through the mind of Captain Winslow. He had damaged the enemy ship whilst his own was still fully functional and so counting on this advantage decided to force the pace and so turned harder into his opponent. If his manoeuvre worked his ship would be well place to deliver a telling blow.

Turn 5. Both ships continued to fire with a single d6. The Confederates rolled a miserable 1 whilst a glorious 6 came up for the Union. The effect roll of 1 added a 3 meaning that the adjusted score was 4 - 1 point of damage!

Initiative - Union 4 Confederate 1 - the Union opted to move first.


Trusting to luck and conscious of being temporarily outgunned the U.S.S. Kearsage accelerates and turns into the enemy ship. Meanwhile the C.S.S. Alabama makes ready to engage the Union ship with a full broadside.

Captain Winslow urged his ship forward as hard as he could as he knew that he had given the enemy a temporary advantage. If he could come through the enemy fire relatively unscathed he knew he would be in a good position to relentlessly harry his opponent from a position of advantage. Both he and his crew knew what was coming and so mentally braced themselves.

Captain Semmes looked at the closing enemy ship with grim satisfaction. Now was the chance he had been waiting for - and the enemy had given it him. The C.S.S. Alabama needed to make this count - her safety, their lives and the chance of getting home depended on it.

Turn 6. The Union ship only fires with a single d6 and scores a 6! The second roll is a 4 which is a miss. The penetration roll is a 2 which with 3 added makes a 5 meaning a single point of damage is scored. The Confederate ship rolls a 4, a 5 and a 6. The 5 is from the 1/1 battery which then rolls a 5 for effect meaning a point of damage is scored. The second roll due to the 6 is a 2 which is a miss. The roll for effect is 4 to which is added 3 making 7. This is 2 points of damage. The Union ship has sustained 3 points in total.

Initiative - Union 6, Confederate 2 - the Union allows the Confederate to move first.


The biter bit! Has the C.S.S. Alabama committed a fatal error? She tries to dart across the bows of the Union ship but with too much speed on her overshoots the enemy leaving her in a potentially fatal position under the guns of the Union ship at close range! The U.S.S. Kearsage was to take full and climatic advantage of this heaven sent opportunity….

Captain Semmes watched his guns battering the Union ship and acknowledged the ragged cheers of his men. His plan had worked or had it? He had certainly given the Union ship a bloody nose for little damage in return but his euphoria was short lived. Too late he realised that he had not reduced speed so as to be placed across the enemy bows - in fact the C.S.S. Alabama had overshot the enemy ship and was now at close range with only a single battery able to bear. He ordered full steam ahead and braced himself for the retribution that was surely coming.

Captain Winslow was relieved that he still had a ship despite the best efforts of the enemy to determine otherwise. He knew that his ship would be in for a battering but she had emerged from the forest of shell splashes more or less intact. There was damage aplenty but it was all relatively small beer, the fact of which Captain Winslow was immeasurably grateful for. More importantly though, and for reasons unknown, the enemy ship now presented her aft starboard quarter more or less under the muzzles of his artillery. This had to be it!

Turn 7. The rebel ship fires with a single d6 and rolls a 5 meaning she scores a potential hit. The effect roll is a 6 meaning two points of damage are scored on the Union warship. The U.S.S. Kearsage rolls 5d6 by way of a reply. She rolls a pair of 2s, a 4 and a pair of 5s meaning three hit rolls each with plus 3. She rolls a pair of 2s and a 6. These are adjusted to a pair of 5s and a 9 meaning four points of damage are scored.

The C.S.S. Alabama has gone beyond her critical point (she has sustained 8 damage points out of a total of 9) and so must now roll for her critical damage. In any event she must now break off the action. Her roll is a 4 meaning that she must lose 2 gun factors. The effect of the critical point is that she is not allowed to fire except when alongside an enemy ship as the result of a ram and she must break off the action and head back from whence she came at best speed. There is also a chance that the affected ship would surrender or sink

The chance of a critically damaged ship surrendering is equal to rolling her critical point or less using a d6. For every point under the critical point 1 is deducted from the die roll so in this case a roll of 5 or less (her critical point was three but she was two points beyond this) meant that the C.S.S. Alabama would haul down her flag. The roll was a miserable 2 and so the “Sweet roam of the Alabama” came to an end.

Endgame

The main deck of the C.S.S. Alabama was a jumble of shattered woodwork, tangled cables and rigging, scorched fittings and the shouts and cries of the wounded. Captain Semmes knew his ship was finished - the final ear shattering, heading ringing storm of shot and shell from the Union warship had turned his once proud command into a sinking wreck. His casualties were relatively light but the fight was over and so all he could do would be to abandon ship - better that than an ignominious surrender. The ship was too badly damaged to be a worthwhile prize and in away event, the ever increasing down slope of the deck told him all he needed to know - the C.S.S. Alabama was sinking. He saw the small British vessel heading towards him and so he knew what he had to do. Captain Semmes ordered the ship to be surrendered whilst he abandoned his command to escape.

Captain Winslow was proud of his men and of his ship. For two years the pursuit of the rebel ship had been his whole life and now it was over. The final broadside wreaked havoc on the enemy ship and there could only be one outcome in the face of such a pounding. He could see the rebel ship was sinking so he gave the order to standby to pick up survivors. The only black mark against what had been a splendid day was the now obvious fact that the commander of the enemy ship had escaped to a British vessel - for a moment he was tempted to open fire on her but thought better of it. For now the rebel commander would be remain free.

Final Thoughts

There were a number of changes incorporated in this version of the rules and I am pleased to say that they worked very nicely! I have reverted to having firing dealt with as a two part process. The first is a roll to hit and the second is for any damage. The scores to hit are 4, 5, or at range 1, 5 or 6 at range 2 and a 6 at range 3. Damage is then rolled for based on the number of hits scored to which the usual penetration/armour modifier is applied. The resultant score of 4, 5 or 6 is one hit and 7 or over equals 2 points of damage. I started the scenario using the previous method - essentially a combined ‘to hit/damage’ roll - but this proved to be far too effective. In fact the C.S.S. Alabama was sunk outright on turn 2!

Using the two stage combat process feels far better in my opinion so I shall revert to that for the main set as well.

I need to formalise firing arcs - by that I mean write them down with the appropriate diagram - and also turning/manoeuvring. Again, I have this in my head but it needs to be put down on paper.

Other than the above it was a neat little action and in many ways the concept of the 3 x 3 game serves to really focus on the decision making process. One mistake can be fatal and although there was probably an element of ‘I wonder what would happen if I did that’ in the game it certainly proved the point!

As ever, it was tremendous fun and the next time I shall be using a pimped up playing area for sure!

Tuesday, 29 March 2022

Fast Play 3 x 3 Portable Naval Wargame Perceptions


A Confederate commerce raider searching for her next prey.

Now that I have cut my 3 x 3 teeth so to speak, I have taken the opportunity to reflect on the Duel of the Ironclads and how it played out. I am not talking about the rules - more on this later - but the overall ‘flavour’ of the action and how this equates to what we know (or what we think we know) of the chosen period. 

It is safe to say that these rules are best used for small scale, up close and personal actions - think Gregory Peck in Hornblower or Russell Crowe in Master and Commander (earlier period I know BUT it does show you where my thoughts have been wandering….) - which is ideal for the naval bolt on to a land campaign or for low level naval operations - hunt the raider type operations for example.

In the 3 x 3 world having a maximum combat range of 3 squares appears about right  and this is a third of the distance I use for the parent rules. There is no range differential between smoothbores and rifles although the latter have an advantage in respect of penetration. I am adding range modifiers to the firing process in that targets at range 1 add a +1 to each firing dice whilst at range 3 1 is deducted. I have also added to the ‘rule of 6’. As it stands a roll of a natural 6 always scores 1 point of damage and in addition entitles the firer to roll a further d6. Where firing scores after modifiers exceed 6 the target receives 2 points of damage. I am happy with this and so will stick with it and furthermore have also added in the ‘rule of 1’. Essentially a natural roll of a 1 is always a miss, regardless of modifiers.

I am satisfied that the ‘gun factor/penetration factor/armour factor’ works well so this can be left as is. Firing arcs need simplifying but that is no great drama and in fact will do me a favour as the original version was a little cumbersome to use.

Movement speeds initially caused me a few headaches but by adopting a ‘1 square equals approx. 6 knots’ scale it fits in well with speeds of 1 to 3 working well enough. Turning usually costs a movement point although I am allowing highly manoeuvrable types to have one free turn whilst poor types have to move 1 space before they can change direction.

The whole critical hit/critical point section needs clarifying and revising but again, this is largely simplifying what is already in place.

Once the above additions have been incorporated into the rules, along with the updated ship specs, I will run a further action just to see how it works out. 

Going Forwards….

I really enjoyed the first run out of the rules as tweaked for the 3 x 3 format and as mentioned I think there is a lot of potential for certain types of action. Clearly they are not designed for fleet level engagements but for low level encounters they work really well. As mentioned previously - and after much pondering - I am definitely going to be tackling some late 19th century gunboats for use on Madasahatta….

There is also the prospect of age of sail as well….

First things first though - I need to tidy up the rules and pimp the playing area.


Sunday, 27 March 2022

Duel of the Ironclads*, March 9th 1862….Game Number 67


U.S.S. Monitor and the C.S.S. Virginia exchanging point blank gunfire

Although a little late in the month to celebrate the 160th anniversary of the famous Battle of Hampton Roads, I figured that elements of the second day of the action would make a great test bed for my 3 x 3 Portable Ironclad Wargame rules. It is very much a 3 x 3 x 3 action - a 3 x 3 grid occupied by 3 ships!

As mentioned previously the rules are an adapted version of the more formal set for the period I have developed using ideas from Bob Cordery’s book Gridded Naval Wargames and David Manley’s rules Dahlgren and Colombiad. The key differences between the two sets are as follows:

  • No critical hits until a ship reaches its critical damage point
  • Movement distances range from 1 to 4 and turning 45 degrees costs a movement point
  • A firing roll of 4, 5 or 6 equals a single hit point with each score modified where appropriate by comparing the firing value to the armour value
  • A roll of a 6, regardless of any firing/armour modifiers, entitles the firing player to a further d6 roll. A modified score of 7 plus means that two hit points are scored
  • Ship models are deployed in a single square rather than straddling two - this also means that firing arcs are simplified.
  • Movement distances and firing ranges are a third of those in the main rule set.
‘A willing foe and sea room’….The Royal Navy toast for Friday

The areas around the edge of the 3 x 3 grid can be used to add to the fog of war. In order to add a degree of uncertainty to the actions of one’s enemy I am allowing a ship to use those areas to disengage and reengage as the tactical situation warrants. You will notice that the rectangular areas cover all three squares of the central grid. A ship can enter one of these areas and as long as no enemy ships are in the same row as the rectangular zone it is able to redeploy as its move into any of the three squares in any facing after spending a turn there. The rationale behind this idea is that ships are able to gain some sea room for manoeuvring purposes away from the battle. There are restrictions though. Apart from the requirement to spend a game turn in the zone the ship may not fire or be fired upon. Also, should an enemy ship move into one of the adjacent squares the ‘zoned’ ship may not enter play via that square. In the event that the enemy player is able to deploy ships in all three adjacent squares then the ‘zoned’ ship will not be able to enter play at all.

All of these zones (including the corners although these are limited to a single entry square) can be designated as being entry or exit points as per the scenario conditions as well being either sides ‘baselines’. I hope that by using this idea it will enable players to expand their tactical decision making.

The Battle


The protagonists - (from left to right) the U.S.S. Monitor, the U.S.S. Minnesota and the C.S.S. Virginia

Union 

U.S.S. Monitor - Size: small, Speed: 1, Hit Points: 9, Critical Point: 3, Armour: 4, Guns: 3/3 (Turret)

U.S.S. Minnesota - Size: large, Speed: 2, Hit Points: 12, Critical Point: 4, Armour: 0, Guns: 5/2 (P, S). 

Confederate

C.S.S. Virginia - Size: medium, Speed: 1, Hit Points: 9, Critical Point: 3, Armour: 3, Guns: 2/3 (FW), 2/3 (P/S), 2/3 (AW). Ram Bow.

Note: The two numbers after the rating for Guns are for the number of d6 rolled for firing and the penetration factor of the weapon(s) in question. The initials refer to the firing arcs - FW: Forward Wide, P, S: Port and Starboard and AW: Aft Wide. Turret is of course a turret!

Special Rules

The U.S.S. Minnesota is aground and is therefore unable to move for the duration of the action. No ships may enter the square occupied by the U.S.S. Minnesota which means that no ram attacks may be made against her. The U.S.S. Monitor is deployed in the manoeuvre rectangle behind the U.S.S. Minnesota. The C.S.S. Virginia enters the playing area from the corner diagonally opposite the U.S.S. Minnesota. Should the C.S.S. Virginia and the U.S.S. Minnesota both teach their critical point then the U.S.S. Monitor must beak off the action to provide assistance to the U.S.S. Minnesota.

Victory Conditions

The Confederate player wins if the U.S.S. Minnesota or the U.S.S. Monitor is sunk and the C.S.S. Virginia exits the playing area.  The Union player wins if the C.S.S. Virginia is sunk. All other results are a draw.

Starting Positions


U.S.S. Monitor lurked on the port side of the grounded U.S.S. Minnesota whilst the menacing shape of the C.S.S. Virginia heaves into sight.

Turn 1. There is no gunfire as yet. The Confederates are deemed to have the initiative on the first turn and so opt to move to engage the U.S.S. Minnesota. Meanwhile, the U.S.S. Monitor prepares to surprise the Rebels.


The situation at the end of the first turn.

Turn 2. The only firing is from the forward guns of the C.S.S. Virginia as neither of the Union ships are able to fire - the U.S.S. Monitor because she is in a manoeuvring zone and the U.S.S. Minnesota because her guns are broadside mounted so the C.S.S. Virginia is currently out of her firing arc. The C.S.S. Virgina has a forward facing battery rated at 2/3 (FW) meaning she rolls 2d6 to hit and has a penetration factor of 3. She rolls a 2 and a 3. To each of these scores the difference between the penetration factor of the firing gun and the armour factor of the target is applied - in this case the 3 of the C.S.S. Virginia deducts the 0 armour of the U.S.S. Minnesota - she was a wooden frigate and so very vulnerable to shell fire - meaning the scores are now 5 and 6 which equal two points of damage on the hapless Union ship.

Initiative - Union 4, Confederate 6. The wily Confederate opts to allow the Union to move first so as the intentions of the U.S.S. Monitor can be determined.


At the end of turn 2 the C.S.S. Virginia continues to head towards the U.S.S. Minnesota whilst the U.S.S. Monitor attempts to bar her way.

Turn 3. The U.S.S. Monitor opens fire against the C.S.S. Virginia. Her turret mounted artillery is rated as 3/3 whilst the armour of the C.S.S. Virginia is rated as 3 meaning that there are no modifiers applicable to the d6 roll. A 1 and 2 x 6s are thrown meaning that 2 points of damage have been scored AND the Union player is entitled to throw an additional 2d6! These come up as a 3 and 4 meaning the C.S.S. Virginia has taken 3 points of damage! She immediately returns fire on her previously unseen assailant. Her guns are rated 2/3 whilst the armour of the U.S.S. Monitor is rated at 4. This means that each of the 2d6 rolled will have a minus 1 modifier. A 5 and a 3 are rolled which are adjusted to 4 and 2 meaning that the ‘Cheese box on a raft’ sustains a single point of damage.

Initiative - Union 3, Confederate 4. Once again the Confederate opts to allow the Union to move first.


Have the Rebels made an error? Instead of Turing to face the U.S.S. Monitor the Confederate ship moves to engage the U.S.S. Minnesota although in doing so will be exposed to the full broadside of the Union ship.

Turn 4. Once again the U.S.S. Monitor and the C.S.S. Virginia exchange shots. The Union 3d6 come up as 2, 3 and 6 with the extra roll being a 4. This means a further two points of damage on the Rebel ship. Her response was a 3 and a 4 each of which deduct 1 meaning no hits are scored. The rebel ship is in trouble.

Initiative - Union 5, Confederate 6. Once again the Confederate opts to allow the Union to move first.


The U.S.S. Monitor opts to move in such a way that she can cover the U.S.S. Minnesota whilst the C.S.S. Virginia decides against moving across the broadside of the grounded frigate.

Turn 5. Again the two ironclads exchange punishing point blank fire. The Union roll a 6, a 5 and 4 meaning 3 damage points and the extra d6 comes up a 2. The three points of damage are sufficient to move the Confederate ship beyond its critical point so a d6 roll will need to be made to determine her fate. Realising it is her final round of firing she instead opts to fire at the U.S.S. Minnesota. A double 6 comes up! As each d6 adds plus three making two scores of 9 this equates to four damage points AND a further two d6 rolls - these come up as a 2 and 3 which then become 5 and 6. The U.S.S. Minnesota has sustained 6 points of damage in all which also gets her to her critical point.

The C.S.S. Virgina rolls a 4 on the critical damage table and so loses gunnery factors to the value of 2. It could have been worse as any further hit points would be sufficient to sink her outright! The grounded U.S.S. Minnesota rolls a 3 which translates as engine damage. 

Initiative - Union 3, Confederate 4. Once again the Confederate opts to allow the Union player to move first.


In response to the grievous condition of the U.S.S. Minnesota after the battering she received at the hands of the C.S.S. Virginia as well as the fact that the Rebel ship appears to be breaking off the action, the U.S.S. Monitor is content to observe the enemy ship from a distance, her job done. She would never know just how close she came to sinking the Rebel ironclad outright.


A view of the action from behind the U.S.S. Minnesota - who was largely a spectator of the unfolding drama

Endgame. That was an enjoyable way to spend a Sunday morning and no mistake. The result was even fairly close to what actually happened although the C.S.S. Virginia was very lucky to survive. Wooden ships are incredibly vulnerable and indeed, had the C.S.S. Virginia not been distracted by the U.S.S. Monitor then there is little doubt the U.S.S. Minnesota would have been destroyed. The U.S.S. Monitor proved to be a tough nut to crack - the armour rating of 4 certainly helped - and perhaps the Confederate may have fared better had she chosen to use her ram. As it was she was comprehensively out shot by the Union ship. All three ships would live to fight another day.

Although it did not look like a lot happened in the game it certainly did not feel that way as every decision seemed to be magnified in terms of the immediacy of its effect.

Thoughts on a 3 x 3 naval game

I have to say that I really enjoyed this. Using such a small playing area really makes you have to think about what you need to do to achieve your specific aim. The Confederate plan was to engage the U.S.S. Minnesota at point blank range off her bow thereby avoiding any return fire. The U.S.S. Monitor put a stop to that but the Rebel ship essentially dithered in the face of two threats and so nearly paid a heavy price. It was all very quick and dirty and indeed, the longest part of the action has been writing it up.

I like the focus on the action this concept gives you and whilst it is not the be all and end all of naval wargame techniques it certainly falls nicely into the edited highlights category. For a challenging quick fix the rules worked out really nicely and to be honest some of the ideas I used for this set will filter back into the parent version. Using the border areas - although only briefly in this case - adds to the tactical decision making which will make for a more ‘rounded’ game rather than just the close range knife fight. 

I shall certainly experiment with this further - the rules need a little tidying up - and plan to use the system for late 19th century Colonial style gunboat actions (Madasahatta here we come!) and even for smaller actions up to the Great War. There is no reason why this concept could not be used for pretty much any pre 20th century naval action and it is certainly something I shall look towards going forwards.

The crude piece of plywood I used as a playing area will now be pimped into something rather more suitable and I will also be looking to get the last of the ACW ships finished. There are also implications for the playing area for the parent rule set as the use of a single square for a model rather than using two certainly makes life easier in many ways!

*Duel of the Ironclads 


From the pen of the prolific Mr Angus Konstam - this Osprey hardback is a compilation of the Campaign Series title on the Battle of Hampton Roads and the two Vanguard titles - Union Monitor and Confedrate Ironclad.

The title of this post was, ahem, borrowed from the title of the above book that I have in my library. Angus Konstam has written extensively on naval matters for Osprey and his ACW selection covers a vast array of ship types. All are highly recommended.


Friday, 25 March 2022

3 x 3 Portable Ironclad Wargame - Setting the Scene


To the untrained eye the above is merely a piece of plywood with some lines drawn on it - members of the Portable Wargame 3 x 3 club will recognise it and nod knowingly as to its true function….

It is rough and ready I know but for experimentation purposes it will be just fine! In any event I can always make something a little more aesthetically pleasing later. I used an odd piece of plywood I had laying around and a trusty Sharpie permanent marker and the overall size of the playing area is 2ft by 2ft - also known as the 15mm sized playing area for DBA and HOTT. Coincidence? Maybe, but I couldn’t possibly comment….

The 3 x 3 central grid is made up of 6” squares and the areas around the edge of it will be usable during a game but only for scenario specific reasons.

The first thing that has struck me about this playing area - and seeing it in the flesh so to speak, has been something of a revelation - is that only a small number of ships would be needed for a game. Now I know that is pretty obvious but I have spent a considerable amount of time pondering how to fit squadrons on a 3 x 3 grid - and for my collection this will not be happening! I reckon three or four at a push models a side would be about it but that actually works really well for me for a variety of reasons.

The ‘variety of reasons’ mentioned in the previous paragraph includes something Madasahatta related - I am looking long and hard at various late 19th century ‘Colonial’ gunboats, mainly for the British and Germans although there are some rather nice looking French types which are definitely tempting. 


H.M.S. Gannet at home in Chatham Historic Dockyard….


….and a rather picture of the same in service.

I am also being strangely drawn to making a version of the sloop H.M.S. Gannet - after all, not only is she available to look at in Chatham Historic Dockyard but she was also built in my old hometown of Sheerness on the Isle of Sheppey. The only trouble with this idea is that I know that this would be very much the thin end of the wedge and inevitably a whole gamut of other models to go with it!

The next post will be of the battle I shall be fighting - effectively my somewhat delayed initiation into the brotherhood of 3 x 3 Portable Wargamers - and I have to say I am really looking forward to it.

Better late than never!


Thursday, 24 March 2022

Further Thoughts on the 3 x 3 Portable Ironclad Wargame


C.S.S. Arkansas engaged by the U.S.S. Carondelet and U.S.S. Essex

I was able to spend some time working on the 3 x 3 Portable Ironclad Wargame and I am very pleased that I did! A lot of the rules from the ‘parent’ set I devised can readily be used as written but there are a few changes necessary in certain areas. Ironically some of the changes I envisage making may well feed back into the parent set.

The biggest single change concerns movement speeds. In the parent set movement rates were calculated on the basis of 2 knots equalling 1 square of movement - bear in mind that models occupy two squares. To fit in a 3 x 3 grid I am using a movement rate of 1, 2 or 3 and furthermore ship models will be occupying a single square. As a rough guide a movement rate of once equals a speed of up to 5 knots or thereabouts, from 6 to 12 knots equals a movement rate of 2 whilst faster ships can move 3. Turns are of 45 degrees (diagonal movement and firing is permitted) and will have a movement cost depending on the type.

I have scrapped entirely the cumbersome critical hit system as although I quite liked it it was a little on the clunky side. Instead I am planning on using the critical damage point as a trigger for a random critical effect. The rationale for this is that when a ship reached its critical point then it could be ablaze, flooding or otherwise inconvenienced somewhat. I have also reintroduced the ‘roll a 6 and get an extra roll’ when tackling firing.

Firing arcs will be a whole lot simpler as models are occupying a single square. Gun Factors determine the number of d6 rolled to hit with 4 and 5 being 1 hit and 6 being 2 hits. The armour value has to be overcome by hits for damage points to be inflicted e.g. armour value 2 will need a minimum of 3 hits to score any damage. If a ship is armed with rifles it will gain an extra d6 regardless of how many it is armed with. Finally, ranges are 2 and 3 squares with the latter being for rifles. The biggest difference from the parent set is probably abandoning the whole armour value versus penetration value mechanic. Firing will now be a whole lot simpler and quicker but will still retain the flavour of the firing ship.

I did not mention it specifically but I am looking at this system for pre dreadnoughts and also for Colonial/Great War gunboat style actions - such as might have been fought on the waterways of the island of Madasahatta….

Needless to say there is a cunning plan afoot.


Monday, 21 March 2022

Thoughts on the 3 x 3 Portable Ironclad Wargame


C.S.S. Manassas and Little Rebel (in the centre) engaging a pair of Union gunboats

I must confess to being hugely inspired by the work undertaken by the many aficionados of the Portable Wargame in respect of the ‘3 x 3’ variant, or, more correctly, variants. I am very keen to try a number of these out but given that Bob Cordery’s Portable Wargame Compendium will be featuring a veritable smorgasbord of ideas in this direction it would make sense for me to wait until it is published which means that I can instead concentrate on my own contribution - a naval version!

The 3 x 3 format lends itself rather nicely to naval actions that are fought ‘up close and personal’. In my opinion this potentially translates into pretty much any type of naval combat prior to the advent of the Dreadnought type. For now though, I am focussing on the ironclad era, or, more specifically, the American Civil War.

The 3 x 3 idea is designed to be very fast play which means that certain compromises are needed to be made in respect of the complexity of the rules in use. Once again my go to choice of rules to inspire me are both Bob Cordery’s Gridded Naval Wargames and David Manley’s Dahlgren and Colombiad. The challenge will be what to leave in in order to ensure that the end result retains the all important flavour of the period.

As an aside I remember reading that it is very easy to design a complicated set of rules but it is far more difficult designing a simpler set!

Whilst I am pondering the final shape of the rules the following are some of the ideas I have been flirting with.

  • Ships can move 1, 2 or 3 squares - diagonal movement (and firing) is permitted
  • Ships can move or turn 1 point per movement allowance
  • Ships will occupy a single square
  • Hit points are based on the size of the ship
  • Armour values are based on the type of ship e.g a medium sized casemate ironclad might have 6 hit points and an armour value of 3
  • No critical hits until the critical point is reached
  • D6s are rolled for combat with 4 and 5 being one hit and 6 being two. A 6 also allows a further dice roll.
  • Firing ship must score more hits than the target armour value e.g. armour value of 2 needs 3 hits or more to score damage.
  • The number of gun dice is determined by the weight of the artillery carried
The above are a selection of ideas I am currently playing around with and I reckon I am quite close to a first draft and a play test. Before I do that I will also need to furnish a suitable playing area and luckily I have sufficient material in stock to tackle this relatively easily.

I certainly have the ship models available….

In other news….

Initially I had planned to avoid the blog until next month but overall I am feeling a whole lot better in myself as long as I am mindful of my mental reserves and pace myself accordingly. Sleep continues to be an issue but again, as long as I take things steadily I am able to cope.

It has been a very busy couple of weeks since Laurel came home. We have managed to get settled into a kind of routine and the positive effect of having her home has also helped the rest of us as well as Laurel. At the present time and for the immediate future I would certainly need to be around on a full time basis and so I am currently negotiating with work to carry on working fully remotely for the time being. To be fully recovered from her surgery we are talking about 18 to 24 months so it is very much a marathon and not a sprint.

For sure Laurel has a long way to go but progress is steady although not as rapid as she would like!