
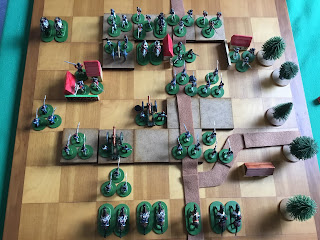
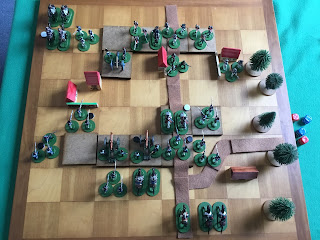
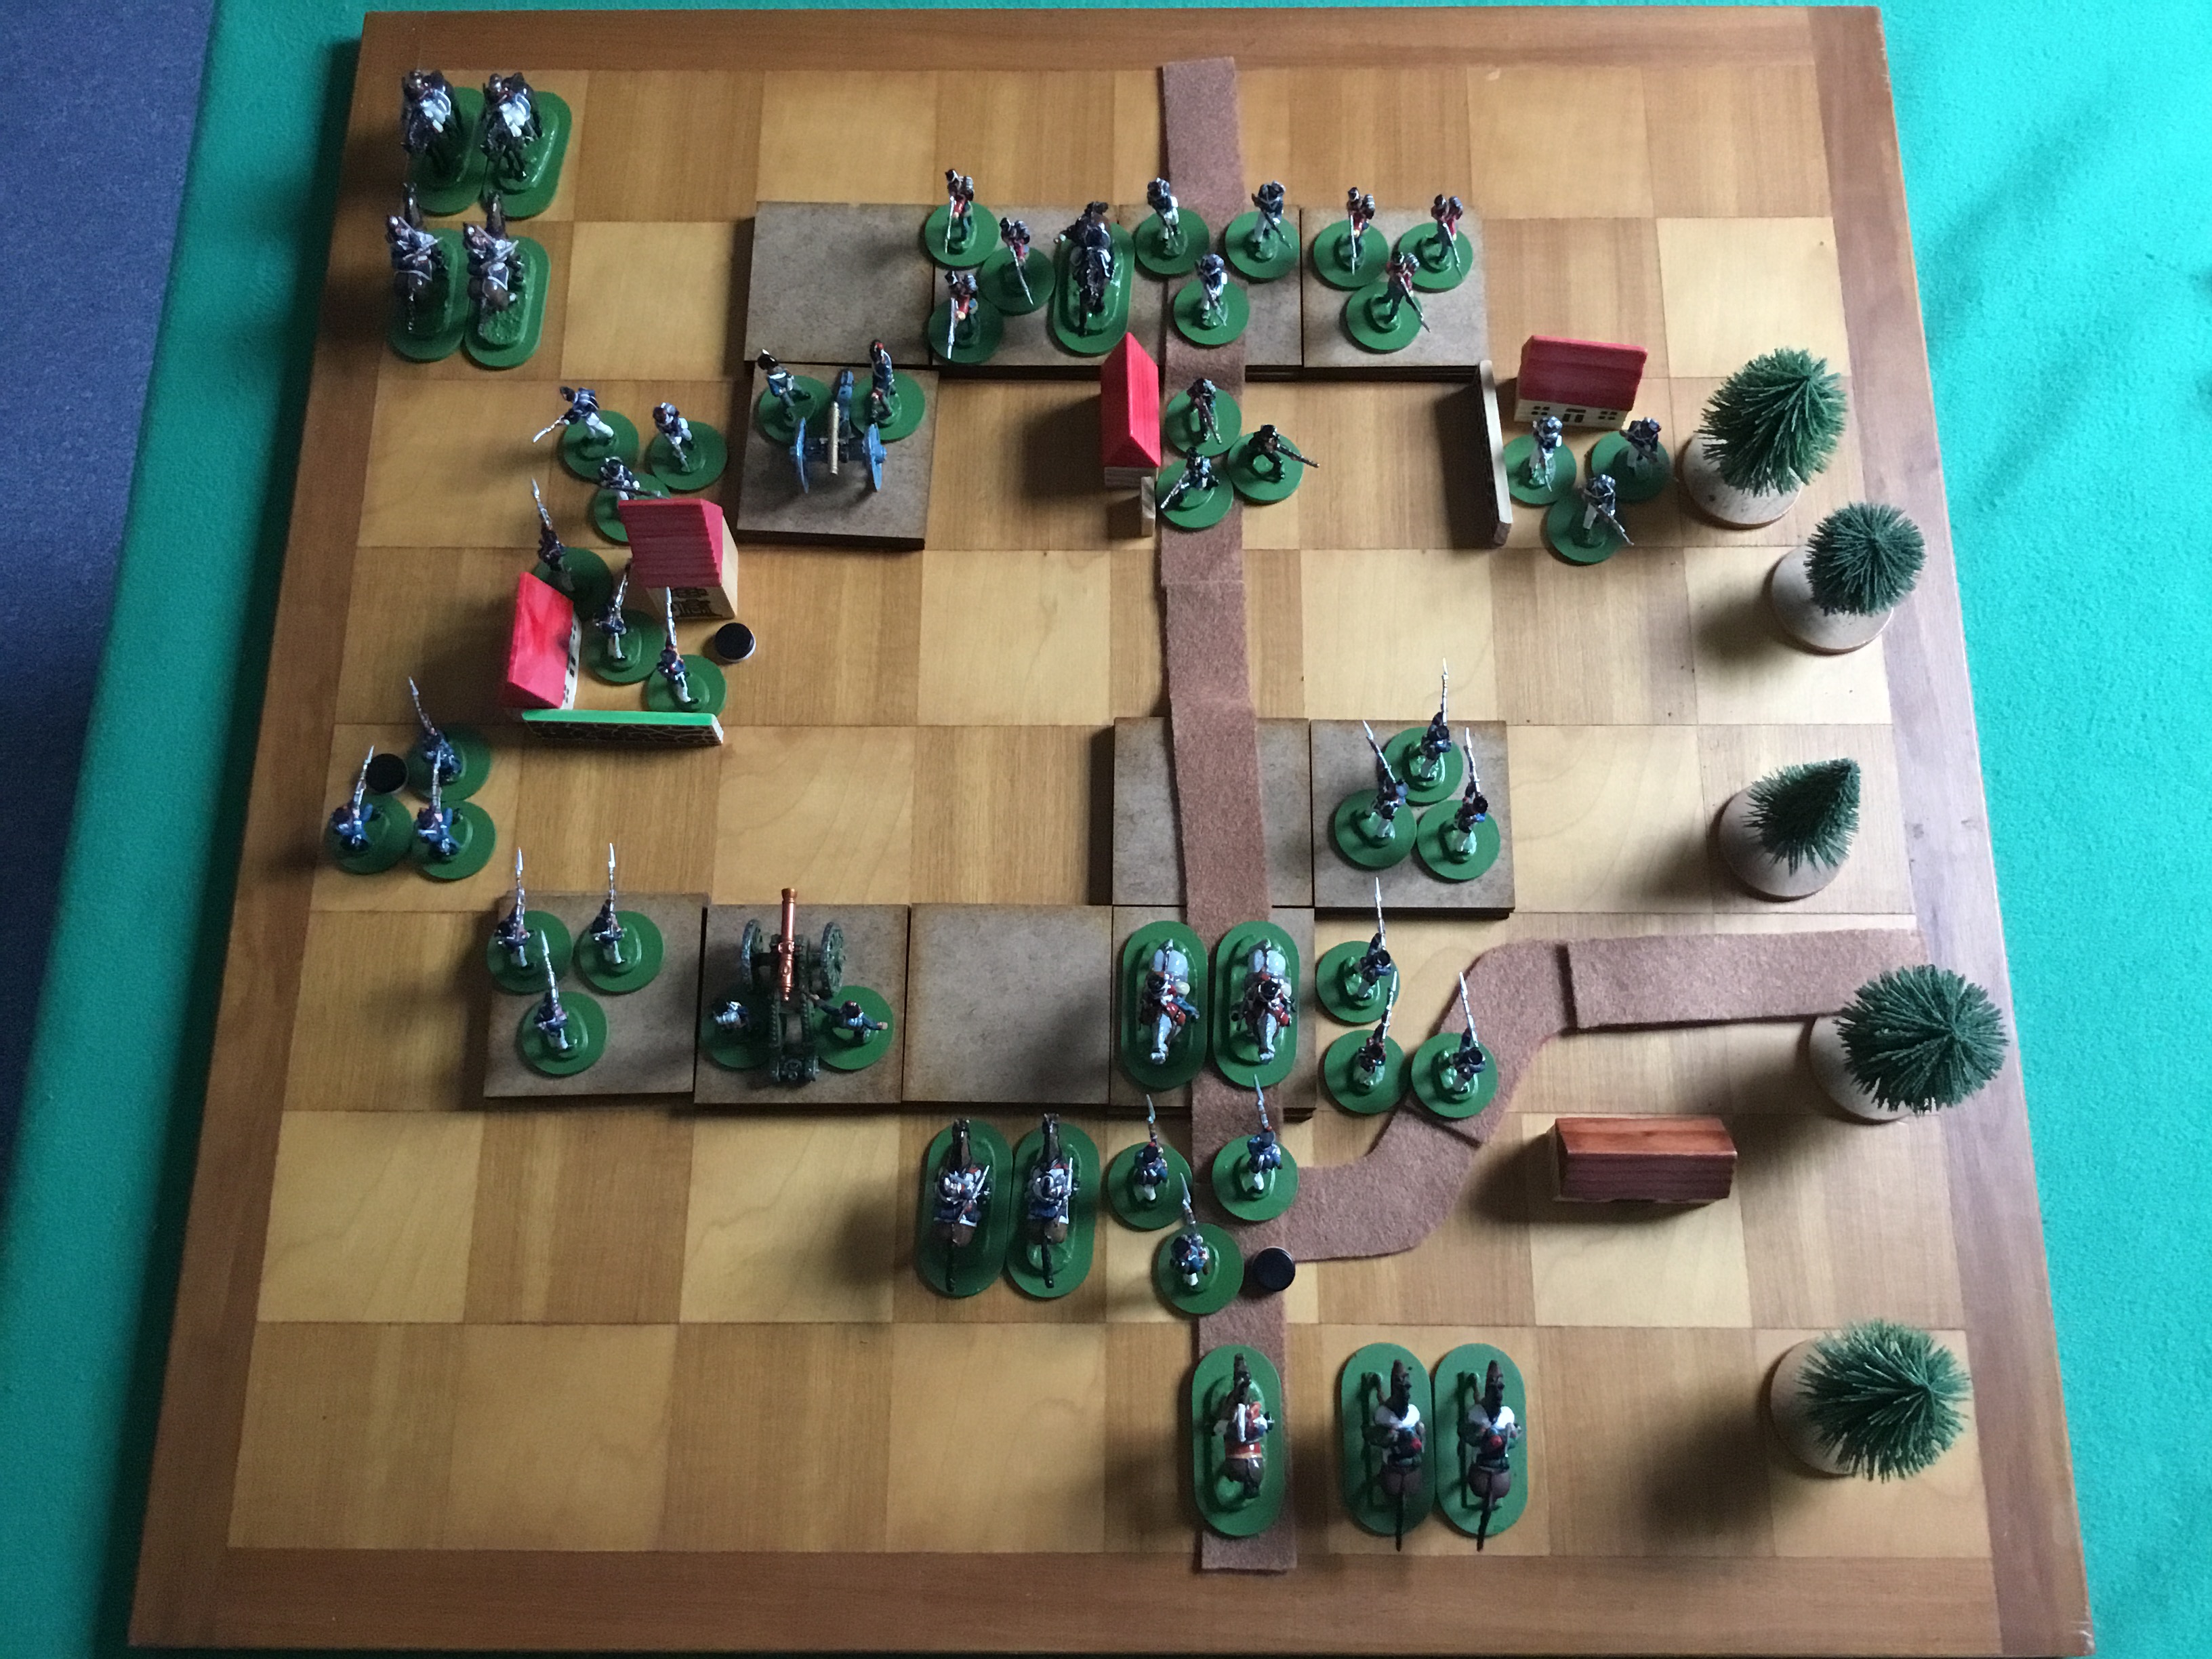
The opening dispositions with the Allies in the North.
First of all apologies for the delay in getting to this after action report but we decided to decorate another room! That is now complete and so I was able to get to the game and managed to get it fought and completed over two sessions. I opted to write the report as I went with two pictures for each turn - one for the French and of course one for the allies. The report will be in two parts with this post featuring up to (and including) turn 6. I have needed to redo some of the pictures from the second half which has proven a challenge due to it being very overcast and our electrics being on and off as some 15 or so sockets have been changed!
The opening positions are above and so without further ado I present Waterloo A La Carte Part 2 by Jay Ward but fought on squares rather than hexes!

French Turn 1 - 7 Action Points. Attacking both Hougoumont and La Haye Sainte with artillery moving up in support of the latter and bombarding the former to the discomfort of the Guards forming the garrison (note the white disruption counter that gives a +1 to an opponents attack dice)

Allied Turn 1 - 6 Action Points. The Guards soon recovered and drove off part of the attacking French columns whilst the artillery scored a telling hit against their opposite number (note the black counter which indicates a hit). The rifles engaged the attacking French to their front whilst the Scots Greys moved up in support. The Belgian horse moved out wide of Hougoumont whilst some of their countrymen occupied Papelotte.


French Turn 2 - 5 Action Points. The fight for Hougoumont intensifies as a hit and a disruption is scored against the gallant Guardsmen as more French infantry are thrown into the fray. The attack on La Haye Sainte makes little headway but wait - French Cuirassiers are seen moving up into new positions....

Allied Turn 2 - 5 Action Points. The garrison of Hougoumont fought back and inflicted a telling blow against their assailants whilst the supporting Belgian cavalry launched a thundering charge into the Voltiguers scoring two hits! The French fell back for one hit and took the second as the cantankerous horsemen continued to cut a bloody swathe through their ranks. A devastating series of rifle shots from La Haye Sainte proved too much for the young conscripts facing these grizzled veterans as they broke and ran.


French Turn 3 - 7 Action Points. As the Voltiguers fell back the Cuirassiers immediately charged into the Belgian cavalry but to little effect. The artillery continued to bombard the allies but again, with little result whilst some fresh infantry headed up the Brussels road to resume the attack on La Haye Sainte.


Allied Turn 3 - 6 Action Points. The Belgian cavalry, not wishing to push their luck against the heavier French horse fell back to their supporting infantry whilst the Guards continued to blaze away at the attacking French. The British artillery has rather better of the duel with their counterparts and so the Frenchmen pulled back slightly to the main gun line. Meanwhile, and spoiling for a fight, the Scots Greys launched a charge into the approaching French columns and pushed them back relentlessly to the main French position.

French Turn 4 - 5 Action Points. Hougoumont falls! With what was certainly going to be the last attack on the chateau from the investing French unit a single hit that was not saved despite the ‘elite’ status of the Guardsmen was enough to finish their rather undistinguished day. The Cuirassiers pursued the Belgian horse but to little effect. Similarly, the attempts to attack the milling Scots Greys were also ineffective.


Allied Turn 4 - 4 Action Points. The Scots Greys continued to push on into the main French position but with impetus lost and horses tiring it was to little effect. The British artillery made up for this though with a telling blow against their French opposite numbers! The Belgian cavalry continued its uneven fight with the Cuirassiers whilst their infantry moved up to Hougoumont.
French Turn 5 - 6 Action Points. The French moved cautiously into Hougoumont with the Voltiguers in support. Further infantry moved up to exploit the open allied flank. Unfortunately this was to be but a temporary advantage so further reinforcements, especially artillery, was urgently called for.

Allied Turn 5 - 5 Action Points. Reacting to the fall of Hougoumont quickly the Duke immediately ordered the Belgians forward and redirected the artillery to bombard the wrecked chateau. Their fire was extremely effective and the new occupants, already weakened from their fight with the Guards, beat a hasty retreat out of the blazing ruins. With the Allied right flank under threat the Duke sought to redress his deployment and so a right shift took place. The Allies had rather better of the engagement this far but they were being pulled out of formation.

French Turn 6 - 7 Action Points. As the French sought to realign their attack to take advantage of the now unoccupied Hougoumont, a lull descended over the battlefield. For sure the presence of the Scots Greys milling around in the centre of their position was a distraction but it was a mere inconvenience. The French artillery finally got its eye in and scored a telling hit on their opposite number whilst their other cavalry began to move to support the right.

Allied Turn 6 - 4 Action Points. The Belgian infantry moved into the charred wreckage of Hougoumont as more of their countrymen moved along the ridge to support the right. The Scots Greys, now barely at walking pace, continued to mill around, looking for an opportunity to cause some additional damage but to no avail.
We have now reached a convenient break in the proceedings as the remaining game turns feature the potential arrival of the Prussians as well as an appearance by the French Old Guard. The former arrives randomly whilst the latter pitches up regardless.
As far as the action itself went the French plan was to launch a diversionary attack against Hougoumont as well as La Haye Sainte. The former succeeded whilst the latter did not but in both cases losses were heavy. So far the British have held their own (despite losing the Guards) but they are being pulled out of position. The French, perhaps somewhat taken aback by their success on the right, are trying to hurry reinforcements over to potentially turn the Allied flank. The Scots Greys, by maintaining their presence in the heart of the French position, have held them up rather more effectively than by the casualties they have caused.
The rules have worked well although I did make one critical mistake that I will adjust for in the second half.
To be continued....
12 comments:
Worth the wait - a great looking game. Looking forward to seeing what happens when the Prussians turn up.
Hello there Maudlin Jack Tar,
I plan to run this again using hexes and with Portable Napoleonic Wargame sized units and reckon that it will look even better. Having said that the chessboard will certainly be used again but I think it is better suited to smaller figures.
Things get VERY interesting in the second part of the battle....
All the best,
DC
Hi David,
Excellent battle report, can't wait for part 2!
Cheers
Jay
Hello there Jay,
I am really pleased you have dropped by in respect of this after action report and I apologise in advance if I have battered your idea beyond redemption! The game has worked really well and the transition to squares was fairly straightforward - I would be keen to discuss it further so would you drop me a line please? You can get me on roguejedi@btinternet.com and I look forward to hearing from you.
All the best and many thanks for a fantastic toy to play with!
DC
David,
I enjoyed your battle report so much that I copied the photos and turned them into a slide show. This gave me an animated version that told the story.
All the best,
Bob
Enjoyed your battle report very much, and look forward to seeing how it works out.
Just shows what one can do with the humble chess/checkers board!
Really enjoyed your battle report, a splendid effort!
Cracking game and looking forward to part II. Let's hope Blucher arrives in time!
Hi Bob,
Many thanks for the animation - once the second half is completed then it should make for an interesting read!
All the best,
DC
Hello there arthur1815,
The next part gets very interesting for sure! I certainly want to make more use of this chessboard although I am thinking that it would work better with smaller figures.
All the best,
DC
Hi there tradgardmastare,
Considering it was a little bit of a lash up it did not work out too badly!
All the best,
DC
Hi Steve J,
In the words of Luke Skywalker - “This is not going to end how you think it will!”
All the best,
DC
Post a Comment