
C.S.S. Florida underway. My version will not include sails and at this stage I am uncertain about the slightly angled funnels - but I have a cunning plan about them!

The picture discovered ‘Journey to the Centre of the Earth style’ between the pages of Paul Silverstone’s book: Warships of the Civil War Navies.
The model I am working on came about quite by accident in that the above cut out picture was between the pages of a book on American Civil War Warships I acquired on eBay some time ago. It is definitely from a magazine and so after a little internet trawling I decided that building one for my Confederate fleet would be a good idea and so welcome to what will be my ‘purely representational’ version of the C.S.S. Florida
Putting the ‘Representational’ in ‘Purely Representational’
First and foremost I need hardly remind you of my take on the models I build. They are designed to look similar to their historical counterparts but on a very simplified basis. I do not profess to be a good model maker in the accepted sense but I can improvise rather well and so the fruits of this are featured all over the blog and have been for a good while now. When making a model I try to capture the overall look of the subject without being too fussy about fine detail, scale or accuracy. The one thing I do try to do though, is to maintain a sense of the relative sizes between models. The ACW collection is all over the place in this respect, mainly because I did not really think about such niceties when I embarked on the build. The new ironclads will be much better aligned in terms of relative sizes and I will certainly be doing this with the WW1 collection when I get to it.
The model itself
After having built the masts the hull that goes under them is almost an anticlimax in terms of complexity! The hull in this case is made up from four layers of 3mm thick MDF, measuring 5” by 1 1/4”. This size is currently the largest I use and whilst this model is of a sloop for frigates I use five layers. The top layer had holes drilled for the masts and a small notch for the bowsprit. As the top layer will be edged white (common practice for ships of war during the middle years of the 19th century) I usually paint this separately before sticking it to the other layers to ensure a clean finish. The three lower layers can be assembled in readiness to take the top deck once both sections have been painted.
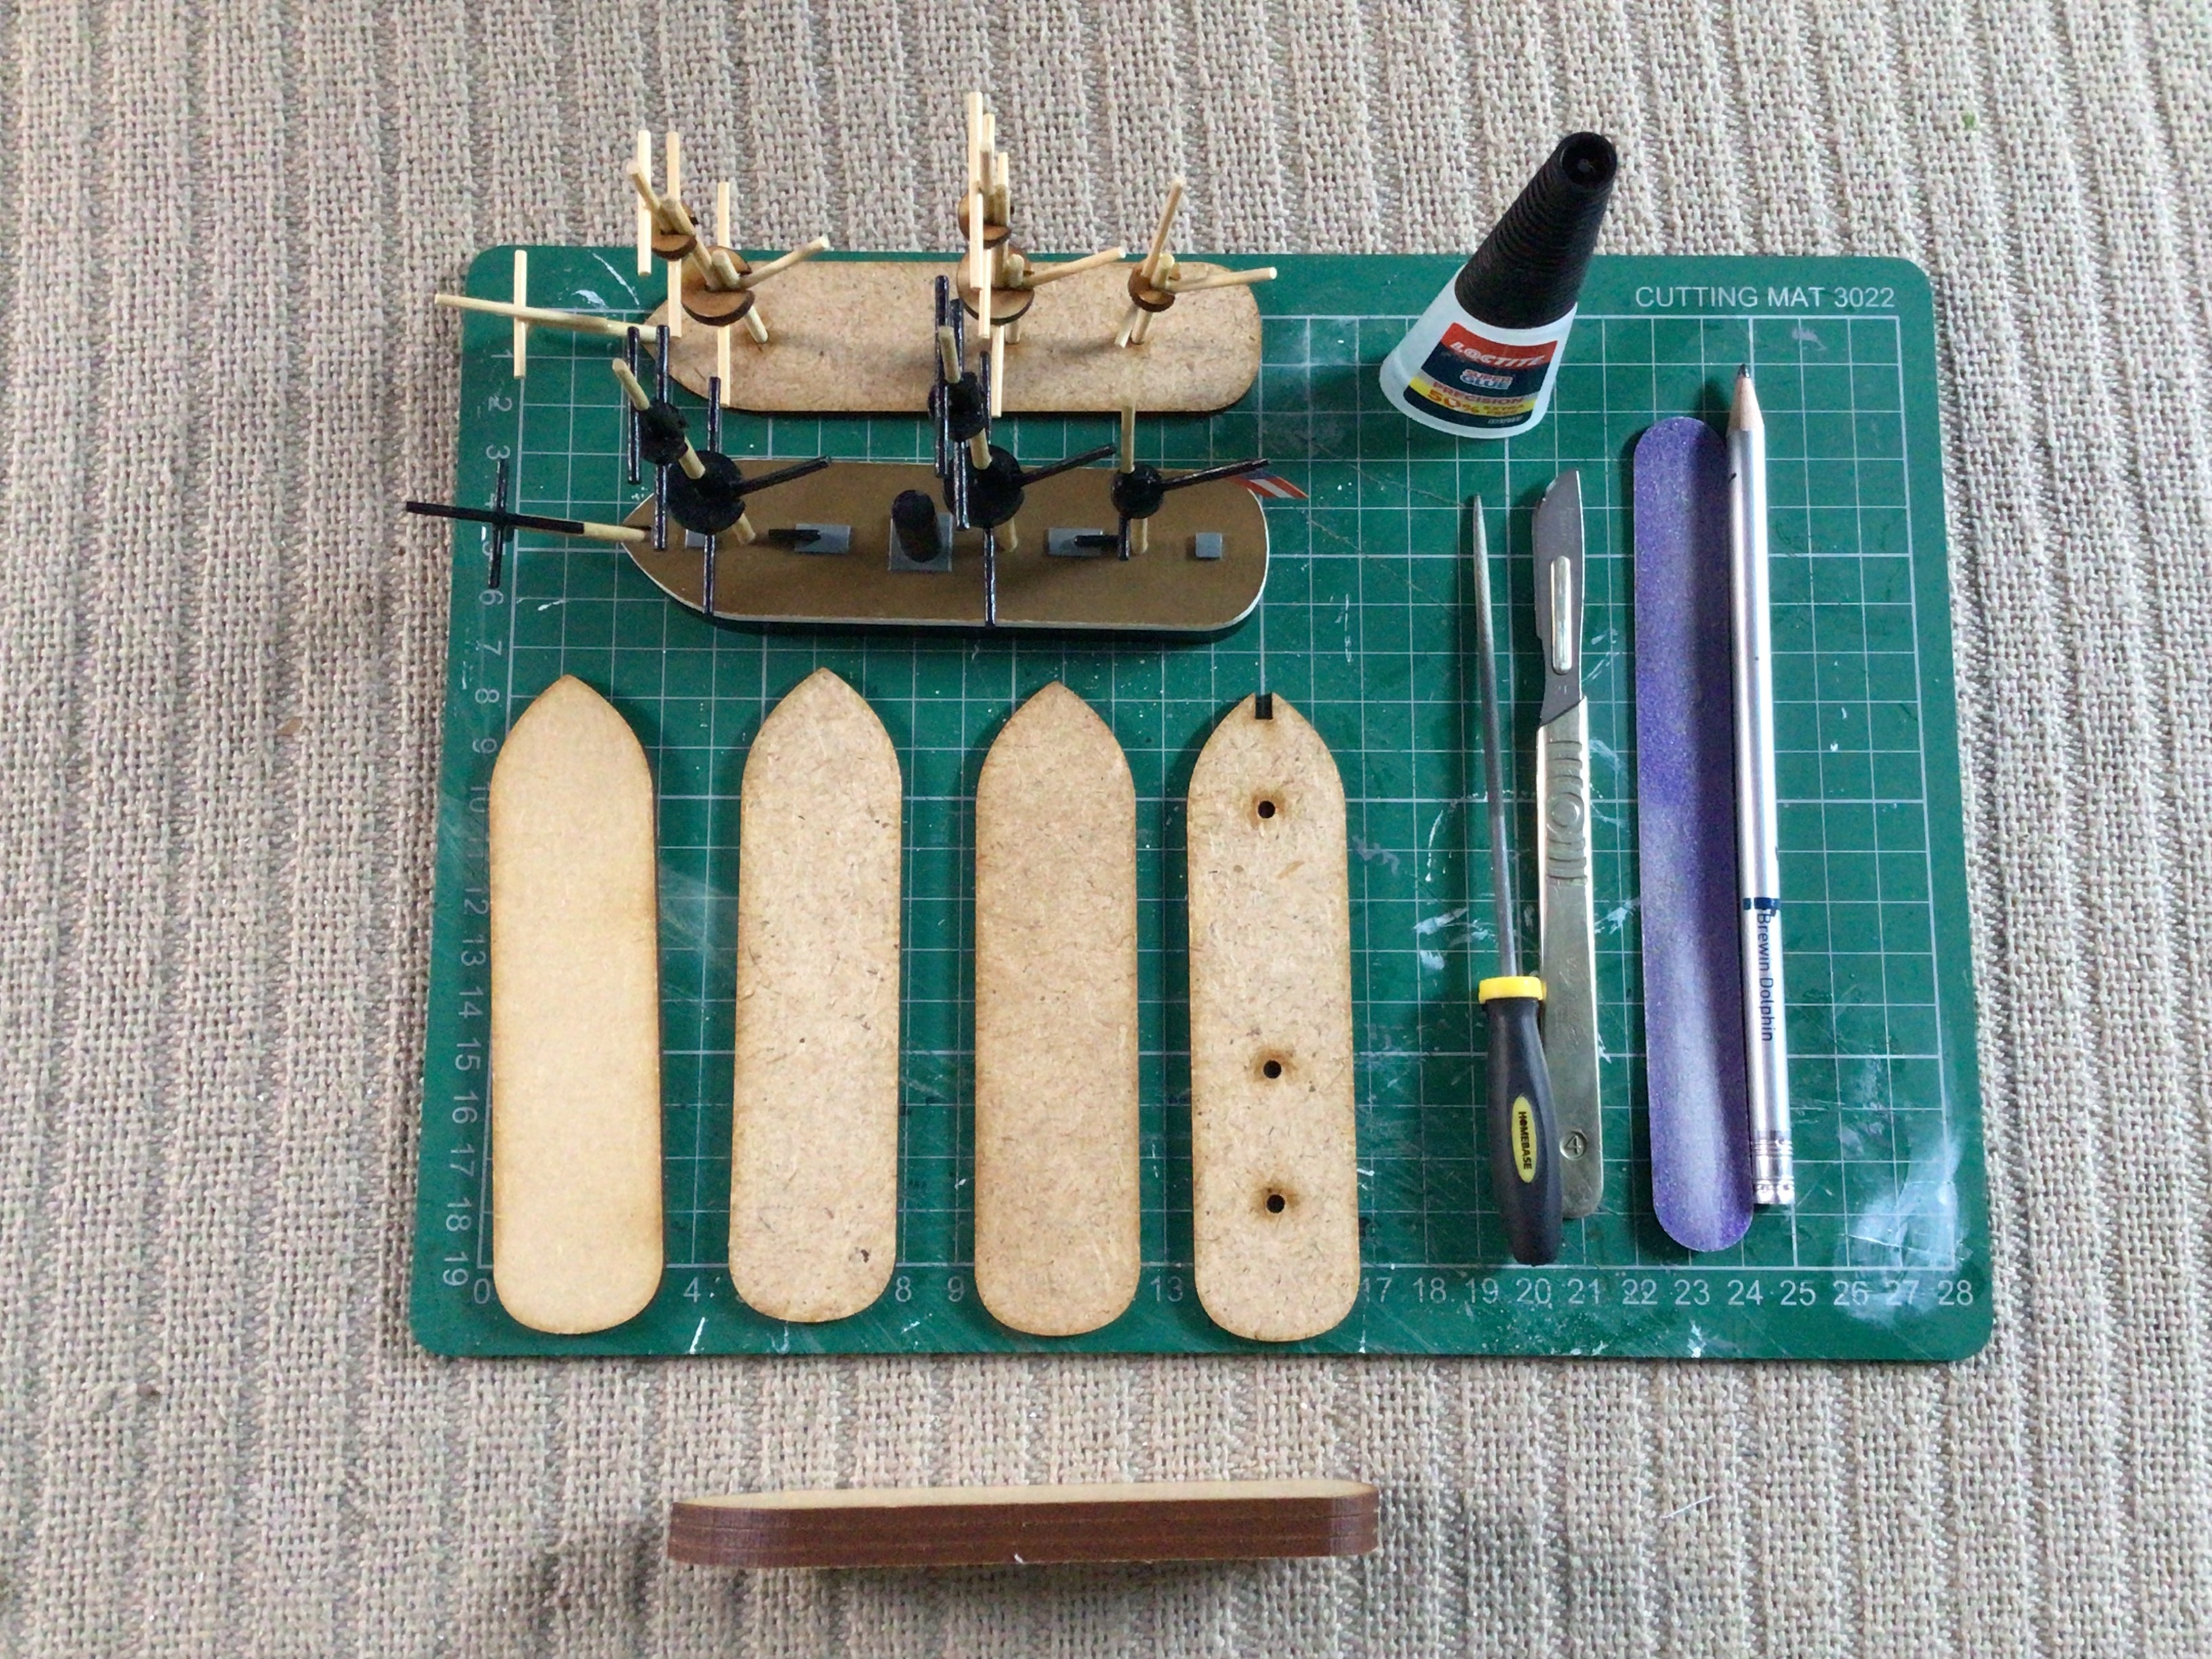
The hull. Built from four layers of 3mm thick MDF and assembled in two stages. The three lower hull pieces are first glued and painted black whilst the top deck layer is edged white before being glued in place to ensure a clean finish. At the bottom of the picture is the hull awaiting sealing, undercoating and then painting.
Hull Shape
The shape I use for my ship hulls (with a couple of exceptions) has all the grace and elegance of a barge! It has a rounded stern and along with the bows are best described as 'bluff'. The sides are also ramrod straight. There was a reason for this. My casemate ironclad building technique requires straight sides and so I kind of stuck with it. From a practical perspective it gives a uniform look to the collection and also makes reordering a lot easier! The main drawback is that shaping the hull into anything requiring slopes etc requires some major work with the Dremel - my model of C.S.S. Manassas was quite a tricky build in this respect despite the apparent simplicity of the actual ship itself. I am not too fussed about it as the end results of straight sided hulls with bluff characteristics fore and aft at least looks like a ship should!
Back to the model
As the model is flush decked and I do not bother with gunwales or similar, the deck fixtures and fittings are positively spartan! In this case they will be limited to a fore and aft hatch cover, a pair of gun carriages and a base for the two funnels. For each of these I use 1mm thick greyboard which is cut to size by Warbases. I use 5mm squares, 5mm by 10mm rectangles for the gun carriages and 10mm square to pop the funnel on. I also have two sizes of 3mm thick lifeboats which have yet to be painted and added to the collection but will get around to doing so - they will help to add to the deck ‘clutter’.

A better view of the deck features on the previously completed model, sparse though they are!
The gun barrels are fashioned from 10mm lengths of cocktail stick with one end filed into a rounded shape. I usually paint up a cocktail stick black and cut these off as needed - they are also fixed in place when the main deck and other features have been painted - as it avoids having too many small pieces lying around.
As this stage of the process is closely linked to the actual painting I will go into more detail in the next post. In the meantime though, the hull and all the masts have been sealed prior to undercoating and the cocktail stick from the gun barrels will be fashioned, along with the two funnels, are also being prepared.
More to follow....
4 comments:
Another interesting post David, enjoying seeing your tutorials and though process behind your models.
Love seeing how you are going about making these David, the results of which really are superb:)!
Thank Donnie! I must admit that it has certainly helped me to clarify some of the steps involved in the construction process!
All the best,
DC
Thanks Steve J! I have quite enjoyed dong this and so may well do some more!
All the best,
DC
Post a Comment