Showing posts with label Games. Show all posts

Sunday, 17 May 2026

Game Number 80….Missenhitti, I’ll Remember You….*

 *With apologies to the Pussycats from 1976….

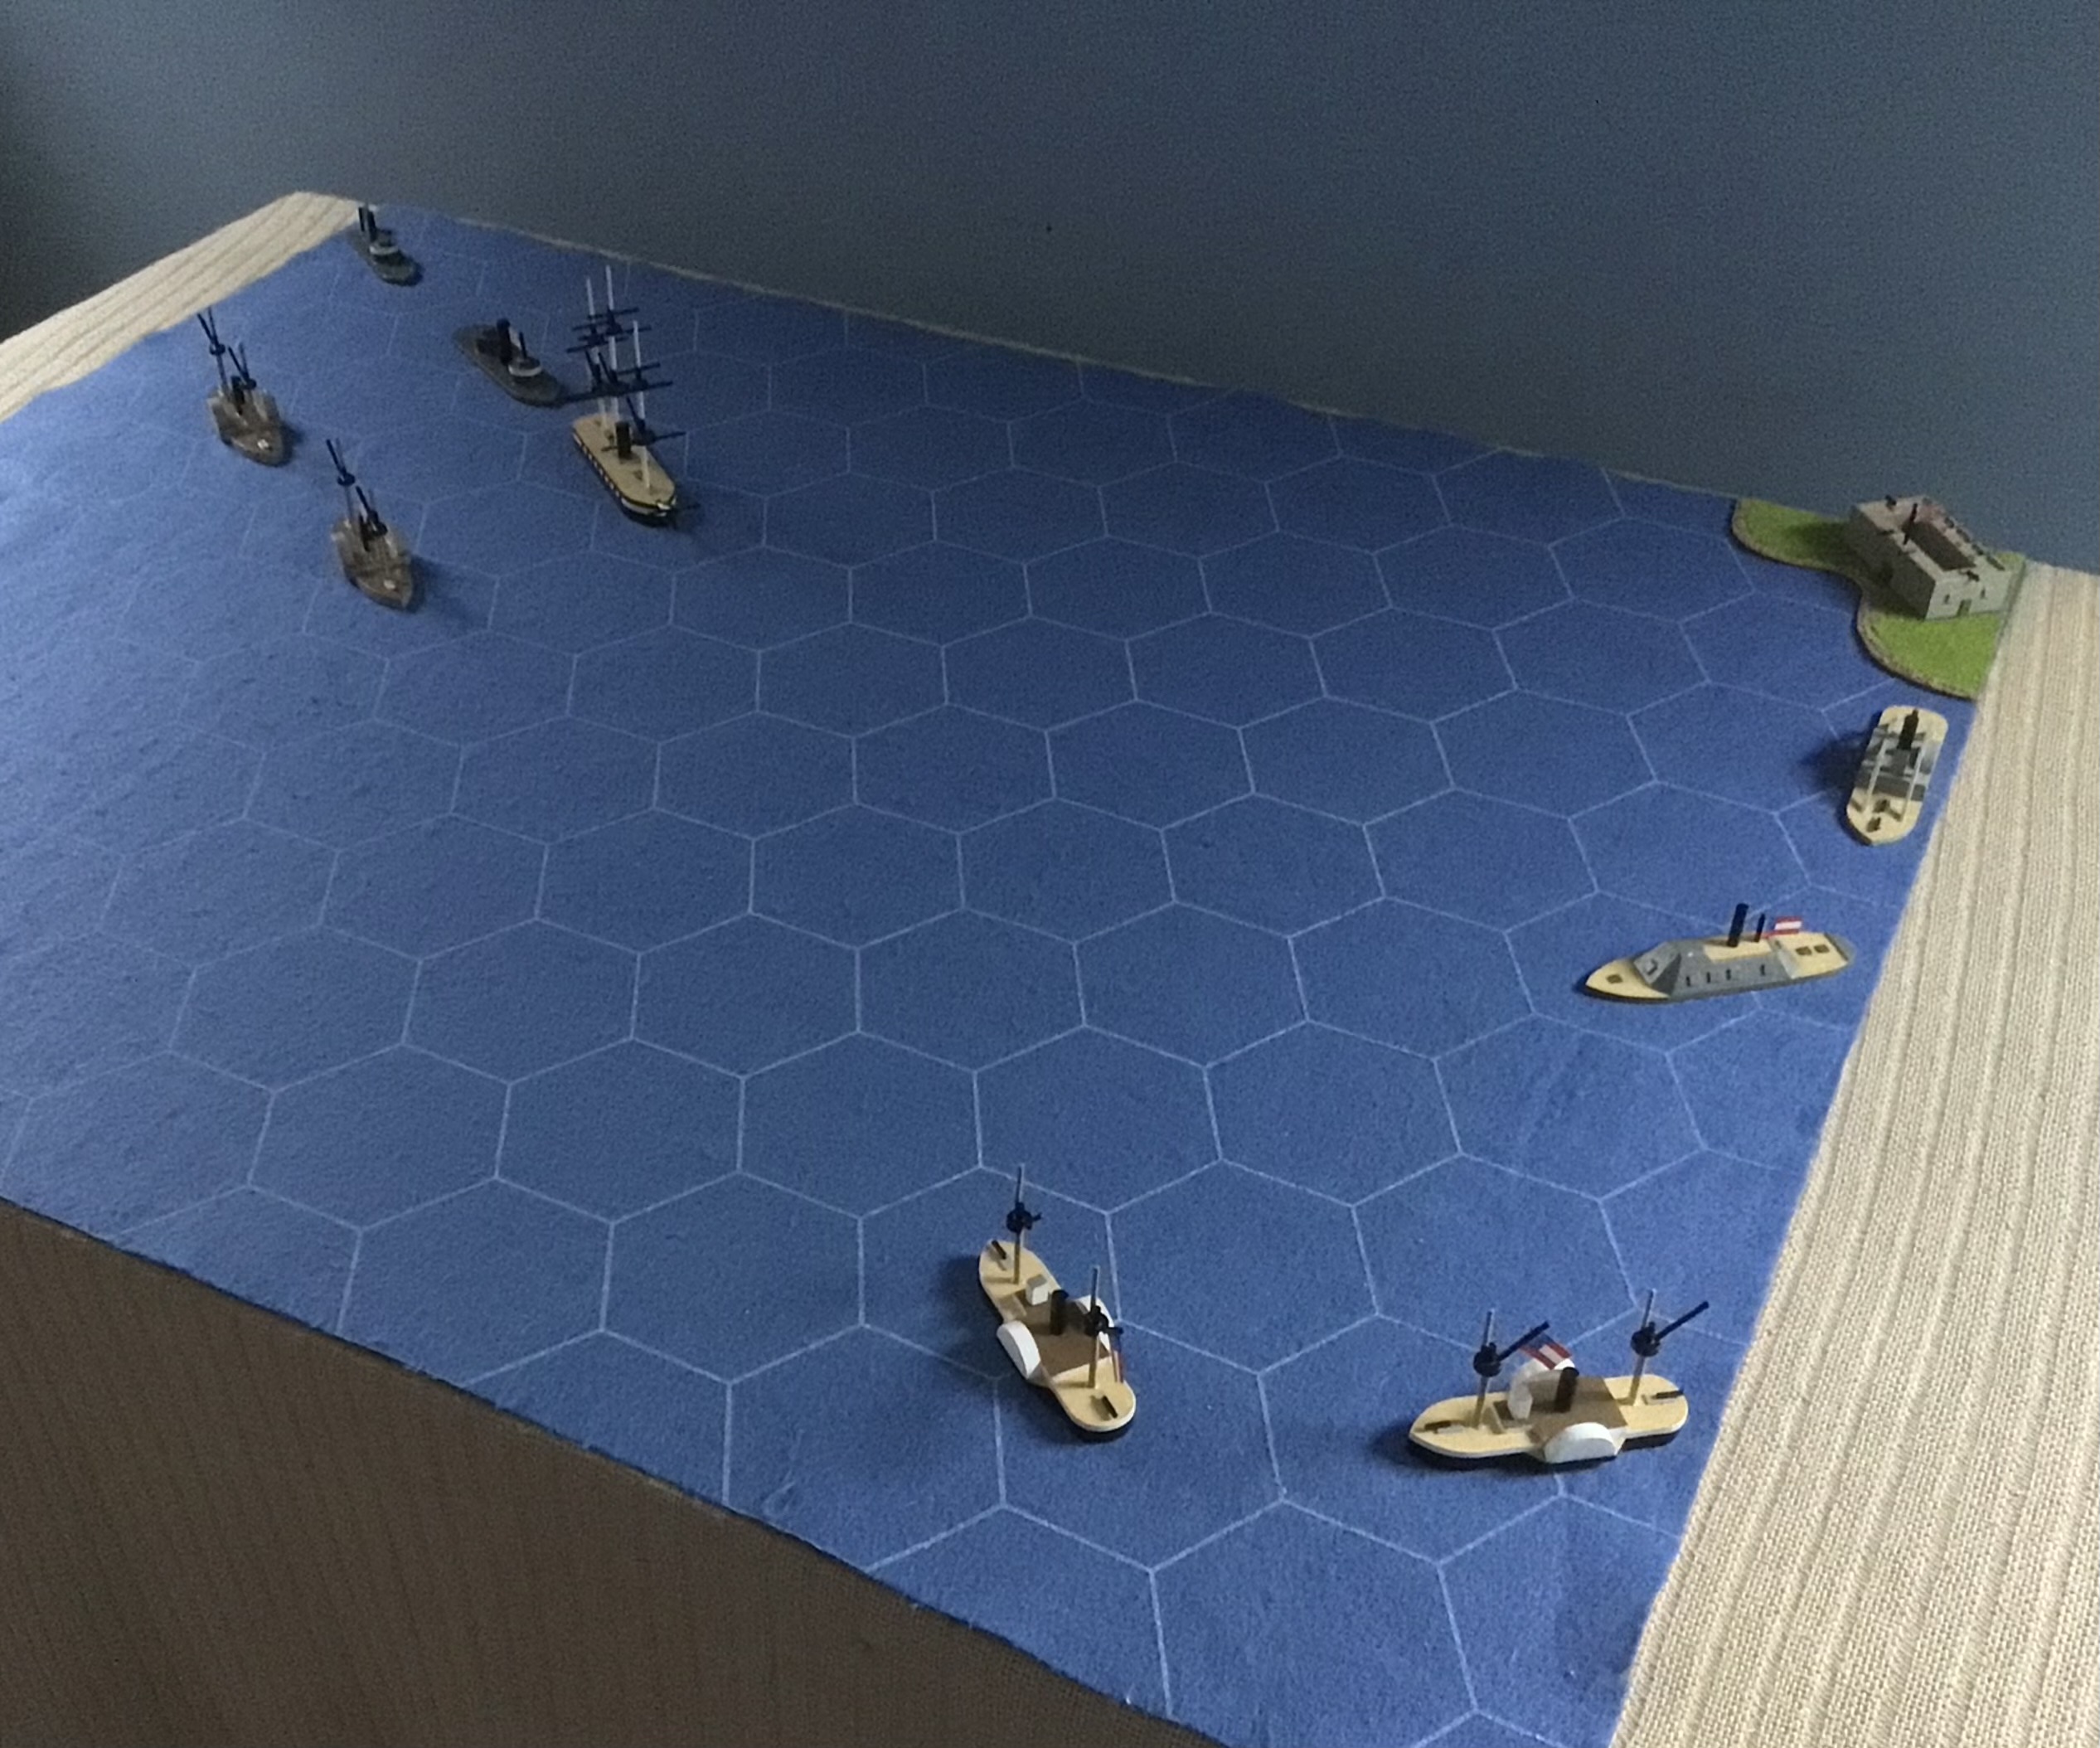
The initial positions. The U.S.S. Admonisher is at the bottom of the picture whilst the C.S.S. Missenhitti approaches from the top. 

I can do no better than to quote, verbatim, the words used by Bob Cordery to describe the background to this action, taken from his book Gridded Naval Wargames.


U.S.S. Admonisher

“For some months the Union government’s spy system had known that the Confederates had been building a Casemate Ironclad at Pratt’s Landing on the Missenhitti River. To ensure that this threat to Union army transport ships using the lower reaches of the river negated, the Union had stationed the newly-built Turreted Monitor - the U.S.S. Admonisher - on the Missenhitti. She had been patrolling the area for some weeks and expected to be in action as soon as the Casemate Ironclad appeared.


C.S.S. Missenhitti

Unknown to the Union forces, the C.S.S. Missenhitti had already been launched and her crew of sailors, riverboat men, and transferred artilleryman had been getting her ready for her maiden voyage down the Missenhitti River. One cold and misty morning she set sail downriver….”

Turn 1. The Confederate ship won the initiative (3-1) and as the range between the two ships was still some 13 hexes, opted to move first. Both ships moved at a speed of two and so moved a single hex forward and turned towards each other before moving a further hex.


End of Turn 1. Both vessels decided to move into midstream so as to have some room to manoeuvre.

Turn 2. Again the Confederate ship won the initiative (6-4) and again, as the ships were out of range opted to move first. The C.S.S. Missenhitti continued on her new heading so as to ensure that she could bring as much of artillery to bear as possible - she would be able to bring two heavy rifles into action against the two smoothbores the Union ship carried. The U.S.S. Admonisher turned directly towards her adversary, no doubt to close the range as quickly as possible, thus helping to negate the range advantage possessed by the Confederates. 


End of Turn 2. No firing as yet but you can be sure that the Confederate ship is ready to do so by virtue of her longer ranged artillery.

Turn 3. Yet again the Confederates win the initiative (5-4)! This time though, they allow the Union to move first. The Union ship slows down and turns to face the opposite bank of the river whilst the Confederate maintains her speed and course, mindful of keeping her guns facing towards the enemy. At a range of four hexes, both ships open fire. The C.S.S. Missenhitti is able to roll 1D6 with a plus 1 due to her weight of artillery (heavy rifle) against the medium armour of the U.S.S. Admonisher. She rolls a 5 which goes to 6 which inflicts a single flotation point and either a secondary or tertiary gun. Since she has neither the hit is classed as another flotation point making two in all. The U.S.S. Admonisher fires back at the same chance - overall plus 1 to the single D6 roll - and rolls a miserable 2 meaning she has missed the target.


End of Turn 3. Fortune thus far favours the South as the C.S.S. Missenhitti scores two hits on the Union ship. The return fire was ineffective, presumably due to range being at the maximum distance for her smoothbore artillery.

Turn 4. Finally the Union win the initiative (5-2)! Given the relative closeness of the Confederate ship the Union allow them to move first. Conscious of the fast approaching river bank the Confederate ship maintains her speed but turns hard to starboard so she is now facing the Union monitors. Unfortunately, her turn did not allow for the slow moving Union ship and so she now is unable to fire as her forward gun has insufficient traverse to reach. Not so the Union ship and so maximum range she opens fire again. She rolls a 4 which, with the plus 1 for the gun/armour modifier makes 5 - a flotation point.


End of Turn 4. Both ships have sustained minor damage with the Union ship getting the worst of the exchange. The Confederate ship now faces a tactical dilemma. Does she try to get the Union ship within a firing arc, thereby exposing herself to more fire, or does she go ‘hell for leather’ and attempts to position herself for a ram attack? The next initiative roll will be crucial.

Turn 5. The Confederates resume their winning ways with a 6-1 initiative roll victory! The Union ship moves first. The U.S.S. Admonisher moves forward one hex and turns to starboard, thereby ensuring that her turret is able to fire (she cannot fire directly ahead). The C.S.S Missenhitti surges forward and turns to face the Union ship and is able to make use of her forward firing artillery. The Confederate ship opens fire and rolls an abysmal 1!. The U.S.S. Admonisher is able to fire with both her heavy guns, each at plus 1. She rolls a 4 and a 1. The 4 goes to five so the C.S.S. Missenhitti suffers another flotation point of damage.


End of Turn 5. Both ships have suffered the same amount of damage - 2 flotation points - and from the perspective of the C.S.S. Missenhitti the next initiative roll will be crucial. Has the U.S.S. Admonisher made an error in keeping her speed down and occupying the centre of the river?

Turn 6. The Union win the initiative 6-2! Seeing the imminent threat of a ram attack the Union monitor accelerates and crosses the bows of the fast approaching Confederate Ironclad.At the last second she throws her helm over hard to starboard. The C.S.S. Missenhitti follows the Union ship and by cutting the corner comes up on her aft starboard quarter - close enough to fire but not for a ram attack! The U.S.S. Admonisher opens fire at a range of one hex with both her heavy smoothbores. She rolls 2D6 each with a plus 1 gun/armour modifier. She rolls a 4 and 5 which go to 5 and 6. The C.S.S. Missenhitti suffers another flotation point for the 5 and another for the 6, along with a further flotation point as she does not have any secondary or tertiary guns, making three in total. This is sufficient to require a Critical Hit roll which comes up as a 6! The Confederate ship now has a fire to deal with, as well as losing a gun factor - in this case her forward heavy rifle. As damage is considered to be simultaneous she is still able to fire this turn. For the final shot from her forward rifle the C.S.S. Missenhitti replies with a roll of 3 that goes to 4, thus giving the Union ship a further point of flotation damage.


End of Turn 6. With a devastating point blank salvo the U.S.S. Admonisher batters the onrushing C.S.S. Missenhitti and is rewarded by seeing great gouts of flame pouring out of her forward gunport. The Union ship did not escape the return fire though and sustained a further point of flotation damage.

Turn 7. The C.S.S. Missenhitti rolls a D6 to determine the state of the fire. She rolls a 4 which means that it still blazes and so a further flotation point of damage is sustained. To add to the chagrin of her captain, the initiative roll goes against them with the Union winning handsomely, 6-1! The Union ship moves first, hoping to shake off the blazing Confederate ship. Not so, as the C.S.S. Missenhitti continues to doggedly follow the Union vessel. Only the U.S.S. Admonisher can fire as the Confederate ship has lost her forward artillery. The range is one hex and she rolls 2D6, again with each being at plus 1. A majestic 5 and 6 are rolled! The 5 goes to 6 and the 6 to 7. In total this equals a further four flotation points and a Critical Hit roll. The Critical hit roll is a 5 which is flood. Straightaway a further flotation point is lost meaning that the Confederate ship has suffered 6 in total this turn - one from the fire, four from shooting and one from the flood. As this is a further multiple of her hull size of 3 this requires a further Critical Hit roll. This roll is a 2 which is hull/armour. The C.S.S. Missenhitti opts to take a further 2 flotation points rather than weakening her hull or armour. She is in a bad way and needs to think about getting away.


End of Turn 7. With her hull leaking like a sieve and the fire continuing to blaze, the C.S.S. Missenhitti must seriously think about breaking off the action if she can. She is positioned nicely to ram the Union monitor assuming she can win the initiative but will this be enough to snatch victory from the jaws of defeat?

Turn 8. The C.S.S. Missenhitti fails both her recovery rolls scoring a 3 and 4 which in turn means two more points of flotation damage. More importantly she has now passed her critical point having sustained 16 points of damage out of 18. Reaching the Critical point also triggers a further Critical Hit roll and this comes up as a 6 - another fire (and a further flotation point of damage)! The Union win the initiative 5-2 and opt to move first. The U.S.S. Admonisher pulls away at best speed from the blazing and sinking Confederate ironclad that appears to be attempting to get away. Not wishing to risk his own ship the captain of the Union vessel is content to fire a final broadside at point blank range rolling a 5 and a 2 which go to 6 and 3. The resulting two floatation points inflicted on the battered C.S.S. Missenhitti are enough to sink her.


End of Turn 8. With a flood, two fires and more point blank battering from the Union monitor, the C.S.S. Missenhitti settles by the bow and sinks slowly in the shallows.

Overview

Now that was a lot of fun and no mistake! The rules worked very smoothly with no major issues to tell of. The damage levels felt suitably paced and with sufficient impact. I am quite pleased with how this is now working.

How should the ram equipped C.S.S. Missenhitti fought this action? Well, the mistake was in not pursuing either a standoff at range shooting or going full tilt for a ram attack. She appeared to have chopped and changed her mind during the action and crucially was often at a disadvantage in terms of gunnery - mainly due to not having a usable firing arc. Losing her forward heavy rifle was definitely a handicap as every time she was able to get in close she was unable to ‘shoot her way in’. All the U.S.S Admonisher needed to do was to stay out of way and make sure that she could get her turret to bear. The rolls of the dice during the game swayed first one way and then the other which I have no problem with as it all evened out. Early in the action I really thought that the Confederates had the measure of the Union ship but it soon went the other way.

It was tremendous fun to refight a wargaming classic action - once again thanks to Bob for the inspiration - and even though the outcome was different to the original it should not take away from the fact that it is possible to have a rewarding and entertaining game with but a single ship on each side.

Loved it!


Monday, 12 January 2026

An Affair of Outposts, Yellow Sea, November 1904….Game Number 79 Part 2.


The initial staring positions - the Russians are on the left whilst the Japanese are on the right. The two sides were using a similar cruising formation, concentrating the heavier units in the centre with the lighter cruisers deployed as a screen. The Russian formation was more compact than that of the Japanese.


The Russians. The protected cruiser Oleg leads the Aurora in the centre column, flanked by the Izumrud on the port side and the Jemchug on the starboard.


The Japanese. Similarly to the Russians the central column consists of the protected cruiser Kasigi closely followed by the Chitose and flanked by the Niitaka on the starboard side and the Tsushima on the port.

Vice Admiral Dewa Shigeto, aboard his flagship, the protected cruiser Kasigi, observed the approaching Russian squadron with deep satisfaction. His orders were to scout ahead of the main bulk of the fleet and to sweep aside any Russian opposition. The expectation was that their most likely opposition would be cruisers and so when four columns of smoke were sighted in the distance he was confident this would be the case. As the distance between the two forces closed so the expectation was confirmed - four protected cruisers, two large and two smaller. The two larger cruisers were tentatively identified as the Oleg and the Aurora with the smaller being the Izumrud and the Jemchung. He was aware that the two big Russian cruisers could outgun his command - despite the range advantage his eight guns conferred - but he knew the calibre of his commanders and their crews and so was confident that they would prevail. The potential cost of a victory was something he would dwell upon later but for now there was a battle to fight. Vice Admiral Dewa Shigeto, and every man under his command, would do their duty, with honour, and make their ancestors proud.

Aboard the Russian cruiser Oleg the first reaction upon sighting the fast approaching Japanese cruisers was one of surprise. Captain 1st Rank Leonid Dobrotvorsky, commander of the Russian scouting group, was not expecting to meet any Japanese ships this early in their patrol. He, and most of the crew under his command, were secretly hoping for a ‘clean sweep’ - no enemy contact but with orders executed fully. When the composition of the Japanese force became clearer he allowed himself to relax a little. Four ships, for the most part they looked similar to his own command. No matter, he thought as he felt confident in the firepower that the Oleg and the Aurora could bring to bear. He was secretly relieved that the two larger Japanese ships did not appear to be armoured cruisers - there were far too many of them to deal with - so he ordered his ships to increase speed and close the range with the enemy formation as soon as possible.

Aboard the ships of both sides the crews sweated and cursed whilst bringing the guns to readiness until all fell silent, with just the incessant thrum of the engines vibrating throughout the ships, the swish of the waves and the clipped orders of the officers the only sounds being heard. The atmosphere was uniformly tight and filled with both apprehension and expectation. It would not be long.


Turn 1. Both sides seemed to a similar plan in that their screening ships headed in the opposite direction to the heavier units. The Russian Oleg and Aurora (the top two ships on the left)attempted to head off the the Japanese Kasigi and Chitose (the top two ships on the right) and at this stage the Russian flagship did not expect to come under fire.

The two opposing commanders were seemingly of one mind as the two forces simultaneously split into two separate elements heading in opposite directions. Fortuitously the split meant that both sides would be facing their opponents equivalent ship types - heavier against heavier and lighter against lighter. The two large Japanese ships, Kasigi and Chitose possessed a crucial advantage though, in that they were both armed with a pair of 8” guns - one fore and one aft and it was those that opened fire first. All four 8” guns targeted the leading Russian cruiser, the Oleg.

Eight inch shells from both the Kasigi and the Chitose quickly found the range to the large Russian cruiser and after a forest of shell splashes all around her came the ominous rumbling crump with flashes of sparks and black, soot-like smoke indicative of multiple hits. In short order two starboard six inch guns were knocked out along the starboard side and the hull was heavily damaged. Mercifully, her engines were unaffected but being unable to reply with her artillery due to the range was a bitter pill to swallow for Captain Dobrotvorsky - his close range advantage had, in one fell swoop, been removed.

Vice Admiral Shigeto, his face an impassive mask, was inwardly delighted with efficient way the Russian cruiser had been pounded at range. Now it was time to administer the coup de grace. With little time to lose he ordered his two cruisers to a complete one hundred and eighty degree turn. The Kasigi was still completing the manoeuvre when the looming bulk of the Russian flagship approached off the starboard bow. The ensuing broadsides from both ships as they passed harkened back to the age of sail with the guns fired as soon as they could bear. Confusion reigned supreme on both ships as shot after shot wreaked havoc on the decks and in the hulls - ear-splitting explosions, the screech of tortured and twisted metal, the cries of the wounded and the shouting of orders. Miraculously, despite having most of her artillery destroyed, the Kasigi was still able to steam unimpeded. Not so the Oleg.

Captain Dobrotvorsky knew that the ship has taken a fearful battering - guns dismounted and the ominous sight of twisted bulkheads and water appearing everywhere it was not supposed to. A wounded sub lieutenant, his head sporting a bloody bandage, made his way onto the wreckage of the bridge and confirmed the news. The ship was flooding.

Turn 2 - The North. Kasigi and Chitose boldly swung around one hundred and eighty degrees and so the Japanese flagship was now broadside on to their Russian opposite number and at point blank range! A fusillade of 6” guns from the Russian flagship - the Oleg - battered the Kasigi and knocked out her main guns - fore and aft - followed by the complete starboard secondary broadside. Her hull also suffered extensive but fortunately not heavy damage. The Kasigi was not to be outdone though. Both her main guns missed but her secondary and tertiary batteries certainly made up for it. The combination of rapid firing artillery, close range and a large target meant that shot after shot struck home - eight hits in all meaning that a critical hit was also inflicted. Of the eight hits inflicted five of them were flotation hits with the odd three being two secondaries and a tertiary gun. The critical hit was a telling one though - a roll of 5 meaning a flood


Turn 2 - The South. The Russian Jemchung and Izumrud fell in with the Japanese Tsushima (leading) and her sister, Niitaka. Both the Russian ships opened fire at the rearmost Japanese cruiser - the Niitaka - and scored a couple of hits. Both Russian ships launched torpedoes but failed ignominiously in the attempt (two rolls of 1!). The two Japanese ships then pounded the Jemchung into scrap and she was soon in a sinking condition.


Turn 2 - The North. Meanwhile, following their one hundred and eighty degree turn, the Kasigi, with the Chitose following closely behind, proceeded to engage the Oleg at point blank range (the white markers represent hits, the black is for a critical).


The Kasigi suffered nine hits in all and the scores you see above were the location rolls. The three 6s took care of both main 8” guns and a flotation point, the four 5s took care of the three secondary guns with a flotation point. The single 1 was also a flotation point. Whilst the Japanese ship lost most of her starboard artillery, the Russian was less fortunate as her hull took the brunt of the damage, with telling effect.

The situation for the Russian squadron was grim and it was about to get worse. The Jemchung was sinking  by the bows (her roll of 6 meant that it would take six turns before she slipped beneath the waves) and the Oleg had, alongside all her other damage, a flood to deal with. The dice roll of 6 meant that it was uncontrollable and so she to would sink. To add insult to injury, her sinking roll was also a 6 meaning it would take six turns for her to go under.


Turn 3 - The South. With the Jemchung sinking, her sister ship, the Izumrud, chose discretion rather than valour and immediately head away from the action. The Tsushima and the Niitaka did not pursue.


Turn 3 - The North. The Kasigi, heavily damaged, headed away to join up with the Tsushima and Niitaka who would act as an escort for the battered flagship. Meanwhile the Chitose sped around the sinking Oleg and fired a parting shot with her aft 8” at the rapidly departing Aurora, inflicting minor damage on the Russian as she did.

Vice Admiral Shigeto was pleased. His flagship was heavily damaged but sinking not one but two Russian cruisers was a tremendous result. His ancestors would be pleased as he had done his duty with honour. He ordered the Kasigi to break off and rejoin the remainder of the squadron. He also signalled to the Chitose to disengage and rejoin. It had been a good day.

Captain Dobrotvorsky knew the ship was doomed but she showed little sign of disappearing quickly. The remaining ship’s boats were being lowered and the wounded transferred to them. The scene was orderly and disciplined. He mused over his plan and thought that but for the 8” guns of his adversary the outcome could have been very different. Such were the fortunes of war.

So What Did I Learn Then?

I really enjoyed this brief but highly contrived action! The rules worked well although I will think about firing again. I am happy with the ranges and damage etc but I would like to streamline it further if I can. Having said that, when ships get up close and personal the resulting fireworks display will tend to be impressive as anything and everything that can bear and shoot will join in the fun. This definitely feels correct for the pre dreadnought period.

All in all then, a great way to spend a couple of hours and it has certainly given me much to think about and to take forwards as the rules develop.


Sunday, 11 January 2026

An Affair of Outposts, Yellow Sea, November 1904….Game Number 79 Part 1.


A Japanese squadron looking for the Russians

For a variety of reasons the planned naval Russo Japanese War game for next week at the club has been postponed until early February. In the meantime though, I thought it would be a good idea to have a solo run out of the rules at their current stage of development, just so you could see what is what and where is where. The action was fought using my WoFun collection and my Hexon seascape on a 5ft by 3ft playing area or 15 by 8 hexes if you prefer. I have opted to use two forces of protected cruisers that essentially run into each other whilst on patrol. Contrived I know, but there is a method in the madness. The two forces consist of the following and at this stage do not worry overmuch about the abundance of letters - they all mean something and this will become clearer as the action unfolds.

Japan


Kasigi and Chitose


Tsushima and Niitaka


Oleg and Aurora


Izumrud and Jhemchug

The ship charts you see above are very much a work in progress and have been made deliberately large so that notes etc can be easily recorded if required. The top half - speed, turn increment, hull size, armour class and flotation points are pretty much self explanatory but the weapons fit may seem a little complex. In a nutshell, each box represents a D6 roll for combat - either a guns or guns or torpedoes. The letters within the boxes are the firing arcs that the weapon can bear upon. There are six main firing arcs and a further twelve combined arcs making eighteen in all. Straightaway that will seem overly complex but in practice it is surprisingly simple to work with and has the advantage of better representing some of the unique weapon fits carried by ships over the period - wing turrets, casemate batteries and so forth. Every permutation of firing arc has its own diagram which avoids any ambiguity and the ship specification tables for each sub-period will also include the appropriate abbreviation.

Armour and Guns range from very light to very heavy with the former also having an unprotected category. Looking at the charts above you can see the appropriate initial by the gun or torpedo line - for example the Japanese protected cruiser Kasigi has a pair of medium weight (M) main guns with two gun boxes. FWPS means forward wide part and starboard whilst AWPS means aft wide port and starboard. In each case this translates as being able to bear in either the port, starboard or forward wide firing arcs. P/S means a gun box that can bear either port or starboard. Simple eh?

Where there is an overlap in gun types - where two calibres fall within the same category - the larger of the two gains a * next to it to distinguish it, as well as a positive D6 modifier. 

Guns classed as main or any ironclad era rifles have one box per barrel, secondary have one box per two barrels whilst tertiaries have one box per three barrels. Guns classed as light (L) or very light (VL) - typically 6” or smaller - gain a positive firing modifier to allow for their generally faster rate of fire.

I could witter on about this stuff for ages but for now I will leave it there as I have a battle to get ready for.

Somewhere in the Yellow Sea, November 11th, 1904….

To Be Continued….

Tuesday, 12 November 2024

Thoughts on Needlepoint


Although sinking the CSS Tennessee was still stuck fast to the USS Monadnock. I played this ‘on the fly’ as I had not thought about entangled ships being able to carry on fighting outside of their ‘up close and personal’ situation. Read on for more insight….

In the picture above the CSS Tennessee has rammed the USS Monadnock and they are locked together as a result. The four white counters represent ‘sinking markers’ and one is removed at the start of each game turn. When they have all gone the ship slips slowly beneath the waves….

Now I had not thought about ships being stuck together being able to fight other than with each other at the point of contact but the situation above got me thinking (never a good thing….).

I have not researched this kind of situation in any great detail but I was reminded of the duel between the CSS Governor Moore and the USS Varuna. Although they were around ten feet apart at the time the Confederate ship fired into the hull of the Varuna through her own deck as she was unable to otherwise bring her artillery to bear. The unfortunate Union ship ended up being rammed three times before sinking - twice by the CSS Governor Moore. As ten feet apart would be within the realms of ramming in my rules - it would fall within one grid area - I got to thinking about how a ship could fight in such circumstances.

Looking at the picture above you can see that the bow of the CSS Tennessee is firmly stuck in the starboard aft quarter of the USS Monadnock.

My thoughts are as follows.

The grid area in which the ram occurs prohibits and form of combat IF the two ships are locked together. If they are separated then combat can take place as normal using the appropriate firing arcs.

Ships that are locked together may only fire from the hex that is not rammed so the ramming ship may not fire from her bow whilst the target ship firing will depend on which part has been attacked. Ships may fire outwards as per normal from their unengaged side and either ship may be fire on from any vessel in range.

I will have a bit more of a think about this but on the face of it this seems like a feasible ruling.

In the meantime though, have a look at the below.

The Varuna

Who has not heard of the dauntless Varuna?
Who has not heard of the deeds she has done?
Who shall not hear, while the brown Mississippi
Rushes along from the snow to the sun?

Crippled and leaking she entered the battle,
Sinking and burning she fought through the fray;
Crushed were her sides and the waves ran across her,
Ere, like a death-wounded lion at bay,
Sternly she closed in the last fatal grapple,
Then in her triumph moved grandly away.

Five of the rebels, like satellites round her,
Burned in her orbit of splendor and fear;
One, like the Pleiad of mystical story,
Shot, terror-stricken, beyond her dread sphere.

We who are waiting with crowns for the victors,
Though we should offer the wealth of our store,

Load the Varuna from deck down to kelson,
Still would be niggard, such tribute to pour
On courage so boundless. It beggars possession. — 
It knocks for just payment at heaven's bright door!

Cherish the heroes who fought the Varuna;
Treat them as kings if they honor your way;
Succor and comfort the sick and the wounded;

Oh! for the dead let us all kneel to pray!

For the record both the Varuna and the Governor Moore are STILL on the modelling tray - and have been for best part of a year so I reckon I need to do something about getting them finished!

Sunday, 10 November 2024

The Battle of Needle Point, November 5th, 1864….Game Number 78

This will the last game fought using the published version of the Portable Ironclads Wargame because from here on in I shall be making use of some of the optional rules that will appear in Developing the Portable Ironclads Wargame. I should point out that these are optional and so the rules as written are in fact largely unchanged - unless you change them that is!

Having said that, there is one amendment to the original version that I shall be using for this battle and that is the amended fire arcs for Forward Wide and Aft Wide artillery. 

If the set up below looks familiar then it will not surprise you learn that it is! I have fought a rather more involved version of something akin to this scenario previously. It was great fun to fight and in truth running something broadly similar is no great hardship.  


The opening positions. The Rebels have hastily raised steam and are looking to engage the oncoming Union force.

A small Union force has been tasked with carrying out a reconnaissance of the Confederate coastal defences beyond the small fort at Needle Point and up as far as the main base in the area at Hullbridge. They are also further ordered to engage and destroy any Rebel shipping they find en route. Finally, the fort at Needle Point is to be bypassed if possible as it was expected to be invested by the advancing Union troops in the near future - a captured Rebel fort complete with its garrison made for a tempting objective.

The opposing forces

Union

USS Brooklyn (Flagship) - wooden first class sloop

USS Monadnock - double turret monitor

USS Canonicus - monitor

USS Sassacus - 'double-ender' gunboat

USS Metacomet - 'double-ender' gunboat

Confederate

CSS Tennessee (Flagship) - casemate ironclad

CSS Selma - gunboat

CSS Morgan - gunboat

CSS Gaines - gunboat

The small fort at Needle Point is unmanned other than by a small observation post. The garrison and artillery had been withdrawn some weeks ago to bolster the defences in and around Hullbridge itself.

The Battle of Needle Point

For some weeks the Union navy had been scouring the delta of the River Crouch for any sign of Rebel warships, thus far without success. There could only be two possible explanations for this. Firstly, that the Rebels did not have any naval assets to speak of or secondly, and on balance the far more likely explanation, that they did have and were keeping them back as a reserve. The latter option was settled on by the Union command and so an endless round of tedious and fruitless sweeps around the delta by assorted task forces had achieved little other than burning through a prodigious quantity of fuel.

Spies had reported that a few ships were available at Hullbridge - mostly extemporised civilian vessels - and that rumours of an ironclad being readied had also been heard. Thus far though, there was little in the way of concrete evidence to support the story - just wild speculation.

Nevertheless, the navy had to take this threat seriously given that virtually all the invading Union force needed access to the river or sea for supplies and reinforcements, not to mention mobility.

The decision was taken to force the Rebel's hand in that a squadron would be sent past Needle Point and up as far as the outer defence works of Hullbridge itself to engage any Rebel shipping and hopefully draw out the mysterious ironclad. So, shortly after nightfall on the 4th of November, the Union squadron quietly weighed anchor and headed out into the open river, to arrive on station around dawn the following day.

Every precaution was taken to ensure that as little noise as possible was made on the journey, chains were carefully wrapped in cloth so as to muffle any clanking, all unnecessary lights were extinguished and orders were urgently whispered. Lookouts squinted into the darkness in an attempt to identify anything onshore that could spot their secretive approach but for the most part, nothing was seen, only the slumbering landscape gliding by. It was an unbelievably tense journey and undertaken at the lowest speed possible due to darkness and the uncertainly of the depth of the water.

The only sound to be heard was the rhythmic and monotonous thump of the engines as the five vessels cruised along, wraithlike in the blanket of the night. 

As the sun rose and began to burn off the early morning mist, the small squadron was able to increase speed for the last leg of their journey. So far, so good - or so they thought.

Unknown to the commander of the Union squadron they had been shadowed almost as soon as they had set sail. A small Confederate cavalry piquet had been observing the Union anchorage throughout the day and indeed, was on the verge of heading back when the sergeant in charge of the small detachment - who happened to a be former sailor before the war - noticed an increased amount of activity around the five Union ships anchored midstream. He knew enough to know that they were obviously readying to sail and so he ordered his best mounted trooper to report back that the 'Yankees were a-coming!'

The news was received with a mixture of excitement, dismay and bravado, tempered ultimately with a degree of fatalism from the more knowledgable of the Confederate command. Arguments went back and forth as to the merits of engaging the Yankees as opposed to letting them approach and fall under the guns and mines protecting the approaches to Hullbridge. Eventually the war party prevailed and so, much against the wishes of the navy - the Tennessee had not been properly worked up  and there were shortages of of just everything a warship needs to function efficiently, so the navy said - the plans were drawn. The high command would brook no arguments, the fleet must sail. With an air of resignation the orders were given and so the Confederate ships hastily raised steam and cast off in the early light of dawn to meet and engage the oncoming Union force - three gunboats and the ironclad, the CSS Tennessee.

Sailing in two columns, with the CSS Tennessee leading on the starboard side, the Confederate squadron made the short trip to Needle Point from Hullbridge at a steady, measured, almost leisurely pace. All pretence at being on a pleasure cruise quickly evaporated when the lookout on the lead ship of the port column, the CSS Morgan, urgently shouted out "Smoke ahead!" "Where-away?' Came the questioning reply. At this juncture Needle Point jutted out from the north shore and so the Union squadron were masked from view. The Captain of the CSS Morgan, his ship already turning to port so as to clear the point, guessed that any shipping coming from that direction would certainly be enemy in origin, immediately ordered the crew to beat to quarters. Almost as soon as his port turn was completed he ordered the helm hard over to starboard to engage the enemy.

CSS Morgan leads the CSS Gaines into a starboard turn prior to engaging the Union force. In the near distance the CSS Tennessee starts her turn followed by the CSS Selma. 

The starboard column of the Confederate squadron followed the turn of the port column but did not do so immediately, thereby allowing a gap to form between the two divisions. Fortunately, the CSS Tennessee reacted promptly to the starboard turn of the CSS Gaines and her captain immediately ordered her helm to follow suit. It was a ragged approach but with just about enough time and space to reform into a more suitable formation.

As the four Confederate ships cleared Needle Point in turn so they saw for the first time the approaching Union squadron - five ships against their four with two of these being monitors. This was going to be a hard fight indeed.


Something wicked, this way comes....The sloop USS Brooklyn leading the double turreted monitor the USS Monadnock and the USS Canonicus. Off their starboard bow the two 'double-ender' gunboats - the USS Sassacus leads the USS Metacomet

Meanwhile the Union flagship, the sloop of war the USS Brooklyn, had spotted the oncoming Rebels almost simultaneously and so a flurry of signals alerted the rest of the squadron. The enemy gunboats should be relatively easy to deal with but the low, squat bulk of a Confederate ironclad was a different game altogether. The monitors made ready, for this was to be their fight.

The Battle of Needle Point


The starting positions - The Confederate force are scrambling to get into a semblance of a fighting formation whilst the Union steam resolutely onwards.

Turn 1.  As the two sides were out of effective range there was no firing and so initiative was rolled. The Confederates rolled a 4 and the Union a 3 so the Confederates opted to allow the Union to move first.


The end of Turn 1. The Confederates attempt to get into a formation as the Union ships head off in two opposite directions. Is there a cunning plan here? The two monitors that appear to be heading straight towards the CSS Tennessee would argue yes!

Turn 2. Firing - of which there was plenty! CSS Morgan opens fire at the USS Sassacus at a range of 3 with her Forward Wide artillery (rated 2/3) so she rolls a single D6 which comes up a 5 with no modifiers so a potential hit is scored. The Penetration Factor of the Morgan is 3 opposed to the zero armour factor of the Sassacus. The roll is a 4 making 7 in total. This translates as 2 points of damage for reaching the score of 6 and a one in six chance of scoring a further damage point.The roll is a 6 so no effect, a 1 being required. The two point of damage are duly recorded. The CSS Morgan is not finished yet as she also opens fire against the USS Metacomet, again using a single D6 (her Starboard broadside is rated 2/3 so the range takes it down to 1D6). This time she rolls a 1 so misses.

The next to fire is the CSS Tennessee and she chooses to concentrate on the imposing bulk of the Union flagship - the USS Brooklyn. She is able to engage her with her full Forward Wide battery rated at 2/3 and also her starboard battery although as only a single hex of the enemy ship is within the arc the fire effect is halved to 1D6 - which is the default minimum, even allowing for the range reductions. She therefore 2D6 to hit. The dice come up with a 3 and 4 so there is one potential hit. Her Penetration Factor is 3 opposed to the Union ships 0 and the roll is a 2. Adding 3 to this makes 5 so a single point of damage is inflicted on the Union flagship. 

Finally for the Confederates, the CSS Selma opens fire against the USS Brooklyn with her Forward Wide artillery (rated 1/2) at her maximum range of four hexes. She rolls 1D6 scoring a 3 for a miss.

The Union return the complement with the USS Sassacus opening fire at the CSS Morgan at a range of three hexes. The hapless Rebel ship receives fire from a full Port broadside (her bow occupies a partial hex whilst her stern is fully in arc) and the same from the Forward Wide guns. In each case it is a single D6 but with different Penetration Factors - 3 for the heavier FW guns and 2 for the P guns. The CSS Morgans Armour Factor is 1. The Union ship scores a 6 with the FW artillery and a 2 with the P broadside which is a miss. The natural 6 is rerolled and comes up a three for no effect. There are two potential damage rolls to be made, both at plus 2 - this could be serious! The two damage rolls come up as a 6 and a 3. The natural 6 scores two points of damage and gains an extra two D6 rolls. One of these is the normal natural 6 roll and the other is because 6 and the Penetration Factor of 2 makes 8 so the roll of a 1 or 2 causes an extra damage point. First the natural 6 reroll - this comes up with a further 6! As one roll for a natural 6 has been made this will not require a further roll except for the passing 6 rule. 

As it stands the CSS Morgan has sustained two points of damage from the first natural 6, one point of damage from roll of 3 adjusted to 5 and then a further two points of damage due to the additional natural 6 roll. That is five points of damage in total but the USS Sassacus is not finished yet as she also have a further two D6 rolls each requiring 1 or 2 to inflict an additional damage point. She rolls a double 1! The CSS Morgan has sustained seven points of damage in total and as her hull factor is 3 this will mean a roll on the critical hit table. She is in very poor shape after that shattering opening salvo from the Union ship!


The USS Sassacus and the CSS Morgan exchange blows with the Rebel ship definitely coming second!

The critical hit roll is a 3 which is the gunnery factor for the nearest arc. Her Forward Wide artillery was reduced by one so is now 1/3.

The USS Metacomet also fires at the CSS Morgan, solely with her Forward Artillery which will mean 1D6. She rolls a 3 and so misses.

Next up is the forward turret of the USS Monadnock (rated 4/4) against the CSS Tennessee at a range of 4 hexes. She rolls 1D6 and scores a 6! Her natural 6 reroll is a miserable 1 but she has to roll for two potential damage rolls. These will be at evens as the Armour Factor of the Rebel ironclad is 4. The rolls are 3 and 1 for no effect.

That concludes the firing. 

For initiative the rolls are as follows: Union 3, Confederate 1. The Union allows the Confederates to move first.


The end of Turn 2. With her speed reduced the CSS Morgan reduces speed with the CSS Gaines following suit so as to maintain station. The CSS Tennessee moves into the centre to better engage the Union flagship only to find herself staring at the double turreted USS Monadnock! Meanwhile the CSS Selma attempts to join up with the CSS Morgan and Gaines to provide support but, the Union flagship is positioning herself off the stern of the Rebel ship. The other Union Monitor - the USS Canonicus - heads towards the two gunboats to provide some heavy support. The two gunboats have reduced speed to administer the coup de grace to the hapless CSS Morgan.

Turn 3. Once again the CSS Morgan resumes fire at both the Union gunboats - with 1D6 apiece. Against the USS Sassacus she scores a 4 meaning one potential damage roll - the score is a five so a further point of damage is recorded. Against the USS Metacomet she scores a 6! the natural reroll is a 3 for no effect. The two potential damage rolls are a 1 and a 6 which adjust to a 4 and a 9 (her Penetration Factor is 3 against the 0 Armour Factor of the Union ship). The natural 6 additional roll comes up as a 3 which in turn adjusts to a 6. The total damage inflicted is thus: one point for the 4, two points for the 9 (the original 6 plus 3)and two points for the 6 (the additional natural 6 roll scoring a 3). There is also an excess roll requiring 1, 2 or 3 to score an additional point - the roll is a 1 so six points of damage in all are scored against the USS Metacomet which will require a critical hit roll (her Hull Factor is 3).

The Critical Hit rolls come up as a 5 which is a flood and so immediately causes a damage point making seven in all.

The CSS Gaines resumes firing at the USS Metacomet with her Forward Wide artillery. She rolls 1D6 and scores a 4 for a potential damage roll. This is a 5 which is a further point of damage which takes the Union vessel to her Critical point of 8! This requires an immediate critical it roll which comes up as a 1. As she is unarmoured she has to take a further damage point making 9 in all. The USS Metacomet begins to settle by the bow. She rolls a 5 so will take five game turns to slip beneath the waves.

The CSS Tennessee continues to batter the Union flagship. She rolls 2D6 - one for each arc - and scores a 3 and a 4. The 3 is a miss but the 4 requires a damage roll. She rolls a 4 which is adjusted to 8 meaning two point of damage and an additional roll requiring 1 or 2 for a further point of damage. A 2 is rolled meaning that the Union flagship has sustained three points of damage in total.

The Union reply with the USS Sassacus firing at the CSS Morgan with both her Forward Wide and Port broadside. She rolls a 5 with the Forward Wide guns and a 3 on the Broadside which is a miss. The damage roll (which is at net plus 2) comes up 1 for no damage! The USS Metacomet fires at the CSS Morgan, from her Port Broadside and Aft Wide guns at full effect and her Forward Wide guns at half effect. The 3D6 (one for each arc) come up with a 2, a 3 and a 5 from the Aft Wide guns. Again the damage roll is a miserable 1!

The USS Monadnock opens fire at the CSSTennessee at a range of two hexes with both turrets. They are rated as 4/4 so 2D6 per turret. The score is three 4s and a 6 with the additional roll also coming up as a 6. This means that seven damage rolls are made, all at evens as the CSS Tennessee has an Armour Factor of 4. The dice come up with 1, 2, 2, 2, 4, 6 and 6. That is five points of damage with two natural 6 rerolls that come up with a 3 and 4. There are six points of damage in total and a Critical Hit roll required. This is a 1 which is either the loss of an armour factor or a damage point. 


After a furious round of firing, the Union have sustained further damage to their flagship (the USS Brooklyn) and have a gunboat sinking (the USS Metacomet). Whilst the CSS Morgan escaped unscathed this turn she is still in poor shape whilst the CSS Tennessee has taken a battering from the USS Monadnock.

The initiative for this turn would be critical. The Union rolled a 3 whilst the Confederates rolled a five. The Rebels opted to move first.


Despite her damage the CSS Tennessee rams the USS Monadnock. She rolls three D6 (her hull factor) each with a plus 1 as she is equipped with a ram. She rolls 1, 3 and 5 which adjust to 2, 4 and 6 meaning that she has inflicted 3 points of damage against the Union vessel. As the Rebel ship scored hit as against the Union monitor so she also runs the risk of sustaining injuries. The Union ship rolls a 1, a 2 and a 5 so the Tennessee sustains a point of damage. Each ship then rolls to see if the ships are locked together - if either player scores a 6 then the ships are deemed to be stuck together. The dice are a 4 and 6!


The situation at the end of Turn 3. As the USS Metacomet settles slowly by the bow, the USS Sassacus turns away from the oncoming Confederate line headed by the CSS Morgan, followed by the CSS Gaines and the newly arrived CSS Selma. The USS Monadnock and the CSS Tennessee are locked together in the centre with the USS Canonicus about to enter the fray. Meanwhile the USS Brooklyn prepares to engage the CSS Selma.

Turn 4. A sinking marker is removed from the USS Metacomet and the two locked ships roll to see if they are able to free themselves. The rolls of 1 and 3 are not sufficient - a 6 is required.

CSS Morgan fires at the USS Sassacus with 1D6 and scores a 4. Her damage rolls are at plus 3. She rolls a 1! Nevertheless, a further point of damage is scored against the Union ship. The CSS Gaines also tries her luck. She rolls a 6! The natural 6 roll is a 4 so there are three damage rolls to be made, each at plus 3. The rolls are 1, 3 and 4 which become 4, 6 and 7. That means five points of damage and a one in six chance of a further point. The roll of 3 is no good. The Critical Hit roll is a 6 - Fire! 

CSS Selma fires at the USS Brooklyn. She rolls 1D6 at plus one as the Union ship is adjacent and rolls a 6. the natural 6 additional roll is a 3. The damage roll, even with a plus one is a miserable 1. The USS Brooklyn replies. She rolls 2D6 (the CSS Selma is on a partial hex so fire is at half effect) each with a plus 1. A 4 and a 6 adjusted to a 5 and 7. That is three potential damage rolls but the 7 is ignored as this was a to hit roll. A 3, a 4 and 5 adjusted to a net plus one (penetration 2 versus armour 1) to 4, 5 and 6 means four points of damage on the Rebel ship.

The USS Sassacus fires at the CSS Morgan with 1D6 scoring a 5. The damage roll of 1, even allowing for the net plus 2 is not enough - the Rebel ship seems to be leading a charmed life!

The USS Monadnock and the CSS Tennessee are unable to fire at each other due to being locked together but are able to fire out of their unengaged sides. Obviously this only applied to the Confedrate ship and so she fires at the USS Canonicus. She is able to bring her Port Broadside and her Forward Wide guns to bear so rolls 4D6, each at plus one for the range. A 1, a 5 and a pair of magnificent 6s! This means no less than 6 damage rolls (the roll of 5 was adjusted to 6) at a net minus 1 (penetration 3 versus armour 4). A 1, two 3s, two 4s and a 5 means but a single hit on the Union ship.

The USS Canonicus fires back with 4D6 each at plus 1. A 3, a 5 and a pair of 6s follow. The two natural 6 rolls are a pair of 2s for no effect.This means five potential damage rolls at a net plus one (penetration 4 versus armour 3). The rolls are pair of 1s, a 2, a 3 and a 4. The 3 and the 4 become 4 and 5 meaning two points of damage are scored. This takes the CSS Tennessee over her critical point and indeed, is enough to sink her. She goes down in four turns - possibly taking the USS Monadnock with her unless she can free herself!


The situation after the firing phase for Turn 4. The USS Sassacus sustains more damage and more seriously, catches fire. The CSS Selma gets a rude awakening from the USS Brooklyn whilst the CSS Tennessee, determined not to go down without a fight, batters the USS Canonicus on her unengaged port side. She paid for her temerity though as a point blank salvo managed to sink her.

Endgame

I called it at this point as with the loss of the CSS Tennessee the Confederate force lacked the firepower to tackle the pair of Union monitors. I did play out the fate of the USS Sassacus and of course, that of the USS Monadnock who was still entangled with the CSS Tennessee as she started to sink. 

The USS Sassacus rolled for the fire Critical hit at what would have been the start of the next turn - she rolled a 6 which meant that the fire was uncontrollable and so would sink in D6 turns with a chance of blowing up each turn as the fire raged. The ‘sink’ roll was a 2 so it would take two turns for her slip beneath the waves. Her two explosion roll in each case was a 3 so although she was ablaze from stem to stern she did not explode.

It took two turns for the Monadnock to roll a 6 and so she was able to picot away from the sinking Tennessee and beat a hasty retreat. As hasty as a double turreted monitor could do that is. At this point images of the USS Reliant in the Mutara Nebula in full ‘Wrath of Khan’ mode with the USS Enterprise backing way came to mind - can’t think why!

Strategic Overview

The Confederates, despite sinking a brace of gunboats, definitely came off the worse as the loss of the CSS Tennessee would be a grievous blow. Of the gunboats the CSS Morgan would need extensive repairs, the CSS Selma less so. The two Union monitors proved their worth and would be repaired in short order. As for the two lost gunboats - there were plenty of replacements. The USS Brooklyn would need some repairs but would be good to go in fairly short order - the industrial capacity of the North would see to that. As for Hullbridge, it would only be a matter of time before she fell.

Tactical Overview

The rush of blood to the head of the captain of the CSS Tennessee as she decided to take on the Union monitors was palpable. Had she concentrated on the USS Brooklyn (as she started to at the outset of the action) then there would be little doubt that she would prevail. Wooden ships against ironclads would never end well and in a lesser way the fight that the USS Sassacus/Metacomet and the CSS Morgan/Gaines reflected that. The two Confederate ships had a modicum of protection that proved to be crucial.

Rules Overview

All worked well and for the first time I believe that every ship sustained some damage! At range nearly everything was rolling single D6s to hit which I am happy with but get up close and personal and you could find yourself in a world of pain. The only thing I want to inject some clarity to concerns ships firing when locked together. In the game this was ‘taken on the fly’ but I should formalise it in some way.

Something to think about.

In closing….

It was great fun and after all, that is what it is all about!


Sunday, 8 September 2024

Mimi and Toutou Go Forth*....Lake Tanganyika, 26th December 1915, Game Number 77

It is hard to believe that this is in actual fact the first game I have fought this year! I started one in February - an ACW naval test game - but never got around to completing it. So we are where we are, seven months on and gaming something entirely different!

Steamer Wars: Hexed

The following action was fought using the soon to be available hexed version of David Manley's excellent rules Steamer Wars which are designed for use with warships at the lower end of the scale so gunboats and the like are the main combatants rather than battleships and cruisers etc. Having said that I shall be featuring some cruisers in due course within this system for use in my planned African/Arabian/Madasahatta style campaign, more of which will feature in a later post. For now though, back to Lake Tanganyika where battle is about to be joined - after a few points about the rules.

This is a small action, even by the standards of Steamer Wars as it consists of a pair of Royal Navy motorboats (Mimi and Toutou) and a small gunboat (Kingani) and this has an impact on some of the rule mechanics, entirely intentionally naturally!

Rule Observations

Ships movement is determined by their size in the first instance and then by the player’s initiative. For this action this can be ignored as the largest ship - the Kingani (size 2) - will always move first followed by Mimi and Toutou (size 3). 

Spicer-Simson, as a personality, can be both a blessing and a curse to the Royal Navy but in this case his command ability is satisfactory as his roll of 3 equals no effect. 1 or 2 would have helped with initiative (not relevant for the reasons above) whilst 6 has a negative effect on morale and stops the Royal Navy from getting too close to the opposition.

Fundi, the engineer on the Kingani has the ability to increase the acceleration of the Kingani or with any engine damage however there is a risk of injury in the case of the former.


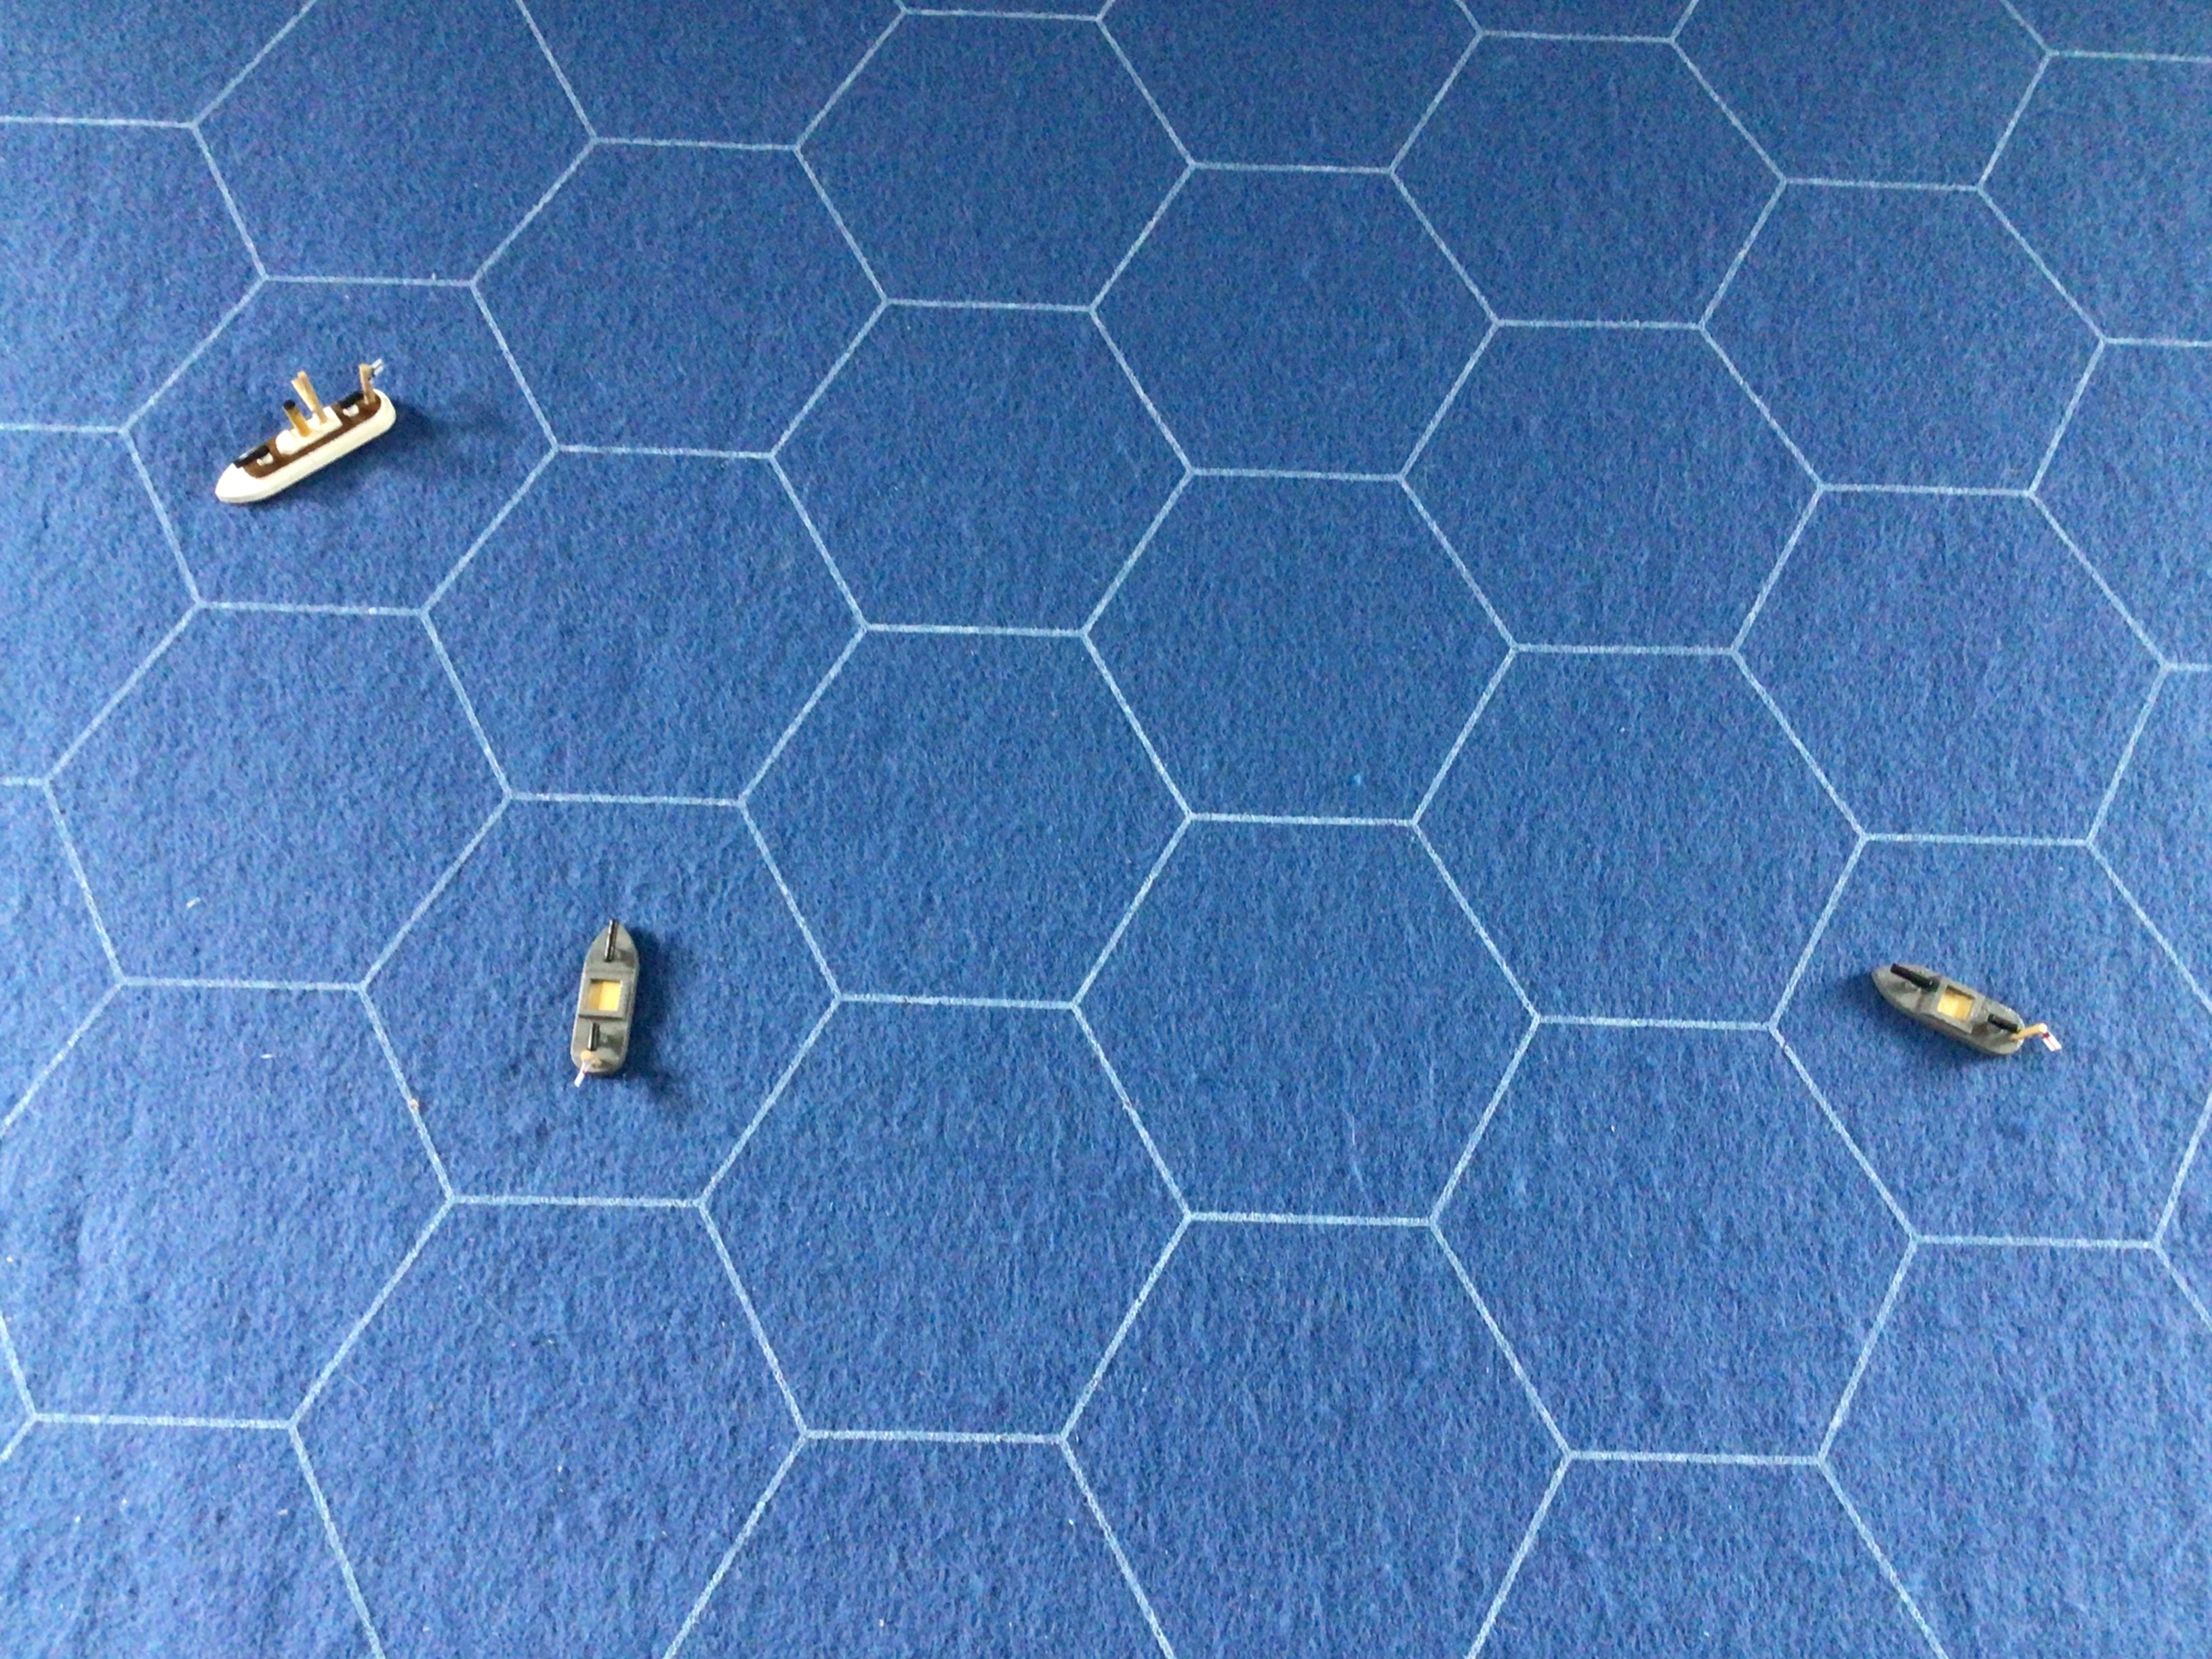
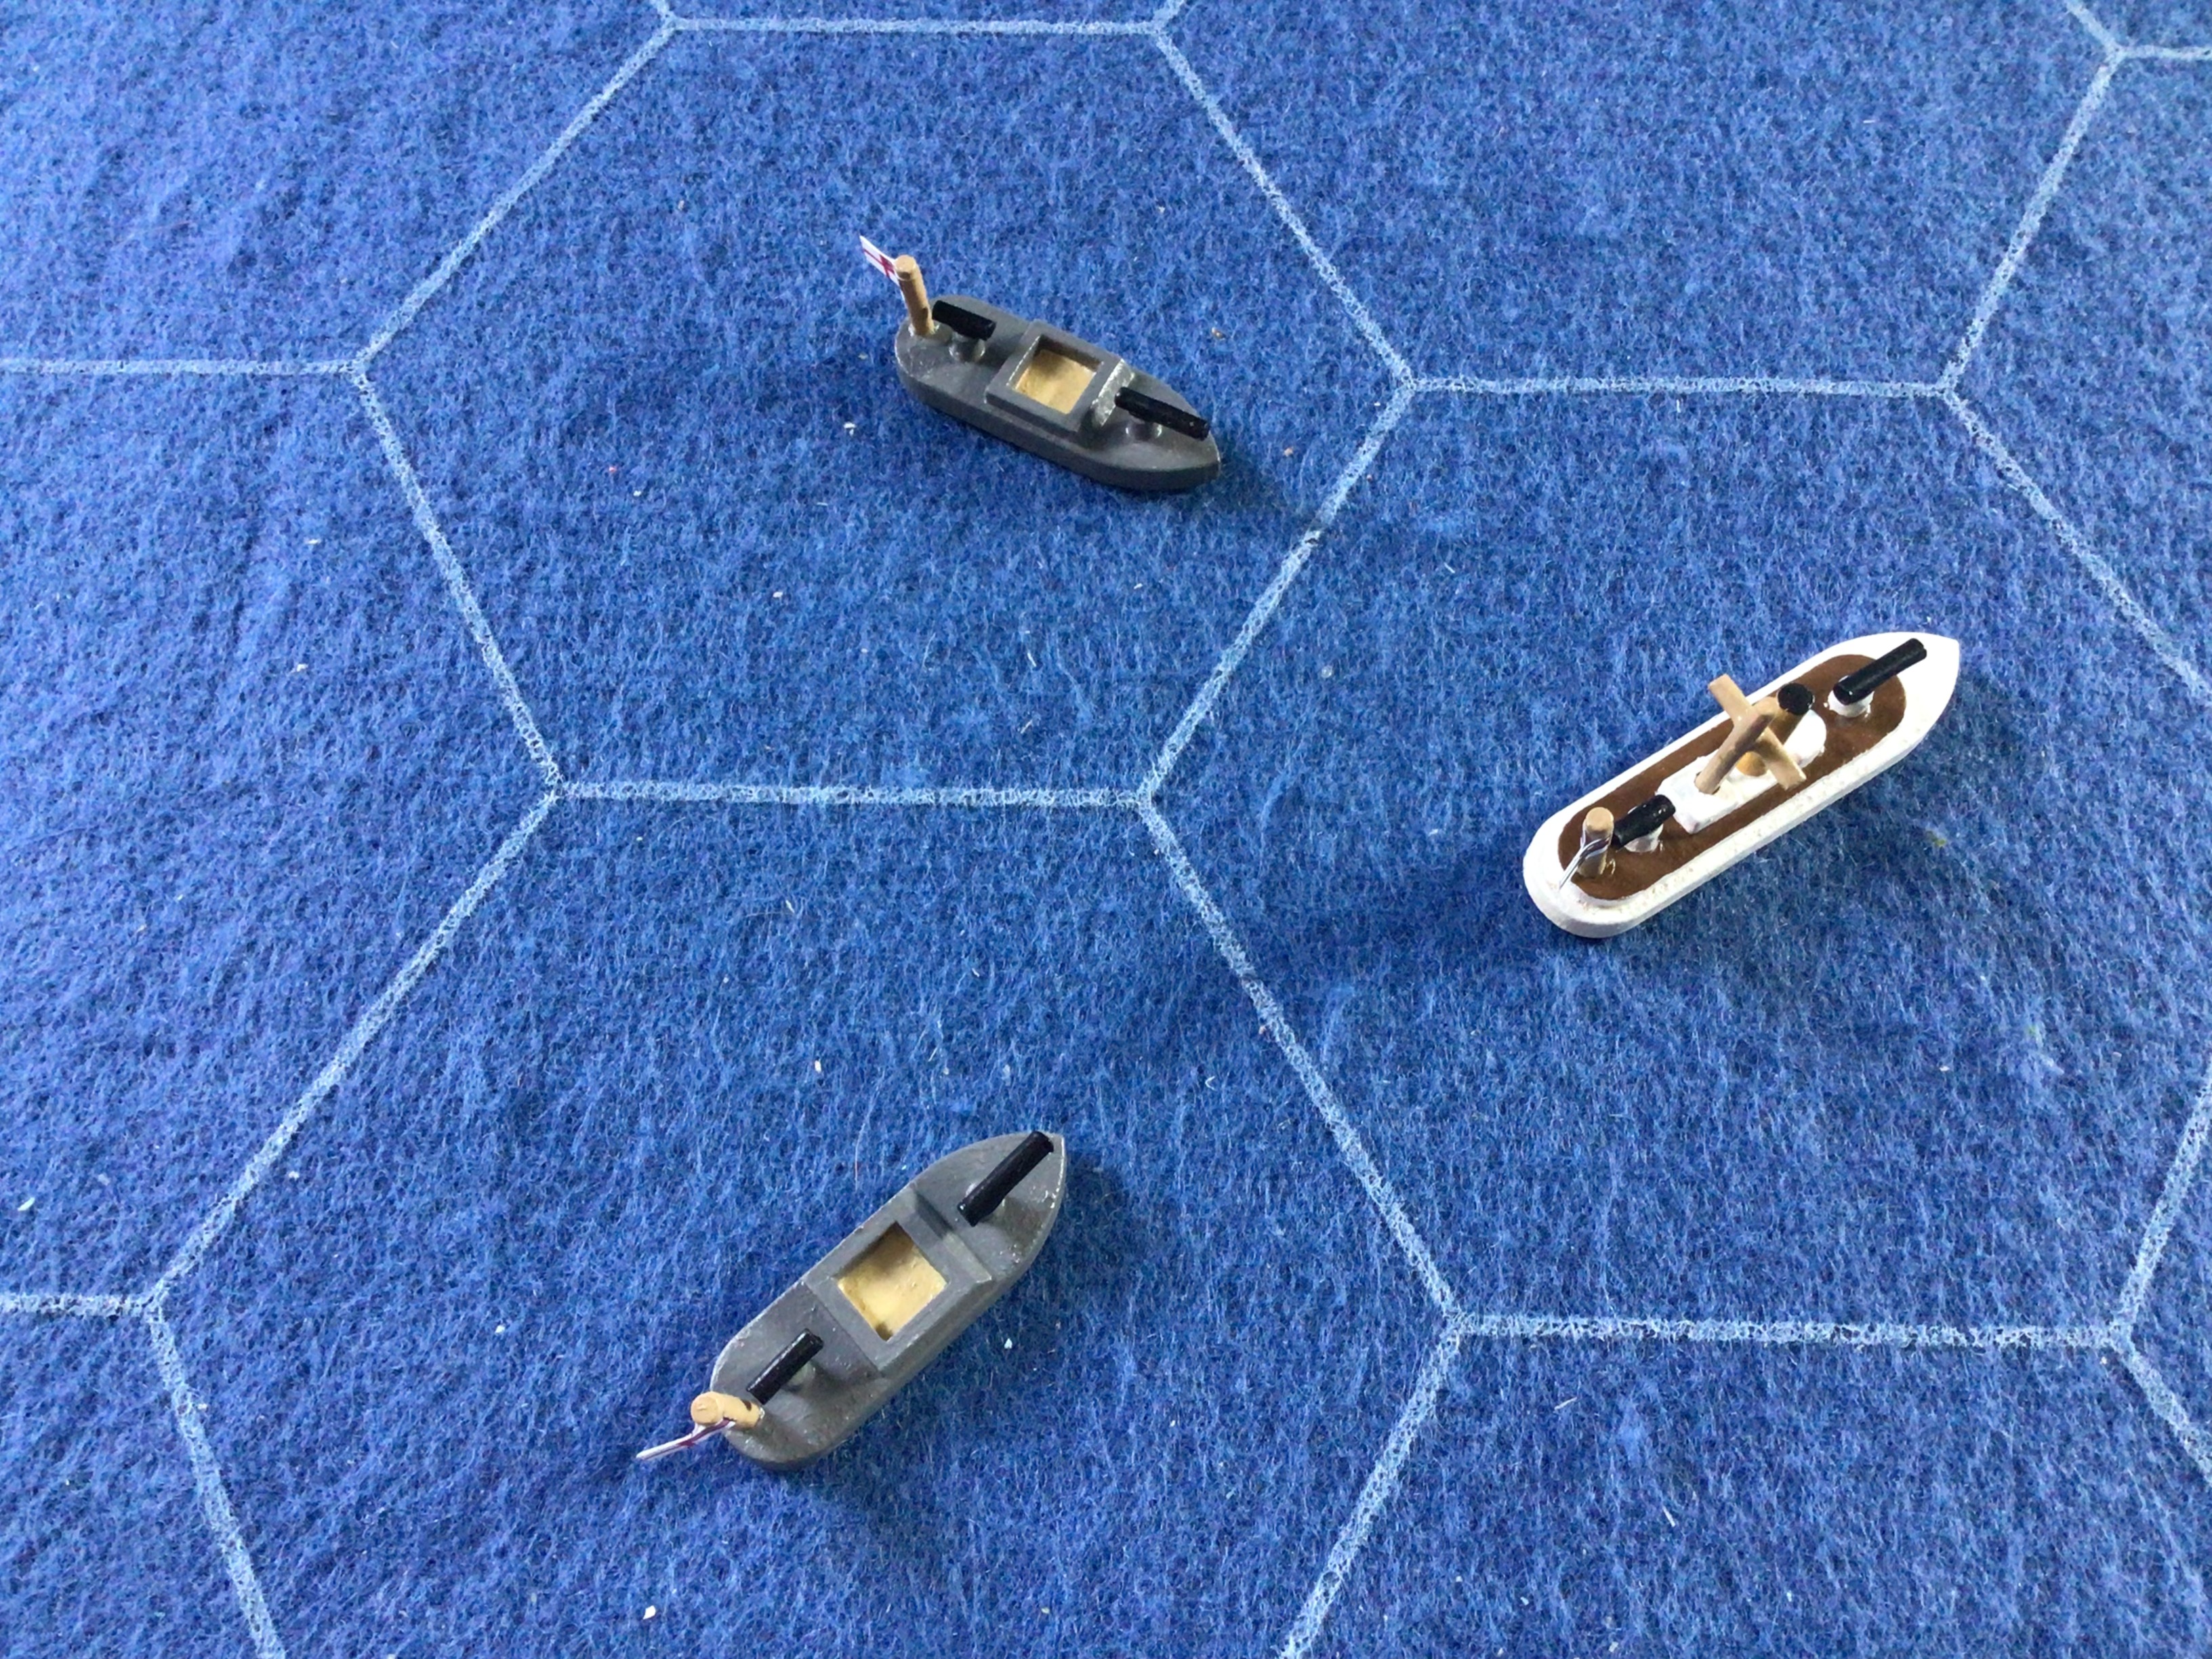
The starting positions. Kingani at the top of the picture being stalked by Mimi (left - Spicer-Simson commanding) and Toutou.

Lake Tanganyika, 26th December 1915

Action at last! The steamer Kingani appeared on its regular patrol route, oblivious to any obvious danger. Little did she know that she was about to be engaged by two small motorboats of the Royal Navy - even in this unlikely part of the world.

“It is both the duty and the tradition of the Royal Navy to engage the enemy wherever there is water to float a ship” Admiral Sir Henry Jackson, First Sea Lord

 Turn 1. The commander of the Kingani, currently cruising along at 8 knots had spotted the fast approaching Royal Navy motorboats and immediately knew that they could be in trouble. The only meaningful artillery they carried was deployed forward so the enemy could hang off his stern and engage the ship with impunity. The Kingani could not outrun them so she would have to turn to fight. She increased her speed to 9 knots and threw her helm over to port.

Mimi and Toutou immediately accelerated to their maximum speed of fourteen knots with Toutou attempting to get to the stern of the German vessel. Mimi however, went straight towards the enemy.


Turn 1 after movement. Toutou is poised to get behind the Kingani whilst Mimi has gotten uncomfortably close to the Kingani. Fortunately for Mimi, her headlong rush at the enemy vessel has positioned her bow just out of the firing arc of the enemy vessel (in rule speak Mimi’s bow is technically in the aft firing arc as the hex is bisected).

The Kingani is unable to fire at present due to restriction of her firing arc whilst Toutou is just out of range  - light guns have a range of 4 hexes whilst Kingani is 5 hexes away. Mimi rolls a D10 to hit with the following modifiers being applicable: -1 for the target being size 2, -2 for the target travelling greater than 6 knots, -1 for the firer moving greater than 7 knots (2 hexes) making -4 overall. The roll comes up as a magnificent 9! This is reduced to 5 which equals the minimum score of 5 required. A further roll of a D10 is required to potentially inflict damage. At this stage the only modifier is a -1 from the D10 roll as the firing weapon is a light gun. This time the roll is a 6, minus 1 making 5 overall. Against a size 2 target the effect is Light Damage which affects gunnery next turn, has a morale impact and requires a roll on the damage table. 

This is a 10! Royal Navy gunnery seems to be in fine fettle! This is a critical hit which requires the roll of a D6. The roll of 2 equals Heavy Suppression so next turn the Kingani, should it be able to fire, does so at a minus 2 alongside any other applicable modifiers.

As the Kingani has been suppressed she is required to check her morale. There are no applicable modifiers so it is a straight D10 roll which comes up as a 9 so her morale is unaffected.

Turn 2. The Kingani increases speed to her maximum of 10 knots (3 hexes). Mimi and Toutou, already at their respective maximum speed of 14 knots swing around on the Kingani who is unable to outmanoeuvre her harrying assailants.


Turn 2 after movement. With her helm hard over and at maximum speed Mimi positions herself at point blank range off the stern of the Kingani whilst Toutou approaches in a more measured way.

Once again the Kingani is unable to fire but now both of the Royal Navy gunboats are able to do so. Mimi fires first at a range of 1 hex. Her firing modifiers are as follows: size 2 target -1, target 6 knots or more -2, firer 7 knots or more -1, firer turned more than one hex side -1 making -5 in total. The roll is a miserable 1! Clearly the high speed manoeuvring of Mimi was sufficient to put the gunner off his aim! Toutou opens fire with the following modifiers: target size 2 -1, target speed 6 knots or more -2, firer 7 knots or more -1 making -4 in total. The roll is a 6 which is reduced to 2 which is a miss at that range (a minimum of 5 is required.

Turn 3. Kingani tries a new tactic. She decelerates at her maximum rate down to 8 knots (2 hexes) whilst putting the helm hard over. She is banking on the high speed of her opponents working against them as they frantically try to avoid coming into range of her artillery. Mimi has to take drastic action to avoid doing exactly that and so decreases her speed down to 12 knots (3 hexes) in order to maintain her advantage. Toutou, once again adopts a more thoughtful approach - keeping her speed up but avoiding excessive manoeuvring - and gets her reward by appearing of the port aft quarter of the enemy vessel. Kingani is in deep trouble.


Turn 3 after movement. Kingani slammed on the brakes and turned as tightly as she could but to no avail as Mimi, by dint of some braking and swerving of her own, managed to stay on the enemy ship’s stern. Meanwhile Toutou has nefarious designs of her own as she prepares to open fire at point blank range.

Once again Kingani is unable to fire and once again, both Mimi and Toutou are able to and at point blank range! Mimi fires first and the modifiers are as follows: target size -1, target speed greater than 6 knots -2, firer speed greater than 7 knots -1, firer turned more than one hex side -1 so minus 5 in all. The roll of 7 was not enough as with a whopping minus 5 in modifiers leaves a score of 2. This is 3 below the minimum required to score a hit.

Toutou has a number of modifiers of her own but has only turned a single hex side so hers are -4 in all. Again the roll of 2 is not enough. 

Thoughts so far.

Excessive speed and manoeuvring certainly wreak havoc with gunnery - even when you are able to fire!

Turn 4. Kingani drops her speed to 7 knots and continues her attempt to at least get in a firing position. Mimi decelerates to 9 knots and closes on the aft port quarter of the enemy ship. Toutou similarly slows - 12 knots in her case - but needs to turn rather more than Mimi which will affect her gunnery.   


Turn 4 after movement. Kingani continues in her attempt to shake off her dogged pursuers to at least cause one of them to overshoot her. Thus far this has been unsuccessful. Mimi is on her aft port quarter whilst Toutou is now positioned off her stern. All three vessels have slowed down.

Kingani is still unable to open fire but as ever, both Mimi and Toutou are able to do so. This time Mimi only has -4 in modifiers whilst Toutou has a -5. Both need to score high to hit - 9 and 10 respectively. The scores are 3 and 8 which is not enough in either case, a minimum of 5 being required.

Turn 5. Kingani slows even more - this time down to 5 knots (2 hexes) meaning that she will be an easier target to hit but there is a plan of sorts. Mimi slows even more - now at 7 knots (2 hexes) - whilst Toutou carries on at 12 knots (3 hexes).


Turn 5 after movement. Kingani still has both Mimi and Toutou dogging her every move and preventing her from engaging either. Her captain is becoming increasingly anxious as he can see no successful outcome to this action unless….

Kingani is still unable to open fire but as ever, both Mimi and Toutou are able to do so. This time Mimi only has -4 in modifiers whilst Toutou has a -5. Once again, both need to score high to hit - 9 and 10 respectively. Mimi rolls a miserable 3 and misses whilst Toutou scores a truly magnificent 10! Her damage roll is -1 due to having a light gun. The roll is an equally impressive 9 which drops to 8. This is heavy damage so she is suppressed for next turn and has three rolls on the damage table. 

The first roll is a 1 which is a heavy suppression next turn (-2 gunnery modifier). The second is a 4 which knocks out a randomly determined gun - Kingani only has a light gun forward so this has been knocked out! The next roll is an 8 which is engine damage. Her speed is reduced by 1D6 knots - the roll is a 4 which takes her speed down to 3 knots. Fundi, the engineer, adds a modifier to any non-critical hit engine damage repair attempts starting next turn.

Kingani requires a morale check due to being suppressed and damaged. The D10 roll has two modifiers each of -1 - the first is for sustaining actual damage (the loss of the gun) and the second is because she is now disarmed. The roll is a 1.

As the adjusted score is now -2 which is a ‘Flee’ result. The vessel must turn away from the enemy and attempt to leave the table. If the vessel is unable to move it surrenders.

Endgame

I decided to call it there as the likelihood of Kingani getting away at 3 knots - even if Fundi works his magic - was pretty remote. All Mimi and Toutou had to do would be to hold station and batter the Kingani into scrap so a fluttering white handkerchief would doubtless have been seen as she surrendered (her only option really).There would have been a chance of the Toutou colliding with the Kingani but the outcome would have been the same. Spicer-Simson had secured his place in naval history although not in quite the same way as historically - the gunnery was abject to start with although rendering Kingani’s gun hors de combat was historical!

The rules worked really well and are suitably manic. Gunnery and high speed manoeuvring do not go together comfortably and so once Mimi and Toutou had gotten into Kingani’s aft and stern and more importantly out of her forward firing arc it was only going to be a matter of time - especially as Kingani obligingly slowed down.

This was a lot of fun to fight despite the skewed initiative due to the differing ship sizes. The next action will feature five ships and initiative will certainly play its part. In the meantime though, I need to think about some more ships for Lake Tanganyika - Belgians and assorted odds and ends oh, and a gun barge….

It is good to be back!


Available really cheaply secondhand and a great companion to Peter Shankland’s The Phantom Flotilla

*Mimi and Toutou Go Forth: The Bizarre Battle of Lake Tanganyika by Giles Foden - an excellent account of the expedition and battle and a constant source of inspiration.