Wednesday 30 May 2012

Passing the Khyber and Collecting 200 Figures


The Roghan valley - serene, peaceful and quiet (at the moment).

The North West Frontier has been very quiet of late and I am sure that suspicions in various quarters are abounding with the prospect of myself, as usual, having gone cold on the idea and to be looking to offload the whole lot at a knock down price. To be fair I have been guilty of this on more than one occasion over the years but, in my defence, the Roghan Valley project is very much a long term idea and so progress will be modest and occasional. Suffice it to say moves are afoot and I could not possibly comment any further.... I need to add some additional figures to round off the units so three more boxes of AIP figures will suffice to finish this stage of the acquisition process. I have also acquired suitable paints for the figures - this in itself was a challenge simply because of my time warped 1973 enamel based painting technique being largely unsuitable for 54mm soft plastic figures!

Models aside though, the first actions to take place in this area will be using the block armies in any event and so watch out for some stirrings in the hills as the Jalfrezis consider their opening (and no doubt diabolically nefarious) move against the hated infidels.

Monday 28 May 2012

The Napoleonic Lightbulb Moment


Salamanca 1812 - If you look closely you can just about make out Wellington's chicken drumstick!

Now here's a thing. It suddenly came to me that it would be a good idea to fight a Napoleonic battle on my Hexon terrain using the period variant of Bob Cordery's Memoir of Battle 19th century rules that I am currently working on. These are basically a tweaked version of both Bob's rules and elements of those contained in Command and Colours: Napoleonics.

So far so good.

Then I got to thinking that perhaps fighting the battle using the Hexon terrain and those very nice blocks that come with the game rather than my own would also be a good idea.

Again, so far, so good

I know of many gamers that have used 3d terrain and painted armies to try this approach so I am wondering if using the blocks and 3d terrain is a first! Of course the action will need to be Peninsula based but that is no problem - I have sufficient books in the library to provide a useful  source of reference - as I could probably just use one of the scenarios with the game with a little improvisation.

I reckon that will be my Jubilee weekend game sorted out - the only problem will be whether I go for a historical refight or the old standby of a hypothetical bash.

One to ponder for the next few days methinks.

The Curse of Ebay and a case of Manifest Destiny?

You may recall that I had recently taken the decision to acquire the final starter set of Axis and Allies: Angels 20 as part of my 'back to work and because I'm worth it style L'Oreal moment'. The order was duly posted via a 'Buy it now' and I eagerly awaited the receipt of this missing link so that I could crack on with the repaint.

Imagine then, my disappointment when I received an email from the trader telling me that he had refunded me in full as he was now out of stock (despite his listing saying that he had 10 available!). This is the second time this has happened to me in recent weeks and for the same item! It seems that as the set was so popular many suppliers are having problems meeting demand so I guess I will have to wait a couple of weeks and then try again!

In the meantime though, work continues with the Napoleonic variant of Memoir of Battle, labels for my blocks and also the dawning realisation that perhaps, just perhaps, the wars of 1793 to 1815 may provide me with more than sufficient gaming material and variety to last the rest of my lifetime!

It kind of feels a little destiny like but I am sure I will get sidetracked with the best of them in due course!

Sunday 27 May 2012

'There I was, at 20,000 feet....'


Artillery, horse artillery, machine guns, mortars and anti tank guns - with vehicles to follow.

It has been a busy couple of days for a variety of domestic reasons but I have made some progress on a couple of fronts. Firstly, I have placed the order for my final starter set of Axis and Allies: Angels 20 and also the decals from Old Glory UK. I have held off from getting the P40s and the Italian aircraft for the time being as I will have more than sufficient to be going on with as it stands! I am really looking forward to making a start on these as using Mr Fox's collection is all well and good (and many of the painting 'tweaks' he has thus far applied look very effective) but I would like to get my own toys at some point!

I have also had a rethink about the block labels and have decided to change the artillery symbol and amend all the 20th century kit. I am going to use standard NATO style symbols with some current US army versions rather than stylised representations of weapon and vehicle types. This will not only be easier to produce but will also ensure that the 3d military map effect (or, the cynical amongst us could observe - the 3d board game!) is closer to what I originally intended. The first of the new types you can see above.

Thursday 24 May 2012

Memoir of Waterloo


That awkward moment when the obvious appears before your eyes!

Now here is a thing. Whilst I have been busy dicing and slicing Bob Cordery's Memoir of Battle 19th century rules to incorporate the earlier smooth bore era I suddenly had a brainwave. I reckon that most of the game system (sans the command cards) used in Command and Colours: Napoleonics could be very simply tweaked into a Memoir-ish set of rules. As a result of this brainwave I shall spend a couple of days seeing if it sticks and if so will try it out with the block armies over the weekend.

Of course if I was tackling a Peninsular based campaign I would just go ahead and use the game blocks but I am not and so I won't - at least not yet in any event!

Tuesday 22 May 2012

Back in the groove and on the horns of a dilemma....Again!

Today is day two of my latest contract and I found out this afternoon that I have made the cut for a permanent role based over near Embankment (actually Charing Cross to be more specific) with another company which is further good news. I have been contracting for just over two years and whilst it is lucrative it is also very wearing as you seem to be permanently on the look out for your next contract! A permanent position then, albeit in a less than convenient location for travel purposes, has much to commend it. The final third round of the interview process is next week and so there may be much to ponder in the Crook household over the next week or so.

Now that I am back in the land of the wage earning masses my thoughts have turned inevitably to the small matter of the outstanding gaming projects that needed a cash injection in order to complete the same. I have given this some thought over the lunchtime period and reckon that the following looks about right and also has the advantage of not being overly expensive.

  • Additional Hexon terrain to cover the new 6ft by 4ft playing table - probably the most expensive outlay and I reckon I would not get much change out of £100.
  • Decals and additional aircraft for Angels 20 - I need another starter set and then a dozen single models for this tranche of the project - four P 40s and eight Italian fighters.
  • Napoleon Returns (the Volley and Bayonet 1815 campaign booklet) and the Spanish expansion for Command and Colours: Napoleonics.
  • Around a dozen Zvezda 1941 German and Russian vehicles and a couple of boxes of Plastic Soldier 15mm support weapons - Russian and German if they are out yet. I was tempted by some of the PSC 15mm Panzer 4s or even the Stug 3s.
  • A couple of Memoir 44 bits - I am missing an expansion and would like to get the second campaign book.
Taken as a whole this is quite a list but individually they are relatively modest. I reckon that as I have just gotten back to work I must be due a little bit of a treat - problem is, which one!?

Monday 21 May 2012

Putting the Battle in Memoir of Battle....Part 2

Following a pretty busy day yesterday with some friends around for Sunday lunch and so I was unable to get to a play test of the suggested 'tweaks' for Bob Cordery's 'Memoir of Battle' rules. In the end this did not matter though as Bob was able to do so with the results appearing in a rather splendid battle account on his blog -
wargamingmiscellany

The action was based around a small punitive expedition being sent to punish some recalcitrant tribesman - I will not divulge any further information on this so you will have to read Bob's blog! - and as such was a fairly typical 'Colonial' scenario. One of the points he raised was the effect on poorly trained troops and by implication, the ease with which they appear to 'disappear' once the shooting starts. This in turn has made me look at how poor troops function and perhaps the negative impact of a flag result is a little on the harsh side with the additional strength point loss for each flag result.

I am thinking that perhaps allowing for militia/raw units to lose a strength point for each pair of flag results instead may be a viable alternative as I strongly believe that such troops once forced back should have some facility for losing strength simply due to the likelihood of headcount deciding that discretion is the better part of valour!

More testing and much to ponder further methinks!

Sunday 20 May 2012

Putting the Battle in Memoir of Battle

The past few days have seen a flurry of emails between Bob Cordery and myself concerning some 'tweaks' to his superb 19th century rules inspired by Battle Cry, Memoir 44 and the work of Jo Morschauser called 'Memoir of Battle'. I have used these rules for a number of games now and so they now form the basis for all my 19th century adventures in conjunction with my Hexon terrain and the block armies. The rule mechanisms are smooth to play with and the entire set is contained in no more than two sides of A4. They are frankly a superb way to fight a battle and capture that all important period feel very nicely indeed. All of my land based games this year have been fought using these rules with only a couple of tweaks from myself - primarily to do with the fact I have been using blocks and roster sheets etc. There is one key area though that could use a little revision and so I have been haranguing Bob with various ideas around this. As usual my first efforts were very much an exercise in over engineering until Bob came up with some simpler ideas (with the same end result!) which I then proceeded to change again! The area in question is the consideration of unit size and quality.

Using the rules as they are provision is made for elite units to gain an extra strength point (making a typical infantry unit of 4 bases/blocks 5 strong) whilst poor units lose one. This represents the disparity in quality from the point of view of unit endurance rather neatly as you would expect an elite unit to stick around for longer than a militia formation with all things being equal. What this approach fails to address though is the question of unit size. For example, a unit that has been in the field for some time; fought a few actions and sustained significant losses and so is urgently in need of reinforcements may well be classed as veterans compared to a newly raised unit of untrained conscripts. In this instance then should the veteran unit (I am treating elite troops in the same vein as veterans as a reflection of their rigorous training etc in the case of the former and their combat experience for the latter) be physically larger (5 strength points) as opposed to the raw/militia units (3 strength points)? It is my belief that size and quality are two separate issues and so if one is attempting to model a specific campaign (as I am currently doing with 1815) then these factors need to be considered in a transparent fashion.

Similarly, at the present time there is no real difference in combat terms between a crack unit of guardsmen and a conscript unit of Marie-Louises. A further complication with this is that there is no facility for the reduction in unit effectiveness as losses mount up.

Size Matters

My idea around this is fairly elastic in that the numbers involved can be scaled up and down as required by the scenario or battle being represented. As it stands at the present the starting base unit size for infantry, cavalry and artillery is 4, 3 and 2 bases/blocks respectively. Supposing you decide that your average battalion strength for the army you are modelling is, say 600 men. Well, if this is represented by a 4 base/block unit then it can be seen that 1 such base/block is roughly 150 men. Armed with this it is easy to scale up or down an actual unit size by simply adding or subtracting a base/block for each 150 men in the actual formation. The same procedure can be applied to cavalry and for guns I would normally use a base of say, 4 pieces per strength point. From a game perspective I would not recommend going more than two bases/blocks larger than the norm simply to keep the units manageable. In theory a larger unit should be capable of inflicting more damage than a smaller unit, all things being equal. With this in mind I am experimenting with allowing units that are larger than normal (larger than the 4, 3 and 2 for infantry, cavalry and artillery respectively) a +1 hit bonus to any scoring combat roll whilst those that are smaller (which is a strength of 1 or 2 for infantry and 1 for everything else) will suffer a -1 to any scoring combat roll. As an example then a unit starting at strength 5 will get a +1 bonus, when it falls to 4 and 3 the damage will be as per normal and when it falls to 1 or 2 then it will go down to a -1 hit.

Quality and Quantity

From a pure combat perspective this is very easy to factor in. My thoughts at the present are to use a +1 hit bonus to any scoring combat roll for troops rated as elite/veteran and a -1 for troops rated as militia/raw. Using this approach will mean that a larger guards unit (e.g. any of the British guards formations at Waterloo averaging around 1,000 men) will gain a +1 for its size when undamaged and a +1 for being rated as elite troops. The qualitative bonus stays throughout whilst the numerical bonus will diminish over time as casualties mount up.

Combat Behaviour

The rules as they stand make no allowance for how troops react to adverse results. By this I mean that units merely follow the dice results regardless of of the calibre of the unit or even how it is actually fighting. It is my belief that elite/veteran units will behave differently under duress than militia/raw troops. In order to reflect this I am proposing that elite/veteran units are allowed to ignore the first 'flag' rolled against them from an attack. Thereafter they may either retreat a hex or take a strength point loss for each additional flag rolled. Militia/raw troops must take a strength point loss as well as the retreat for each flag rolled against them - which will have the effect of making them both brittle and in need of some careful handling and positioning. This leads me to the question of cover. Whilst non artillery units drop a dice when engaging units in woods and towns (fieldworks and fortifications are handled separately) I am not convinced that this goes far enough. I think that troops in such a feature would be more difficult to order about with the same degree of effectiveness as in the open and so I am proposing that all troops deployed in such terrain ignore the first flag rolled against them and that any subsequent flags from the same attack can be taken as either a retreat or as a strength loss. Finally, I am also proposing that troops deployed in open order (infantry or cavalry) can ignore the first flag result and can treat any subsequent flags as either retreats or strength point losses. All of this could make for some confusing combinations and so I need to establish some orders of precedence to make order out of chaos! Essentially all troops making use of terrain  observe the combat effects of the terrain instead of any other effects that may be applicable. This will have the effect of making troops in terrain largely equal in terms of how combat affects them - more or less.

Conclusion

Apologies for the rather long winded explanation of what is in effect a series of simple ideas! To summarise my thinking I am proposing the following:
  • Elite/veteran troops ignore the first flag scored against them and can treat other flags as either a retreat  result or a strength point loss.
  • Elite/veteran troops add a +1 bonus to any hits scored by them in combat.
  • Militia/raw troops take a hit as well as a retreat result for any applicable flag result.
  • Militia/raw troops take a -1 from any hits scored by them in combat
  • Troops deployed in open order (infantry and cavalry) effectively treat combat results the same way as elite/veteran troops in that they ignore the first flag scored against them and can treat other flags as either a retreat  result or a strength point loss.   
  • All troops in cover (woods or BUA) ignore the first flag and can treat other flags as either a retreat or a strength loss. 
  • Units that are larger than the norm for their type (the norm being 3 or 4 for infantry, 3 for cavalry and 2 bases/blocks for artillery) gain a +1 hit bonus to any hits scored by them for as long as they are larger in size.
  • Units that are smaller than the norm for their type (the norm being 3 or 4 for infantry, 3 for cavalry and 2 bases/blocks for artillery) take a -1 from any hits scored by them for as long as they are smaller in size. This means that units sized at 1 or 2 bases/blocks for infantry and a single block for cavalry and artillery will take a -1 from any hits scored.
Some of the points contained above are at variance with what I had been discussing with Bob over the course of last week and so represent further thinking on my part. For a much fuller explanation of the rules and how they work I strongly recommend checking out Bob's blog -

wargamingmiscellany

for many useful insights to how these rules came about and evolved over time.

For my own part adopting this approach will enable me to model actual historical units far more closely than previously as well giving some variation as to how units function on the battlefield. They may not be all things to all men but are certainly something to consider and they will be tested soon.

Friday 18 May 2012

The Road to Waterloo


The Scot's Greys in action

Despite the recent dabble in the waters of the Mississippi I am still looking to tackle the 1815 campaign with a combination of Columbia Games: Napoleon for the strategic dimension and my Hexon collection in the conjunction with the block armies for the tactical side. I shall be using Bob Cordery's Memoir of Battle rules (with the dubious benefit of my inevitable tinkering!) and in the meantime I have been organising the roster sheets and translating the units into their equivalent block formations. The basic concept behind this is that the forces and indeed the action itself, will be largely telescopic in that should I need to fight a brigade level action the blocks will be individual battalions and for divisional level game the individual units become, in effect, brigades. The beauty of Bob's rules is that such an approach is perfectly feasible but for me to exploit this versatility I need to have three levels of organisation.

The divisional level organisation is already in place as I will be using that supplied in the aforementioned board game. The game uses a step reduction system and each division typically will have a combat value of between 2 and 4. I am tempted to fight a game using the divisions with a block representing a point of the combat value by way of an experiment.

The roster sheet I am preparing at present is at battalion level and so after this I will need to look at the brigade level version. The divisional level organisation combat value will need to have both a brigade and battalion level equivalent so that casualties at the lower level can go towards the adjustment at a strategic level. This all sounds rather cryptic but once I have it all written down it will make a little more sense - at least I hope so!

Back in the wide blue yonder....


Bf 109 E 4 Tropical - simple paint scheme and very effective looking

Wednesday evening at the club was the usual night of good fun and banter. This week saw us taking to the skies once again courtesy of Mr Fox and his collection but with my pair of Bf 109 Fs making their debut. We also had a new recruit to the club, a young chap that despite being a die hard Warhammer 40K and Lord of the Rings player was more than happy to give a historical (or should that be hysterical?) game a go. We duly obliged and so Mr Fox picked a brace of Hurricanes and his erstwhile young wingman a pair of Spitfires. We were playing a scenario set over Malta and so the bad guys (under the command of yours truly) consisted of the aforementioned 109 Fs and a brace of Italian Folgore fighters. I should point out that the Italian planes flew very nicely, looked the part but were sadly undergunned - definitely a triumph of style over substance!

As ever the action was fast and furious (unless you were driving a Hurricane of course!) and ended when the 109s blew both of the Spitfires out of the sky (literally, none of this 'death by a thousand cuts' nonsense) and dented one of the Hurricanes courtesy of one of the Italian fighters.

The young recruit enjoyed the game (I hope I did not put him off too much as his command did not last particularly long!) and is now considering buying the game for his own purposes which can only be a good thing as new blood in the hobby is always welcome.

Mr Fox was pleased to see the game out having not been shot down and so we followed this up with the start of 'one on one' dogfight with our preferred aircraft of choice - in his case a Hawker Typhoon and in mine, an FW 190 A. There was much furious manoeuvring and Mr Fox managed to coax the lumbering Typhoon into some truly herculean turns in his attempts to avoid the much nimbler FW 190. We traded shots and I managed to fire at him more than he did me but to no effect. Sadly we ran out of time to finish this but I would like to tackle this again.

Mr Fox also showed me some of the decals he had acquired from Old Glory 'Lil' Flyin' Fokkers!' range which I had also planned to get at some point. They are very nice indeed and so the order will be sent off forthwith. My other pair of 109 Fs have arrived and I am also getting another two starter sets. The rationale behind this is so that I can use 4 Me 110s with two pairs in different paint schemes. I am planning to repaint four of the 109 Es in the tropical scheme for early 1941 and also 4 of the Hurricanes in the desert scheme.

Much to plan and ponder but in the meanwhile the games have been enormous fun to play and so once again many thanks to Mr Fox for the use of his collection.

Wednesday 16 May 2012

It took 2 1/2 times the picture....


I think I actually tried 147 ways to get a job using abilities that some would consider to be unnatural....

....But after 75 days I have FINALLY landed an offer of a contract. It means work and back to the treadmill but at least the wolf can be safely kept from the door!

I start on Monday as well.

All I need now is a successful evening at the club (where my pair of Bf 109 Fs are taking to the skies) and for Chelsea to beat Bayern Munich on Saturday and life will be even more fine and dandy!

Monday 14 May 2012

Back to Block - Moving into the 20th Century


Appearing on a Hexon table near you soon....

I plan to tackle the labelling of the last coloured set of blocks this evening - the olive set. Once this has been completed I can then apply myself to the 20th century units - MGs, Mortars and anti tank guns and of course, vehicles. I have prepared a sheet for the first three which is pictured above. They are very stylised but look the part but they have given me food for thought in one respect. For WW2 I want to be able to use individual blocks for the support weapons as well as in batteries - although the larger formations will feature on a scenario specific basis. What I have opted for is to use a marker for the first hit and then removing the block for the second where I am  using the block to represent single weapons. One to consider when I am testing them for WW2 actions. For WW1 I will probably use the standard two or three block organisation as per the suggested sized in Bob Cordery's Memoir of Modern Battle (MoMBAT). The vehicles are next.

Sunday 13 May 2012

The Attack on Fort Duvet, 1862....Game Number 10


On the banks of Yahoo River - the narrowness of the passable ground can be seen in the lower centre of the picture and Fort Duvet, overlooking Blueberry Bend, guards the river in both directions.

The action that follows is typical of that which featured often during the Union campaign to enable the mighty Mississippi River - the 'Great Father of the Waters' - to flow 'unvexed to the sea'. It is not based on any particular battle fought on and along the river although the title may give you a clue, as would the number of the game itself although that was purely coincidental!


Fort Duvet, overlooking Blueberry Bend with the town of Blocksville in the background.

The Confederates have established a fort on a bluff overlooking Blueberry Bend along the Yahoo River just outside of the town of Blocksville, Tennessee. Thus far the guns have deterred any Union attempts to travel upriver and so a combined naval and land operation has been planned in order to attack and destroy the fort. If successful this will enable the next phase of the Union campaign to take place and will force the Confederates to devote precious resources to prevent any further enemy advances. The Confederates had gotten wind of this plan and had hastily assembled a scratch force to hold the landward approaches to the fort and just to ensure that this particular stretch of the river remains firmly in their control, the armoured ironclad ram Arkansas has been ordered to support the fort and to deter any water borne Union assault.

Unfortunately for the Confederate cause the temperamental nature of the Arkansas's engine meant that she was unable to prevent the Union forces landing some miles downstream of Blueberry Bend. Her engines have now repaired and so she is available for operations against the Yankee invaders.


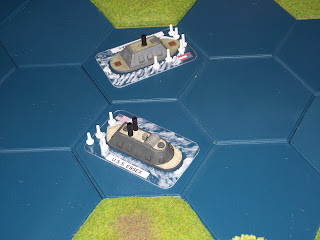
The approaching Union forces - note the U.S.S. Carondelet and the U.S.S. Essex at the top of the picture.

Union

4 x 4 block line infantry

2 x 3 block light infantry (massed skirmishers from the above)

2 x 2 block gun batteries (smooth bore field artillery)

1 x 2 block cavalry regiment

1 x 2 block command (General Odysseus Monroe Gable)

U.S.S. Carondelet (armoured steam ship, smooth bore heavy artillery)

U.S.S. Essex (armoured steam ship, smooth bore heavy artillery)

42 strength points in total - Exhaustion level 16 with 8 points required on either line infantry or the gunboats.

Confederate

2 x 4 block line infantry

1 x 3 block line infantry

1 x 3 block light infantry (massed skirmishers from the above)

1 x 2 block gun battery (smooth bore field artillery)

1 x 3 block cavalry regiment

1 x 2 block command (General Gaylord Beauregard Hastings III)

In Fort Duvet:

1 x 3 block artillery battery (rifled heavy artillery) - Note: these guns may not be moved and may only fire at targets on the river.

The fort guns may not fire at any vessels in the hexes adjacent to the bluff; similarly no warships may engage the fort from the same position. This is due to the limited depression of the fortress guns and the limited elevation of the warships guns.

C.S.S. Arkansas (armoured steam ship, rifled heavy artillery)

30 strength points in total - Exhaustion level 14 with 7 points required from the line infantry.


The terrain around Fort Duvet is mostly low lying and is prone to seasonal flooding which renders much of the local area impassable to large bodies of troops. As a result of this any high ground becomes highly desirable as pretty much everything else is unsuitable for building on or trying to defend. A belt of higher ground follows the course of the Yahoo river from about ten miles downstream and finishes some five miles further up and has a rough track used for land based communications and travel. For this reason the area could be easily defended with a relatively small number of troops as the terrain tends to funnel and movement along the shores of the river. Unfortunately for the Confederates the Union forces are systematically working their way along the river and a succession of Rebel strong points have fallen to the combined river and land assaults of the Yankees.

The Attack on Fort Duvet, Blueberry Bend, the Yahoo River, Tennessee


The Union are forced to attack on a very narrow frontage and are mindful to ensure that sufficient space exists in order to deploy fully. Note the skirmishers moving into the tree line


As the infantry prepare to engage so to do the warships of either side. The C.S.S. Arkansas prepares to challenge the U.S.S. Carondelet and the U.S.S. Essex whilst the guns of Fort Duvet make ready.


The lead Union infantry regiment comes under artillery fire whilst their skirmishers engage the Rebels in their fieldworks. Meanwhile the C.S.S. Arkansas takes a telling hit from the U.S.S. Carondelet.


The guns of Fort Duvet batter the U.S.S. Carondelet as she runs for the shoreline and safety.


The action on the left with both sides hotly engaged and taking casualties


Meanwhile, the C.S.S. Arkansas engages the U.S.S. Essex at point blank range and inflicts severe damage and not to be outdone, the Union vessel retaliates and sinks the Rebel ship!


The Union forces continue to press the stubborn Rebels but see the leading decimated by artillery (black) and musket (white) fire. Two regiments have reached the the woods occupied by the Rebel skirmishers but help is at hand.


With reckless gallantry the cavaliers of the old South charge the leading Union regiment already wavering under artillery fire and cut the disorganised survivors down. Meanwhile, the Union skirmishers have charged back into the fray and, inspired by the sinking of the Arkansas, defeat the Rebels holding the fieldworks.


The beginning of the end as the Confederates near their exhaustion level and the weight of Union numbers begins to tell. General Gaylord Beauregard Hastings III moves into the fort to oversee the heavy artillery fire - which has thus far been fairly ineffective


The Confederate horseman, despite their heroic efforts, succumb to the weight of fire from the Union soldiers whilst the woods are cleared of Rebel infantry. The Confederates have been defeated but with the last throw of dice from the guns of Fort Duvet under the eyes of their gallant commander.....


....the gallant U.S.S. Essex disappears under a blistering salvo of heavy calibre rifle fire!

Phew! That was a game and a half and no mistake. Once again I used Bob Cordery's Memoir of Battle rules and they worked extremely well for what was a fairly complex scenario. I have been itching to try the Hexon with a river based action and to also use the ACW scratch builds with the blocks and the end result looks pretty good in my opinion. It does mean though that I will simply have to finish the other 32 models I have built for the respective navies and really tackle some river based campaign action.

The rules worked really well and the ship part will need minimal work to make them usable as either support for land actions or as a set of naval rules in their own right. This will also mean that I will inevitably need to look at MoBaS again - but not just yet though as I am having far too much fun with the block armies as they are!


The week that just keeps getting better!


This will sit nicely on the bookshelf next to my other Conway Naval titles!

Now that the rain has finally stopped the local boot sales are tentatively emerging from under the covers and so SWMBO and I headed out to a local field for our usual Sunday summertime perambulation. Boy was I glad we did! Pictured above is one of those books that I have been meaning to acquire but always seems to be at the bottom of the shopping list.

Naval Weapons of WW2 by John Campbell (ISBN 0 85177 329 X) covers, on a national basis, the following topics:

Guns and Mountings

Torpedoes

Mines

Anti-Submarine Weapons

Air-Launched Anti-Shipping Weapons

Rockets and Early Missiles

Basically it is all the technical detail you would need about any weaponry carried by a warship during WW2.

I know there is also a version that covers WW1 in a similar vein so that will also be on the 'to get' list at some point. I should point out that the book I mange to acquire this morning cost me the princely sum of £3 so I am feeling pretty smug at the moment!

Saturday 12 May 2012

Battlefleet


This morning saw the arrival of my first copy of Battlefleet - the journal of the Naval Wargames Society (navalwargamessociety). I am really pleased to get this at long last - I have been a member in the past but life etc got in the way and so I have rejoined after a lengthy gap - and the articles contained therein certainly provide much food for thought. The line up for this issue (no. 1 of volume XXXIV) consists of the following:

Privateers: NWS Participation game - written by Dave Manley these are the rules for use with the game and are set in the golden age of piracy in the 18th century and are based on the GW Man O' War fantasy rules. Needless to say the denizens of SEEMS will be very interested in these!

HMS Amethyst and the Yangtze Incident

Japanese Wargaming of the Midway Campaign

WW2 Coastal Forces Scenario Generator

Exercise Tiger - Slapton Sands

Options for the Russo-Japanese War - lots of 'what-ifs?'

Medieval Warships

It is a varied bag for sure and with something for all nautical tastes.

Friday 11 May 2012

That was the week, that was.....

....And what a good one it has been! I now have five sets of blocks labelled with the sixth and final under way, I fought a very good war game with Bob Cordery and received a very welcome amount of kit from him (once again with enormous thanks), the air war game at the club was a hoot, my two Me 109 Fs arrived and I collected a couple of Spitfire's from Mr. Fox, the sun has come out, the lawn has been mowed, the decking painted AND....I have two interviews on Monday  - one of which will take me rather too close for my wallet's comfort to Model Zone at Holborn.....;-)

All in all then, not a bad one in anybodies language - and we still have the weekend to come!

P.S. Game number 10 will be on Sunday.

Thursday 10 May 2012

Of Yaks, Ratas, Emils and even a Friedrich or two....


The Russian Polikarpov I-16 with a Bf 109 'Emil'

Yesterday evening at the club the game of choice was another foray into the skies courtesy of Angels 20 and the rapidly growing aircraft collection of Mr.Fox. The skies over Russia during 1941 was the setting and saw three Bf 109s pitted against a pair of Yak 1s and a pair of Polikarpov I16s. The German invaders featured an ace and two average pilots whilst the Soviets had a pair of veterans in the Yaks and a pair of average pilots in the I16s. The game proved to be surprisingly tactical and when the action had concluded the Russians had lost a Yak and had one of the I16s crippled whilst the Germans had a hit on the ace (scored, he mentions modestly, by one of the I16s - I was driving both for my sins) and not a lot else besides.

The I16 was a great plane when it came out in 1933 but was hopelessly outclassed in 1941 in just about every area of performance. I fully expected to be turned into so much confetti at the hands of the marauding Emils in fairly short order but managed to survive their less than tender mercies with a fairly substantial amount of luck!

As ever it was great fun to play and many thanks to all that took part and to Mr. Fox for his usual umpirical omnipotence and also for the use of his toys. On which subject....


A pair of 109 Fs - I plan to add a further brace as all my aircraft for this game will be organised in flights of four.

I took delivery today of the first two of four Bf 109 Fs which followed on from the E series. Of all the 109s this version was the truest to the vision of Willy Messerschmitt's design - especially in respect of the wings which in this version did not mount any weapons. Everything was fired either on or through the engine cowling. Historically the F was considered to be the best of all the 109s to fly and looking at the card for it it looks a beauty and I can't wait to get one in the gaming air, so to speak.

In common with my other models in this collection I shall be giving these a bit of a repaint although these particular models are actually not too bad and will only need minimal work. Mr Fox has already ordered some 1/100th scale waterslide decals for use with his models and I shall look forward to seeing what they are like and how he gets on with them.

One of these will certainly be painted to represent the mount of Hans-Joachim Marseille (Hans-Joachim_Marseille) of whom I shall certainly want to learn more about if the Wiki entry is anything to go by!


The paint job above should be easy enough to replicate but we shall see - it will be fun trying in any event!

The Bear and the Crescent, 1877....Game Number 9, Part 2


Setting the scene - the Turks are deployed in the foreground with the Russians nearest the bookcase! The newly completed 6ft x 4ft folding table is strategically stored on the left

Apologies in advance for the duplication of some of the pictures contained herein - I still cannot believe I didn't take any during the actual game myself! Bob Cordery, noted wit, raconteur, bon-vivant and all round good egg, very kindly acted as the official photographer for the action and the full selection can be seen on his blog:  wargamingmiscellany

This report will be a little bit of a strange one as I had broken with my usual MO of taking pictures at the end of each turn so that the action could be followed with the supporting text. In this case though I shall merely describe the action in general terms and support this with some of Bob's pictures.

After dicing for sides yours truly succumbed to the lure of the rhythmic stamping of feet and the tinkling of massed balalaikas and took command of the Russians whilst Bob donned a virtual fez to take charge of the Turks.


A trimmed version of the battlefield showing the dirt road that was key to the Russian assault. Note the central Turkish redoubt filled with a large (3 block) artillery battery and an infantry regiment. The Turkish 3 block infantry represent the reserve 'Redif' formations whilst the loose order unit of 3 blocks on the small hill is a light infantry regiment.

The scenario was a very simple one and very typical of the type of action that featured during the Russo Turkish war of 1877. Essentially, the Turkish force was deployed in the outer works of a major strategic objective (for which read Plevna) and was being assaulted by a numerically superior Russian force. Historically the Turks had superior weapons to the Russians who in turn had the advantage of numbers. The basic plan was for the Turks to hold the Russians off until they could retire back into the main fortifications. The Russians were tasked with taking the outer works; thereby enabling the rest of the army to move up and fully invest the fortified area with the option of a later assault.


The view from behind the Turkish centre - Pasha Cordery chose the small hill as his command post with a unit of cavalry as his sole reserve

The action started with an artillery duel which the Turks had by far the better of as they quickly disabled half of one of the Russian gun batteries. In the meantime the Russian cavalry, supported by the light infantry, probed the Turkish left flank via some woods and a couple of small hills. This particular fight remained a separate entity from the main event and culminated in the destruction of both the sole Turkish cavalry unit and one of the two Russian units. The remaining Russian cavalry penetrated as far as the main fortification but was seen off by a unit of Turkish reserve infantry that had retired from its forward position.


The Russian initial set up - note the artillery deployed on the hill with the waiting infantry regiments safely hidden from Turkish view on the reverse slope and ready to make use of the flanking road. the Jager are in the small wood with the cavalry flanking them. 

The Russian commander decided on a lightning attack along the road with the intention of 'bouncing' the Turks from their position and also avoiding the murderous long range artillery fire. The road was shielded from the main Turkish redoubt by some low hills and some woods of conifers. Unfortunately for the Russians they had, in their zeal to attack the Turks, had allowed themselves to bunched up on the road and so presented the Turkish light infantry facing them with a peach of a target that they duly took advantage of. The gallant Turkish light infantry fought like men possessed and continued to inflict telling casualties on the luckless Russians. This unequal fight could have only one winner though as Russian numbers (two full infantry  units of 5 blocks each to begin with) eventually told and so the light infantry (regular light infantry and not the infamous Bashi Bazouks) was destroyed but at a heavy cost. The Turks used an additional unit of infantry in support and after the dust had settled the Russians had lost one complete unit of line infantry and two of the others had been badly knocked about by accurate long range rifle fire. By this time the Turks had begun to pull back into the main fortification from their outer works and the Russians were in no shape to launch a meaningful pursuit as the sole untouched Russian infantry unit was too far back from the action to effectively intervene. In the end the Turks saved their artillery and the two units of Redif reserve infantry and the surviving Russians were able to walk in to the now empty Turkish positions unopposed.


With both flanks driven in the Turkish reserve infantry redeployed to the main fortification with the artillery following them closely behind. The shattered Russians were content to merely occupy the positions recently vacated by the Turks and to await the rest of the army.


The end of the action viewed from behind the Russian lines (this, and the next picture are the only two shots I took of the whole affair!)


A further view of the end of the action with the Turkish artillery (centre left) heading back to the main position with the exhausted Russians incapable of pursuit.

Both sides were able to force the other to their respective exhaustion levels in the same game turn and so the action was deemed to be an honourable draw.

Summary

The game lasted a little over an hour and the rules were, quite simply, a triumph. Simple, but not simplistic, they managed to capture the feel of what the action was trying to represent in a playable and entertaining fashion. The use of the Exhaustion level for each side was a great idea and one which will add to the overall experience immeasurably. It can be adjusted up or down as required to allow for army composition, tactical or strategic considerations, supply status and all manner of campaign style issues.

For me personally the whole thing scored on a number of levels. The use of the blocks with the Hexon terrain as a gaming tool looked very impressive and I am really pleased that I persevered with the idea. They work best for armies that use ordered formations so are best for the typical 'horse and musket' period (say, 1700 to around 1900 although I will use them for the Balkan Wars) although I fully intend producing blocks for vehicles etc. The rules are a delight to use and and whilst I had no doubts about this aspect it was good to see them work as well as they did against a live opponent rather than solo. Bob has really hit the sweet spot with them in terms of detail, playability, speed and the all important 'feel' factor and as far as I am concerned they will be the rules of choice for all of my block based adventures.

The game could not have been the success it was without the invaluable contribution of Bob for the rules, photographs, comments and sheer all round 'good guy-ness' and so once again I would like to extend my very grateful thanks to him - also not forgetting the not inconsiderable mileage involved for the round trip.

Next time, and there will be a next time (and not in 30 odd years time either!), I will make sure that not only do I take some pictures myself but also that the local Fish and Chip shop is open.

Bob, the Cod and Chips will be on me....;-)

Tuesday 8 May 2012

Reflections on a day well spent....

Today saw one of those days that would ordinarily be difficult to organise - if I was at work that is! This afternoon saw the visit of Bob Cordery for a chat, a game, some more chat, some food (originally planned to be Fish and Chips but for a technical oversight on the part of yours truly!), yet more chat and a cup cake courtesy of my daughter.

It was a great day for me - topped off by the enormity of the bag of booty Bob deposited as a result of his recent clear out/reorganisation. Suffice it to say that my much mooted plan to game elements of Operation Barbarossa has suddenly moved right up the batting order courtesy of a pile of Zvezda 15mm kits for both sides and some PSC plastic figures. Then there was the two 3 ft x 2ft gridded and flocked boards and a gridded cloth - not to mention a book on the Ottoman Turks in WW1 for good measure! I was completely overwhelmed by this gesture and rest assured - it will all be put to very good use!

We talked about war games matters many and varied and Bob shared many wonderful anecdotes about such things as the early evolution of Megablitz, visits to Salute and other shows and plans for the future. A dash of family history ranging from Scotland to Port Royal, Gibraltar and Woolwich also features which was really interesting and capped a splendid afternoon.

As for the game well, the full after action report will follow tomorrow - if only because Bob took all the pictures!  - and suffice it to say the result was historical, the action fast and furious, the terrain and blocks looked absolutely fine and above all else, it was fun. The rules work even better against a live opponent (we were using Bob's 'Memoir of Battle' 19th Century rules) and they really hit the sweet spot in terms of the all important 'feel' factor. The Exhaustion Level idea worked very well and I will certainly be incorporating this going forward. They will now be my rules of choice for the period as I can think of little reason to look elsewhere.

In closing this post I would again like to say an enormous thank you to Bob for taking the time out to visit me; for the chance to chat about lots of war games 'stuff' and for the act of incredible generosity with all the assorted goodies.


Monday 7 May 2012

The Bear and the Crescent, 1877....Game Number 9, Part 1


The attack on the Grivitsa Redoubt

Tomorrow will see a first for me. This will be a face to face game using the my block armies on my Hexon terrain in the new man cave. The game will be a representative action based on the Russo - Turkish War of 1877 and will feature a small Turkish force in fieldworks being assaulted by superior numbers of Russians. The Turks will be outnumbered nearly two to one in infantry although they will have the advantage of being in fieldworks and with better weaponry. It will not be a large action but should prove to be an interesting one as the Turks have to delay the Russians sufficiently to allow themselves time to pull back to the next line of defences.

The forces will consist of the following:

Russia

4 x 5 block infantry units
1 x 3 block light infantry units

All Russian infantry units are armed with older firearms

2 x 2 block artillery units

All Russian artillery units are armed with smoothbore field artillery

2 x 3 block cavalry units

1 x 2 block command unit

Total of 35 blocks with an exhaustion level of 12 blocks

Turkey

1 x 4 block infantry unit
2 x 3 block infantry units

1 x 3 block light infantry unit

All Turkish infantry units are armed with modern firearms

1 x 3 block artillery unit

The Turkish artillery are armed with rifled field artillery

1 x 3 block cavalry unit

1 x 2 block command unit

Total of 21 blocks with an exhaustion level of 8 blocks


The 'Exhaustion Level' refers to the number of blocks an army can lose before it is rendered unfit for further action and is an idea I have adapted from Volley and Bayonet as a good victory point condition. The number can be varied based on the quality of the army being used and the tactical/strategic situation they are currently operating under. Half of the exhaustion level losses must be taken from the main troop type being used - in both cases this is the line infantry.


Of particular interest with this action is that my opponent is none other than Bob Cordery and also that we shall be using his Memoir of Battle 19th century rules for the game! I am looking forward to this for many reasons - not least of which is the fact that having a game with the author of a set of rules means that should any problems of interpretation arise you should be able to get the correct word straight from the horse's mouth!

I am really looking forward to this and many thanks in advance to Bob for making the journey out into the wilds of deepest Essex!


Sunday 6 May 2012

Of Books and Buildings and Worthy Causes


Y Villa D'Espana.....

Due to the really grim weather we have been experiencing  - the irony of the fact that since the announcement of a hose pipe ban it has hardly stopped raining - most, if not all of the local boot sales have been cancelled. No doubt walking around a boot sale with several feet of water and mud is not to be encouraged! However, a good alternative source of potential bargains are of course the charity shops. This has the added bonus of the fact that not only are you adding to your own collection but you are also helping a good cause so everyone is a winner. I picked up yesterday the above building which has a label in Spanish on the underside and so is obviously a souvenir. It was a little dusty but scrubbed up well and goes nicely with the collection of similar buildings I have acquired from Corfu last year. It can best be described as Mediterranean non-specific! The cost? A mere 50p.


On the trail of the (Desert) Fox....

The second cost a little more  - £2.99 to be exact - but is a welcome addition to the library and, if truth be told, is one I have been after for a while. I doubt very much if there is a WW2 land gamer that has not heard of Erwin Rommel and David Fraser's biography -  'Knight's Cross - A Life of Field Marshall Erwin Rommel is a great doorstep of a tome that I shall look forward to reading - especially as the desert is an area that I shall look to game in due course.

The two charities that gained from my custom, albeit in a modest way, were a local hospice and the British Heart Foundation - both of which are worthy causes.

Saturday 5 May 2012

Corps, Divisions, Brigades and Battalions


Action around Hougomont - held throughout the battle

Over the past couple of days, usually between job related phone calls and labelling blocks, I have been giving some further thought as to how I should best be representing the units for the three armies for my 1815 mini campaign. Simply replicating the individual Divisions with a single unit on the table top is too high a level for the tactical game and so I am looking at the Brigade being the basic formation. This is exactly the scale used in Volley and Bayonet and I am now regretting offloading the 1815 campaign supplement that was available a few years ago called, as I recall, Napoleon Returns or something similar, as it contained the complete orders of battle organised at Brigade level. I will have a look out for this publication and see if I can rustle up a copy from somewhere. I have sufficient OOBs in my collection for this campaign in any event so it is not a show stopper by any means - Jac Weller's Wellington at Waterloo being a case in point.

Using the Brigade as the basic tactical unit will give sufficient flexibility for a good table top game although I shall still be using the Division as the strategic level formation for map movement etc.

I have also settled on using Bob Cordery's 'Memoir of Battle' rules pretty much as they are written because I can think of little reason not to! They work very nicely for the 19th century and the Napoleonic battle I fought using them worked well enough. The action was crisp and dramatic and aside from some period flavour add-ons are pretty much good to go. I had flirted briefly with the idea of formations for units - using the smaller blocks certainly allows for such - but reasoned that is a unit of four blocks is representing a Brigade then it is not really relevant. The only concession I will make though concerns deployed light infantry/skirmishers. A unit of these individuals will have the blocks that comprise the unit spread about within the hex rather than the regulars that will have their constituent blocks in contact. Troop quality is already factored into the rules although unit sizes are not so I will opt to use the rules as they are but will assign the appropriate number of blocks based upon the strength/quality after having checked a number of sources or even OOBs within a number of rule sets I have.

The final decision I have made is that the the new 6ft by 4ft table with a hexed area equal to 12 x 16 hexes will be the battleground size of choice and so the maps will be drawn up on that basis.

Friday 4 May 2012

Going to your God....


                                     When you're wounded and left on Afghanistan's plains,
                                     And the women come out to cut up what remains,
                                     Jest roll to your rifle and blow out your brains
                                     An' go to your Gawd like a soldier.


I cannot tell a lie - it was not me that painted the above but my very good friend Mr Hardman. He was intrigued at my idea of a 54mm NW Frontier set and wanted to see how an Armies in Plastic 54mm figure would come when painted in a simple style and using the Army Painter dip. The result you see above. I should point out that Mr Hardman is a painter par excellence and the above was a quick try out and is therefore well below his usual standard - which is turn still light years ahead of anything I could produce! The figure was sealed with Woodland Scenics Scenic Cement and flat painted in Vallejo acrylics with an Army Painter Dip to finish off with (brushed on!) Interestingly he did no work on the base other than to Army Painter it and it looks fine! The only problem with that would be the fact that some of the figures I shall be using are in non scenic coloured bases so will require painting.

My thanks for Mr Hardman for the job he did on this and if it does not serve to provide a reasonable incentive to crack on with the inhabitants of the Roghan Valley then I don't know what will!

Thursday 3 May 2012

Earning a Ritterkreuz over England....Game Number 8

Following on from the recent 'Angels 20' game based around the air combat typical of the Battle of Britain I decided (again on the spur of a moment) to revisit the same but with some extra aircraft. If you recall the last game I reported on utilised all the models in a basic starter set - a brace of Bf 109, a brace of Hurricanes, a Spitfire and a BF 110. Since then my planned second copy has arrived and so I increased the match up to four aircraft a side as well tinkering slightly with the initial set up. I wanted to do this mainly because I wanted to have a split scenario whereby a pair of BF 110 escorted by by a pair of Bf 109 as top cover were mixing it with a brace of Hurricanes in turn with the Spitfires acting as their top cover. Essentially this is my interpretation of the 'Hurricanes-going-for-the-bombers-whilst-the Spitfires-engage-the-fighters' scenario typical of the air battles over Southern England during summer, 1940.


Intruder alert - BF 110s and BF 109s somewhere over Rayleigh, Southern England


Hurricanes at the lower level with the Spitfires above (levels 3 and 5 respectively in game terms) racing to intercept


The Bf 110s maintain course and speed whilst the escort moves into attack formation


With Spitfires racing to the fore the Hurricanes prepare to engage


With one eye on the escort the Spitfires turn in to the attack whilst the Hurricanes attempt to engage the Bf 110s. The Bf 109s lurk menacingly, and again, with an eye on the dreaded Spitfires


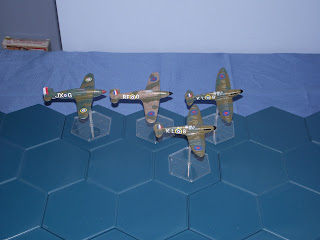
Combat is joined as high speed passes break the formations into two fights - Hurricanes against the Bf 110s and Spitfires against the Bf 109s


The two fights rapidly became entangled as the Hurricanes gamely attempted to tackle the Bf 110s whilst the  109s mix it with the Spitfires. Furious amounts of gunfire yield but a single hit on one of the Spitfires


A Spitfire in real trouble - further damage and a relentless pursuer


An overview of the action (dare I say, a bird's eye view) with a solitary Spitfire separated from his wingman and dire straits whilst the Hurricanes continue to harry the Bf 110s.


The crippled Spitfire tries a diving turn to shake his assailant but to no avail as the Bf 109 matches his every move and administers the coup de grace. In doing so the remaining Spitfire opens fire and damages the German fighter. Note the Bf 109 engaging the lead Hurricane and the Bf 110 opening fire at point blank range against the Spitfire - and misses completely


The end of the Spitfire


The spectacular end of the first Hurricane under the guns of the Bf 109 - much to the chagrin of the Bf 110 who was slower on the draw!


After downing the crippled Spitfire the German fighter roared around in a tight turn between the mass of whirling aircraft, diving as it went, to blow the second Hurricane out of the sky

At this point the sole surviving Spitfire dived away and the German aircraft resumed their mission, buoyed up by their success thus far.

Apologies for the picture heavy and text light approach with this post but the game was very much a spur of the moment thing and so I did not really give the preparation much thought. I usually like to give the scenario back story a lot of consideration beforehand but not this time! Actually it was quite liberating in a way but rest assured, normal service will be resumed with the next game I undertake!

Incidentally, I used all of my blue Hexon tiles (the 21 you get in a box set) on my new 6ft by 4ft gaming table    and made the welcome discovery that in order to cover the table I will not have to buy a full box - in fact I would only need another 11 tiles which will translate into an area equal to 12 by 16 hexes. I will also need to add some additional terrain pieces but not too many - probably just some extra road and river sections and perhaps a few hills.

All in all then, it was a good game and the new table has been officially christened. I have also managed to play 8 games at home and so my plan to fight at least two games a month is back on schedule - albeit only just!