The Battle of Deve Boyun (the Camel's Neck), November 4th, 1877 as fought using Bob Cordery's Big Battle Portable Wargame 19th Century rules
The set up of the battle is slightly different to the organisation suggested in the previous post simply because when I had set the troop blocks out certain areas of the battlefield were rather unbalanced and this would have a key impact later in the action. The following is the definitive order of battle and I have taken the opportunity to split the forces into their various commands for exhaustion level purposes.
Russia
Centre
C in C Lt. Gen. Heimann
2 x 4 Infantry (Elite)
4 x 3 Cavalry
2 x 2 Field Artillery
Strength points 25, Exhaustion level 9
Right Flank
Lt. Gen. Tergukassov
6 x 4 Infantry
2 x 2 Field Artillery
Left Flank
Lt.Gen. Devel
4 x 4 Infantry
2 x 2 Field Artillery
Strength points 21, Exhaustion level 7
Total Strength points - 75, overall Exhaustion level 25
Turkey
Centre
C in C Muktar Pasha
4 x 4 Infantry
2 x 2 Field Artillery
Strength points 21, Exhaustion level 7
Right Flank
Ismail/Faizi
2 x 4 Infantry
Strength points 9, Exhaustion level 3
Left Flank
Mehmet Pasha
3 x 4 infantry
1 x 2 Field Artillery
Strength points 15, Exhaustion level 5
Total Strength points - 45, overall Exhaustion level 15

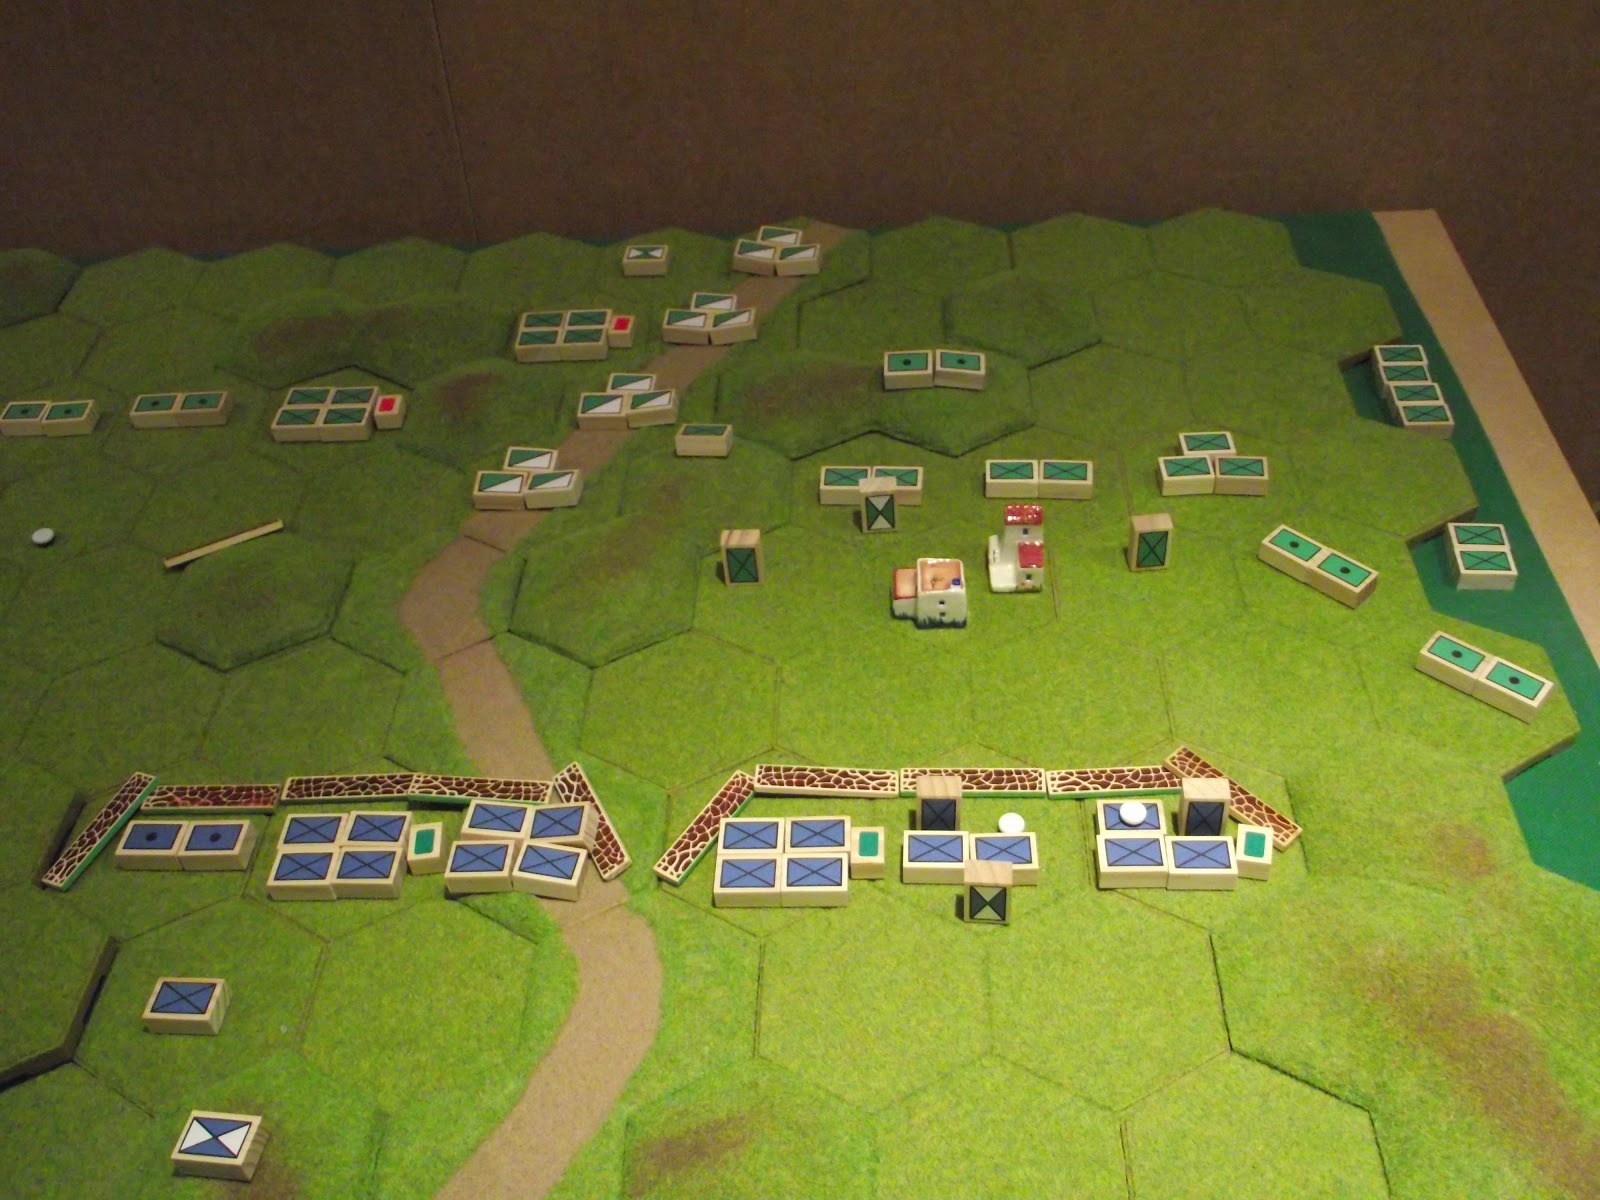
The Russian opening positions. From the top of the picture are the two columns of Lt. Gen Tergukassov - the extreme column under Colonel Prince Amirajibi withe the nearer under Colonel Bronevsky (each of 3 infantry units). The centre, under the command of Lt. Gen. Heimann, consisting of 4 regiments of cossacks and the two grenadier units (the red marker denotes their Elite status) while the left, under Lt. Gen. Devel has two columns each of 2 infantry units - the two nearest the centre under the command of Colonel Avinov whilst the other two are commanded by Colonel Schack.
The two small villages are called Pousi Dara on the left and Gulli on the right.

The Turkish position viewed from behind the Ouzoun-Ahmet plateau. Mehmet Pasha with 3 units of infantry and an artillery unit deployed in the first line of trenches. Muktar Pasha with 3 units of infantry (2 of which are poor quality and are marked with a green block) and an artillery battery behind the trenches astride the Beve Doyun defile. A single infantry unit and an artillery battery are deployed in a forward position so as to enfilade the main Russian assault. On the right the 2 infantry units of Ismail/Faizi are also entrenched.

Turn 1. On the Turkish left their artillery opens fire at the approaching Russian columns with some effect. The Russian artillery is still moving up and so the infantry will have to make do without any support.

Turn 1. On the Turkish right the Russian infantry is also advancing, with the small village of Gulli in their path.

Turn 2. On the Turkish left the Russians come up against the Turkish entrenchments on the plateau. The artillery continues to batter the approaching columns with the battery on the hill being particularly active.

Turn 2. Meanwhile on the right Muktar has reinforced Ismail with a further infantry unit. The Russian columns flow around the village and prepare to assault the entrenched Turks.

Turn 3. As the battle for the plateau intensifies, the supporting Turkish artillery manages to overshoot the Russian column and hits their own men! Meanwhile, the Russian artillery hurries to join the fight while Lt. Gen. Tergukassov resolves to tackle the thorn in his side and launches an attack against the Turkish hill occupied by the artillery and an infantry unit.

Turn 3. The Russian assault on the Turkish right gathers momentum with their supporting artillery poised to make an impact. So far though, the Turkish infantry are holding their own.

Turn 4. The Russian attack on the plateau is beaten off at last and the assaulting troops form a line along the low foothills. Meanwhile the battle for the small hill gains in ferocity as the Russian artillery makes its prescence felt.

Turn 4. The attack on the Turkish right begins to falter and so the Russians attempt to reorganise on either side of the village.

Turn 5. The battle on the Turkish left settles down to a long range firefight but the Russians now have some artillery support. The battle for the small hill has ended with the artillery being destroyed and a mere quarter of the infantry surviving to fall back to the central position.

Turn 5. As the Russians reorganise around the small village of Gulli their supporting artillery at last deploys to commence bombarding the Turkish trenches.

Turn 6. The battle on the Turkish left continues at long range with the advantage swinging first one way and then the other. In the centre, Muktar Pasha hurriedly redeploys his remaining infantry as the first sight of the approaching Russian Cossacks appears in the distance. With both flanks holding could this target be what Muktar needs to clinch an unlikely victory?
Turn 6. The Russian artillery on the flank hammers the Turkish entrenchments to telling effect whilst the remaining reserves of cavalry and the two grendier units move up to punch a hole through the Ottoman centre.

Turn 7. The fight on the left flank continues at long range with neither side willing, nor able, to force a conclusion. Meanwhile the Russian artillery masses in the centre to support the grenadiers and the advancing cossacks.

Turn 7. The final stages sees the cossacks charging the central Turkish position whilst the artillery continues to batter the Turkish entrenchments. The Turkish casualties have taken the army over it total exhaustion level and so the Russians have prevailed.

The overall battlefield at the end of the action.

The final casualty count. The Russians were hammered on either flank - the casualties were spread evenly across the four columns - with both reaching their exhaustion levels fairly early on. The centre force was barely scratched - total losses: 23. Overall the Turks lost 17 so on balance they bucked the historical result somewhat.
The battle followed the historical action fairly closely except that the Turks were effectively on their last legs before the cavalry approached. In the actual battle Muktar saw the approaching cavalry operating in very difficult terrain and seeing that his flanks were safe took the decision to inflict a reverse on the horsemen. The Turkish infantry left their trenches, advanced some thousand yards from them and were doing pretty well against the disadvantaged horsemen until they were engaged in either flank by artillery and the previously unobserved grenadier formation. The Turks were then forced back and when the poorer infantry in Ismail's command saw this they broke and fled down the defile.
The Russians pursued as far as possible and Lt.Gen. Heimann had the pleasure of resting that night in Muktar Pasha's tent.
The action proved that attacking entrenched infantry is not for the faint-hearted but any such entrenchments need to be properly manned. It also demonstrated the value of massed artillery as once the Russians were able to deploy their superior numbers the result, although very close, was ultimately never in doubt.
It was also great fun to fight!
6 comments:
What a fine game, David! The build up was well done and the resulting action was certainly not a let down. Nice use of Unit quality ratings to represent the different abilities of armies.
Now I'm thinking about printing some Russo-Turkish paper soldiers......
-Steve
Bloody good batrep as always David.
Hi Steve,
Thanks old chap! It was great fun to fight and certainly the largest battle I have fought using BBPW. The action flowed really well and no problems to speak of were thrown up. It was a great way to round off the year and the theatre of war has certainly given me much food for thought going forwards.
Junior General has some Russo Turkish paper soldiers and they are very nice indeed.
The war suits either attacking or defensive minded gamers equally well so is great fun for opposing reasons.
All the best,
DC
Hi Fran,
Happy new year to you old chap! It was a great battle to fight and I am looking forward to 2013 with a lot more ideas for the blocks - I am even going to tackle painting some figures so watch this space!
All the best,
DC
David,
It was nice to see a real battle fought on a tabletop where the result was historically correct.
The larger Russian force should prevail in such a grinding battle ... but should not emerge unscathed. In your battle the Russians did grind down the Turks, but at a cost that they would find difficult to pay if the Turks were able to mount a counter-attack in the near future.
I now feel that the PORTABLE WARGAME rules have been proven to work (and work well), and I have you and the other enthusiasts to thank for your feedback and encouragement, as without you this end result would not yet have been achieved. The test of any set of rules is whether or not they will produce a reasonably historical result if they are used to refight a real battle; your recent battles have done that more than once.
Thank you.
All the best,
Bob
Hi Bob,
It was a real pleasure to fight and I was very pleased that the final result felt so realistic. The actual battle was very much in the nature of, to use modern parlance, a hasty attack and so the all important artillery for the Russians was way behind the advancing infantry.
The battle was larger than I would have usually fought but the rules worked like a charm and are testimony to the soundness of the original ideas.
Many thanks Bob for giving us such a good toy to play with!
All the best,
DC
PS This does mean though that I shall have to look at the Caucasus for more inspiration - and I shall not be disappointed methinks!
Post a Comment